这篇文章主要介绍了Spring案例打印机的实现过程详解,文中通过示例代码介绍的非常详细,对大家的学习或者工作具有一定的参考学习价值,需要的朋友可以参考下
目录:
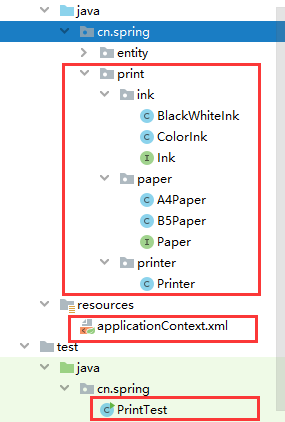
1.applicationContext.xml配置文件
<?xml version="1.0" encoding="UTF-8"?>
<beans xmlns="http://www.springframework.org/schema/beans"
    xmlns:xsi="http://www.w3.org/2001/XMLSchema-instance"
    xsi:schemaLocation="http://www.springframework.org/schema/beans
    http://www.springframework.org/schema/beans/spring-beans.xsd">
  <!--注入bean
    id相当于当前bean唯一标识
    class是bean 的全路径
    property注入bean中的属性     必须封装
  -->
  <!--注入墨盒-->
  <bean id="colorInk" class="cn.spring.print.ink.ColorInk"></bean>
  <bean id="blackWhiteInk" class="cn.spring.print.ink.BlackWhiteInk"></bean>
  <!--注入纸张-->
  <bean id="a4Paper" class="cn.spring.print.paper.A4Paper"></bean>
  <bean id="b5Paper" class="cn.spring.print.paper.B5Paper"></bean>
  <!--打印机-->
  <bean id="printer" class="cn.spring.print.printer.Printer">
    <!--将墨盒纸张组合起来-->
    <property name="paper" ref="b5Paper"></property>
    <property name="ink" ref="colorInk"></property>
  </bean>
</beans>
2.墨盒接口Ink
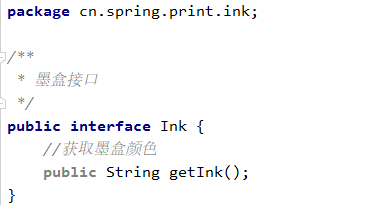
3.黑白墨盒实现类BlackWhiteInk

4.彩色墨盒实现类ColorInk
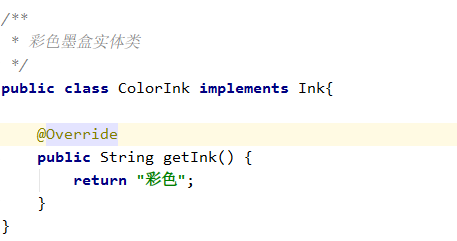
5.纸张接口Paper
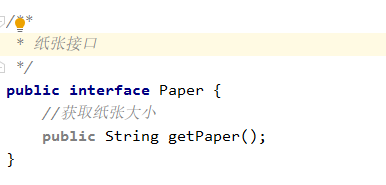
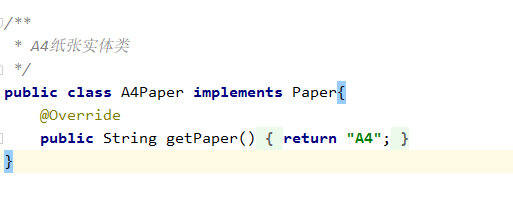
6. A4纸张实现类 A4Paper
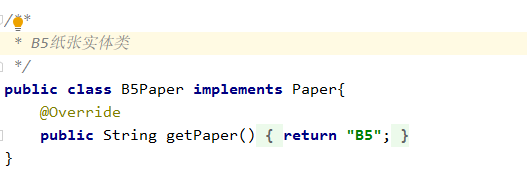
7. B5纸张实现类B5Paper
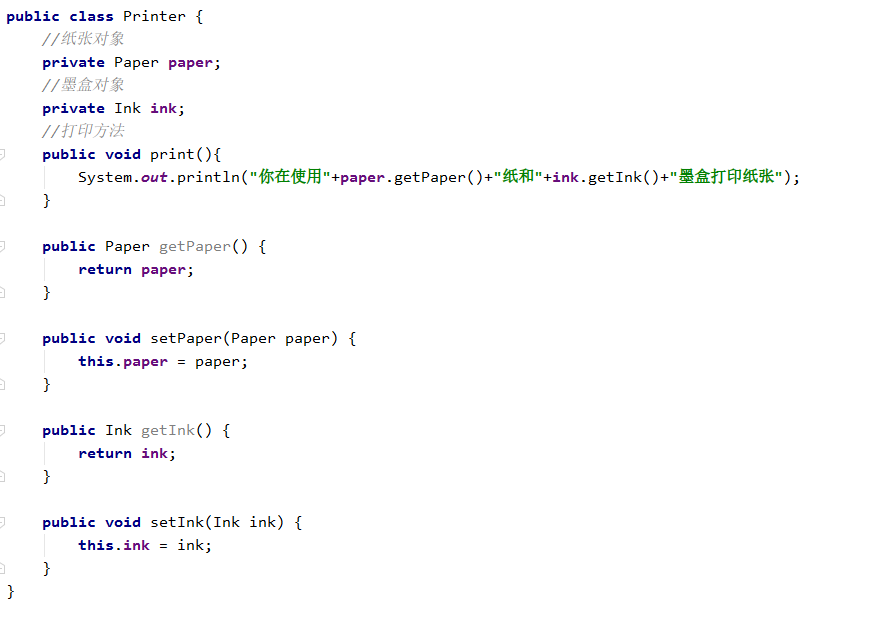
8. 打印机类 Printer
9. 测试类PrintTest

以上就是本文的全部内容,希望对大家的学习有所帮助,也希望大家多多支持亿速云。
免责声明:本站发布的内容(图片、视频和文字)以原创、转载和分享为主,文章观点不代表本网站立场,如果涉及侵权请联系站长邮箱:is@yisu.com进行举报,并提供相关证据,一经查实,将立刻删除涉嫌侵权内容。