
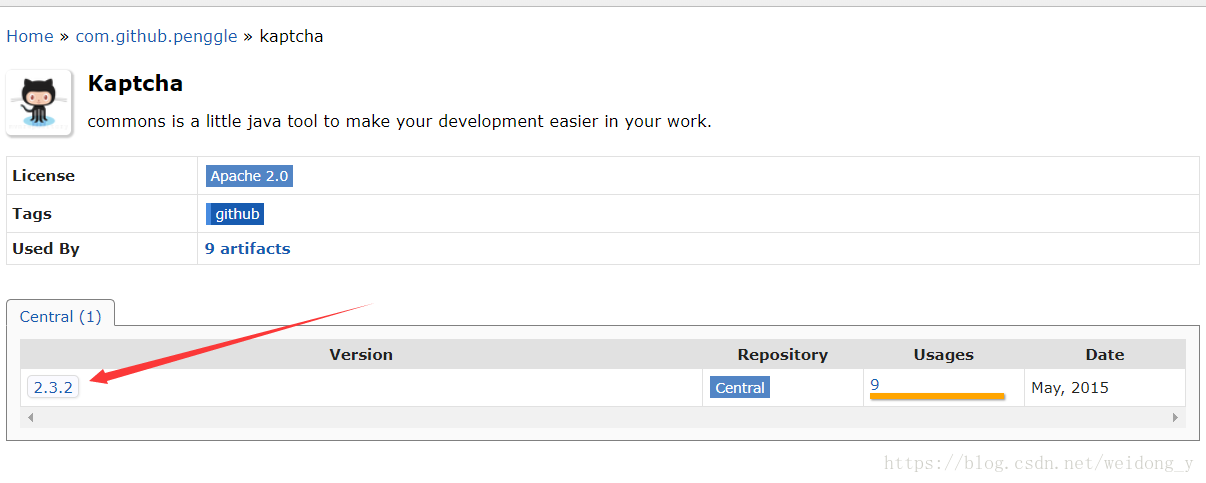
1.由于这是大神写好封装起来的一个框架,所有我们使用前得先下载相关的 jar 包
第一种:maven
<!-- 验证码 -->
<!-- https://mvnrepository.com/artifact/com.github.penggle/kaptcha -->
<dependency>
    <groupId>com.github.penggle</groupId>
    <artifactId>kaptcha</artifactId>
    <version>2.3.2</version>
</dependency>
第二种:lib
打开链接:https://mvnrepository.com/artifact/com.github.penggle/kaptcha

直接在 web.xml 里面直接配置
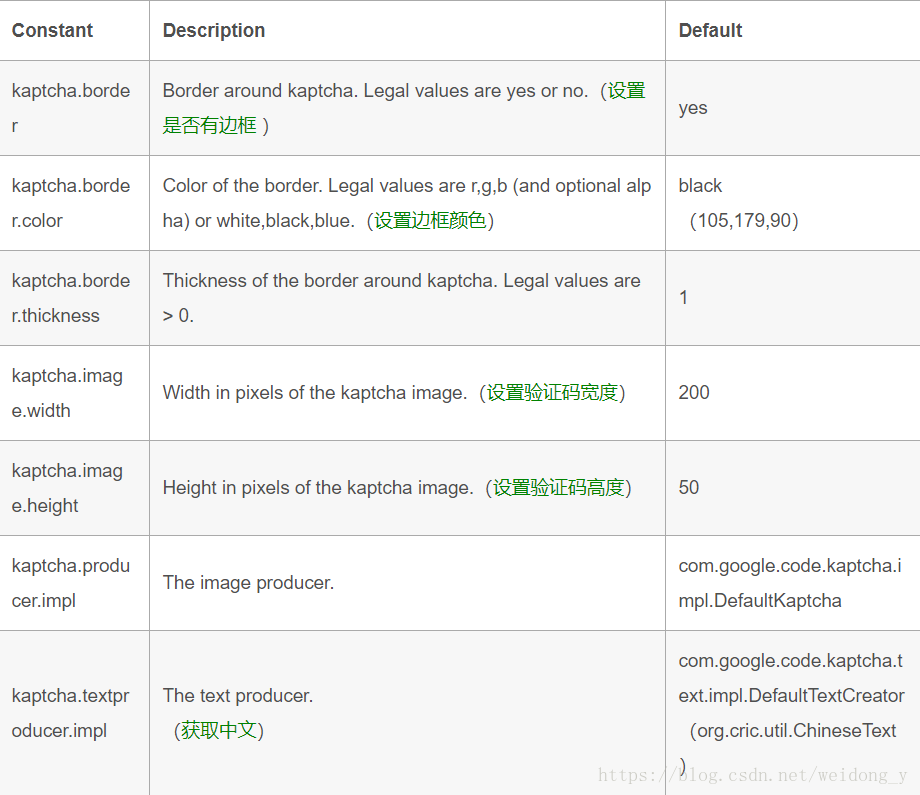
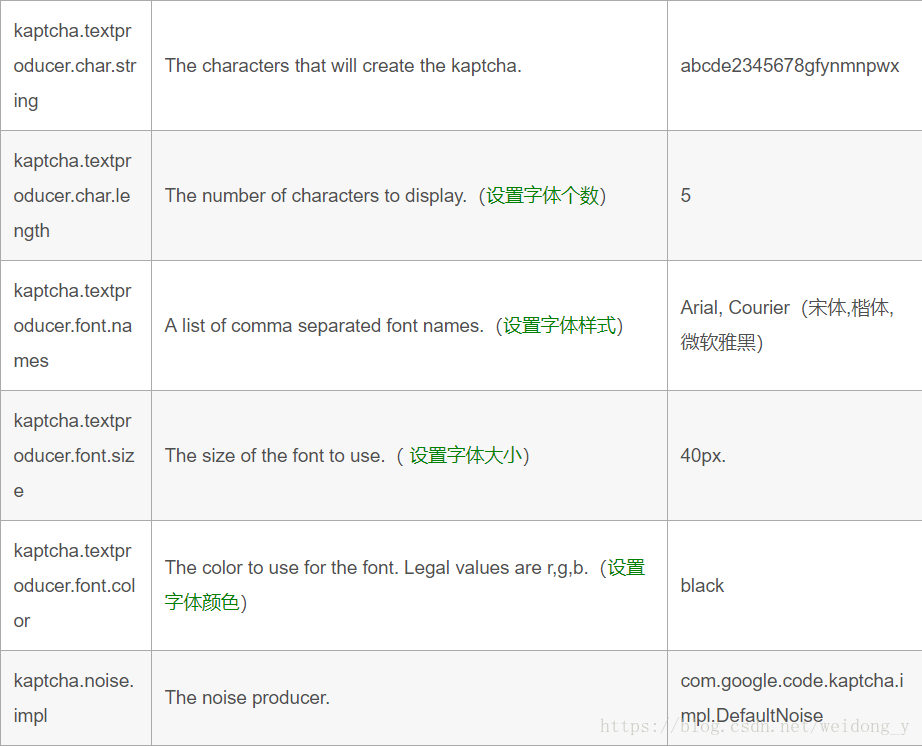
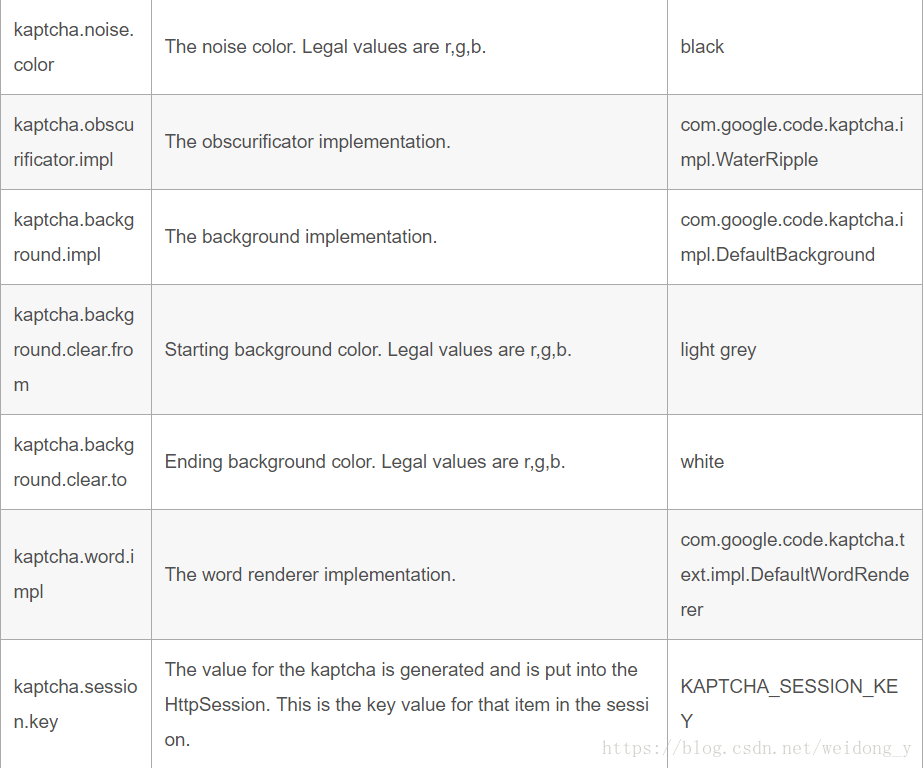
验证码的一些样式都是通过配置来实现的,下面是我自己使用的一个demo,如果需要更改字体颜色还有字体大小什么的等,可以自己根据注释来修改。不然直接复制粘贴也行。由于配置比较简单,不作过多解释,直接上代码。
<!-- 验证码相关属性的配置 -->
<servlet>
 <servlet-name>Kaptcha</servlet-name>
 <servlet-class>com.google.code.kaptcha.servlet.KaptchaServlet</servlet-class>
 <!-- 定义 Kaptcha 的样式 -->
 <!-- 是否有边框 -->
 <init-param>
  <param-name>kaptcha.border</param-name>
  <param-value>no</param-value>
 </init-param>
 <!-- 字体颜色 -->
 <init-param>
  <param-name>kaptcha.textproducer.font.color</param-name>
  <param-value>red</param-value>
 </init-param>
 <!-- 图片宽度 -->
 <init-param>
  <param-name>kaptcha.image.width</param-name>
  <param-value>135</param-value>
 </init-param>
 <!-- 图片高度 -->
 <init-param>
  <param-name>kaptcha.image.height</param-name>
  <param-value>50</param-value>
 </init-param>
 <!-- 使用哪些字符生成验证码 -->
 <init-param>
  <param-name>kaptcha.textproducer.char.string</param-name>
  <param-value>ACDEFHKPRSTWX345975</param-value>
 </init-param>
 <!-- 字体大小 -->
 <init-param>
  <param-name>kaptcha.textproducer.font.size</param-name>
  <param-value>43</param-value>
 </init-param>
 <!-- 干扰线的颜色 -->
 <init-param>
  <param-name>kaptcha.noise.color</param-name>
  <param-value>black</param-value>
 </init-param>
 <!-- 字符个数 -->
 <init-param>
  <param-name>kaptcha.textproducer.char.length</param-name>
  <param-value>4</param-value>
 </init-param>
 <!-- 字体 -->
 <init-param>
  <param-name>kaptcha.textproducer.font.names</param-name>
  <param-value>Arial</param-value>
 </init-param>
</servlet>
<servlet-mapping>
 <servlet-name>Kaptcha</servlet-name>
 <!-- 外部访问路径 -->
 <url-pattern>/Kaptcha</url-pattern>
</servlet-mapping>
3.前端验证码的显示实现
div class="item-inner">
 <div class="item-title label">验证码</div>
 <input type="text" id="j_captcha" placeholder="验证码">
 <div class="item-input">
  <img id="captcha_img" alt="点击更换" title="点击更换"
    onclick="changeVerifyCode(this)" src="../Kaptcha"/>
 </div>
</div>
function changeVerifyCode(img){
	img.src="../Kaptcha?" + Math.floor(Math.random()*100);
}
解释:
验证码图片的链接 src 中的 "../Kaptcha",这里的“Kaptcha”是要与刚刚 web.xml 中的 url-pattern 配置的值一样的,并非随便写的。
4.后端进行验证码的输入验证
实现思路:我是把验证码的验证单独写成一个静态类,然后在控制层里面直接调用就行。
验证码静态类:
public class CodeUtil {
 public static boolean checkVerifyCode(HttpServletRequest request){
  String verifyCodeExpected = (String)request.getSession().getAttribute(
    com.google.code.kaptcha.Constants.KAPTCHA_SESSION_KEY);
  //这里相当于 request.getParameter("verifyCodeActual");
  String verifyCodeActual = HttpServletRequestUtil.getString(request, "verifyCodeActual");
  if(verifyCodeActual == null || verifyCodeActual.equals(verifyCodeExpected)){
   return false;
  }
  return true;
 }}
控制层调用代码:
if(!CodeUtil.checkVerifyCode(request)){
	modelMap.put("success", false);
	modelMap.put("errMsg", "输入了错误的验证码");
	return modelMap;
}
	modelMap.put("success", false);
	modelMap.put("errMsg", "输入了错误的验证码");
	return modelMap;
}
if 里面验证码不通过(错误)的时候,我自己做的一些处理,可以根据自己的实际情况进行修改。
SSM 环境下 Kaptcha 的使用就介绍完了。
思路:将 xml 的形势转化成代码实现。
package com.example.demo.config;
import com.google.code.kaptcha.impl.DefaultKaptcha;
import com.google.code.kaptcha.util.Config;
import org.springframework.context.annotation.Bean;
import org.springframework.context.annotation.Configuration;
import java.util.Properties;
@Configuration
public class KaptchaController {
 @Bean(name="captchaProducer")
 public DefaultKaptcha getKaptchaBean(){
  DefaultKaptcha defaultKaptcha=new DefaultKaptcha();
  Properties properties=new Properties();
  properties.setProperty("kaptcha.border", "yes");
  properties.setProperty("kaptcha.border.color", "105,179,90");
  properties.setProperty("kaptcha.textproducer.font.color", "blue");
  properties.setProperty("kaptcha.image.width", "125");
  properties.setProperty("kaptcha.image.height", "45");
  properties.setProperty("kaptcha.session.key", "code");
  properties.setProperty("kaptcha.textproducer.char.length", "4");
  properties.setProperty("kaptcha.textproducer.font.names", "宋体,楷体,微软雅黑");
  Config config=new Config(properties);
  defaultKaptcha.setConfig(config);
  return defaultKaptcha;
 }
}
编写一个 controller 类。
package com.example.demo.controller;
import com.google.code.kaptcha.Constants;
import com.google.code.kaptcha.Producer;
import org.springframework.beans.factory.annotation.Autowired;
import org.springframework.stereotype.Controller;
import org.springframework.web.bind.annotation.GetMapping;
import javax.imageio.ImageIO;
import javax.servlet.ServletOutputStream;
import javax.servlet.http.HttpServletResponse;
import javax.servlet.http.HttpSession;
import java.awt.image.BufferedImage;
@Controller
public class ChaController {
 @Autowired
 private Producer captchaProducer;
 @GetMapping("/getKaptchaImage")
 public void getKaptchaImage(HttpServletResponse response,HttpSession session) throws Exception {
  response.setDateHeader("Expires", 0);
  // Set standard HTTP/1.1 no-cache headers.
  response.setHeader("Cache-Control", "no-store, no-cache, must-revalidate");
  // Set IE extended HTTP/1.1 no-cache headers (use addHeader).
  response.addHeader("Cache-Control", "post-check=0, pre-check=0");
  // Set standard HTTP/1.0 no-cache header.
  response.setHeader("Pragma", "no-cache");
  // return a jpeg
  response.setContentType("image/jpeg");
  // create the text for the image
  String capText = captchaProducer.createText();
  // store the text in the session
  //request.getSession().setAttribute(Constants.KAPTCHA_SESSION_KEY, capText);
  //将验证码存到session
  session.setAttribute(Constants.KAPTCHA_SESSION_KEY, capText);
  // create the image with the text
  BufferedImage bi = captchaProducer.createImage(capText);
  ServletOutputStream out = response.getOutputStream();
  // write the data out
  ImageIO.write(bi, "jpg", out);
  try {
   out.flush();
  } finally {
   out.close();
  }
 }
}
前端代码:
<img id="captcha_img" alt="点击更换" title="点击更换"
    onclick="changeVerifyCode(this)" src="../getKaptchaImage"/>
至于点击切换验证码还有后台如何接受验证,跟前面 SSM 的使用方法一样,这里就不再赘述。
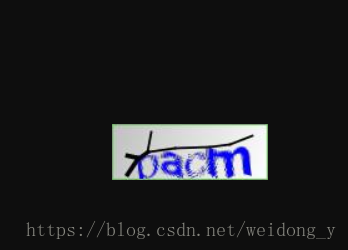
我们可以直接启动 springboot 的项目,在浏览器上直接访问获取验证码的接口。
http://localhost:8080/getKaptchaImage
就能在浏览器上看到验证码的图片了,说明配置是成功的。

总结
以上所述是小编给大家介绍的Google Kaptcha 框架实现登录验证码功能(SSM 和 SpringBoot),希望对大家有所帮助,如果大家有任何疑问请给我留言,小编会及时回复大家的。在此也非常感谢大家对亿速云网站的支持!
免责声明:本站发布的内容(图片、视频和文字)以原创、转载和分享为主,文章观点不代表本网站立场,如果涉及侵权请联系站长邮箱:is@yisu.com进行举报,并提供相关证据,一经查实,将立刻删除涉嫌侵权内容。