这篇文章将为大家详细讲解有关Android怎么实现简单卡片布局,小编觉得挺实用的,因此分享给大家做个参考,希望大家阅读完这篇文章后可以有所收获。
GoogleNow是Android4.1全新推出的一款应用他,它可以全面了解你的使用习惯,并为你提供现在或者未来可能用到的各种信息,GoogleNow提供的信息关联度较高,几乎是瞬间返回答案,总而言之,GoogleNow是Google提出的全新搜索概念。当然,GoogleNow最为引人注目的当属它的卡片式设计。Google自家应用纷纷采用卡片布局(Google Now,Google Plus,Google Play)。
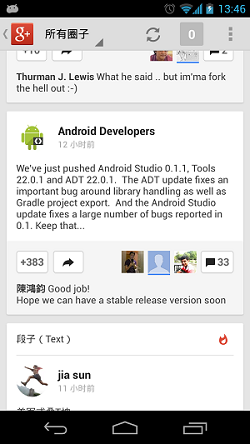
在最新的QQ空间、新浪微博、豌豆荚中也可以见到卡片式设计的影子
下面介绍一种简单实现卡片布局的方式
list_item.xml
<RelativeLayout xmlns:android="http://schemas.android.com/apk/res/android"
 xmlns:tools="http://schemas.android.com/tools"
 android:layout_width="match_parent"
 android:layout_height="wrap_content"
 tools:context=".MainActivity"
 android:background="@drawable/radius_bg">

 <ImageView
 android:id="@+id/iv_logo"
 android:layout_width="wrap_content"
 android:layout_height="wrap_content"
 android:layout_alignParentLeft="true"
 android:layout_margin="8dp"
 android:src="@drawable/ic_launcher" />

 <TextView
 android:id="@+id/tv_name"
 android:layout_width="wrap_content"
 android:layout_height="wrap_content"
 android:layout_alignTop="@id/iv_logo"
 android:layout_toRightOf="@id/iv_logo"
 android:text="@string/hello_world"
 android:textSize="16sp" />

 <TextView
 android:id="@+id/tv_desc"
 android:layout_width="wrap_content"
 android:layout_height="wrap_content"
 android:layout_below="@id/tv_name"
 android:layout_marginTop="5dp"
 android:layout_toRightOf="@id/iv_logo"
 android:text="@string/hello_world"
 android:textSize="13sp" />

</RelativeLayout>自定义Shape图片radius_bg.xml
<?xml version="1.0" encoding="utf-8"?>
<shape xmlns:android="http://schemas.android.com/apk/res/android" >
 <corners android:radius="3dp"/>
 <solid android:color="#ffffff"/>
</shape>主界面布局
<RelativeLayout xmlns:android="http://schemas.android.com/apk/res/android"
 xmlns:tools="http://schemas.android.com/tools"
 android:layout_width="match_parent"
 android:layout_height="match_parent"
 tools:context=".MainActivity"
 android:background="#e6e6e6">

 <ListView
 android:id="@+id/mListView"
 android:layout_width="match_parent"
 android:layout_height="match_parent"
 android:divider="@android:color/transparent"
 android:paddingLeft="10dp"
 android:paddingRight="10dp"
 android:paddingTop="2dp"
 android:paddingBottom="2dp"
 android:dividerHeight="10dp" >
 </ListView>

</RelativeLayout>Card实体
package com.example.carduitest.model;

public class Card {
 private String name;
 private String desc;
 private int icon;

 public Card(String name, String desc) {
 this.name = name;
 this.desc = desc;
 }

 public String getName() {
 return name;
 }
 public void setName(String name) {
 this.name = name;
 }
 public String getDesc() {
 return desc;
 }
 public void setDesc(String desc) {
 this.desc = desc;
 }
 public int getIcon() {
 return icon;
 }
 public void setIcon(int icon) {
 this.icon = icon;
 }
}自定义适配器
package com.example.carduitest.adapter;

import java.util.List;

import com.example.carduitest.R;
import com.example.carduitest.model.Card;
import android.content.Context;
import android.view.LayoutInflater;
import android.view.View;
import android.view.ViewGroup;
import android.widget.BaseAdapter;
import android.widget.TextView;

public class CardAdapter extends BaseAdapter {
 private List<Card> data;
 private Context context;
 private LayoutInflater mInflater;

 public CardAdapter(List<Card> data, Context context) {
 this.data = data;
 this.context = context;
 mInflater = LayoutInflater.from(context);
 }

 @Override
 public int getCount() {
 // TODO Auto-generated method stub
 return data.size();
 }

 @Override
 public Object getItem(int position) {
 // TODO Auto-generated method stub
 return data.get(position);
 }

 @Override
 public long getItemId(int position) {
 // TODO Auto-generated method stub
 return position;
 }

 @Override
 public View getView(int position, View convertView, ViewGroup parent) {
 ViewHolder holder;
 if(convertView==null){
 convertView = mInflater.inflate(R.layout.list_item, null);

 holder = new ViewHolder();
 holder.tv_name = (TextView) convertView.findViewById(R.id.tv_name);
 holder.tv_desc = (TextView) convertView.findViewById(R.id.tv_desc);

 convertView.setTag(holder);
 }else{
 holder = (ViewHolder) convertView.getTag();
 }

 Card card = data.get(position);
 holder.tv_name.setText(card.getName());
 holder.tv_desc.setText(card.getDesc());

 return convertView;
 }

 static class ViewHolder{
 TextView tv_name;
 TextView tv_desc;
 }

}package com.example.carduitest;
import java.util.ArrayList;
import java.util.List;
import com.example.carduitest.adapter.CardAdapter;
import com.example.carduitest.model.Card;
import android.os.Bundle;
import android.app.Activity;
import android.view.Menu;
import android.widget.ListView;
public class MainActivity extends Activity {
private List<Card> data = new ArrayList<Card>();
@Override
protected void onCreate(Bundle savedInstanceState) {
super.onCreate(savedInstanceState);
setContentView(R.layout.activity_main);
initData();
ListView mListView = (ListView) findViewById(R.id.mListView);
CardAdapter mAdapter = new CardAdapter(data,this);
mListView.setAdapter(mAdapter);
}
private void initData() {
for(int i=0;i<50;i++){
Card card = new Card("Card UI Example "+i, "Very Good");
data.add(card);
}
}
@Override
public boolean onCreateOptionsMenu(Menu menu) {
// Inflate the menu; this adds items to the action bar if it is present.
getMenuInflater().inflate(R.menu.main, menu);
return true;
}
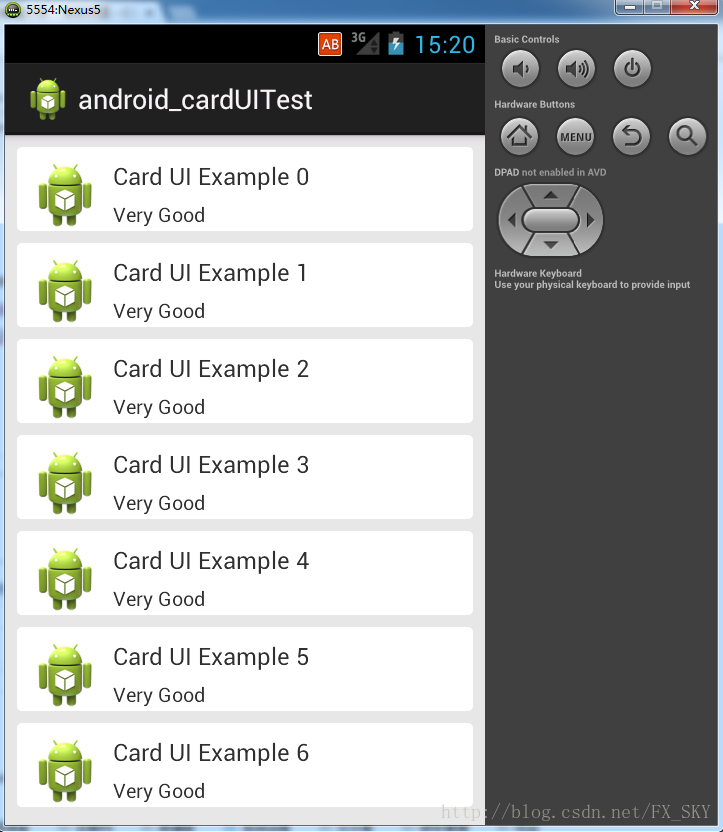
}运行效果如下:
当然啦,Github上面也有专门的实现card的library,这里列举两个不错的library
关于“Android怎么实现简单卡片布局”这篇文章就分享到这里了,希望以上内容可以对大家有一定的帮助,使各位可以学到更多知识,如果觉得文章不错,请把它分享出去让更多的人看到。
亿速云「云服务器」,即开即用、新一代英特尔至强铂金CPU、三副本存储NVMe SSD云盘,价格低至29元/月。点击查看>>
免责声明:本站发布的内容(图片、视频和文字)以原创、转载和分享为主,文章观点不代表本网站立场,如果涉及侵权请联系站长邮箱:is@yisu.com进行举报,并提供相关证据,一经查实,将立刻删除涉嫌侵权内容。


 计算
计算 安全
安全 数据库
数据库 网络和加速
网络和加速 企业服务
企业服务


