配置gitlab
1) 创建项目
2)上传示例代码
注: 本次示例使用的gitlab项目地址为:http://gitlab.hanker.com/colynn/hanker-hello.git
1) 创建项目, 用于存储构建的镜像
注: 本次示例使用的harbor地址为 10.0.0.185:5000/hanker/hanker-hello:v1
1)添加 gitlab 帐号信息
操作指引:【Credentials】-> 【System】-> 【Global credentials】-> 【Add Credentials】
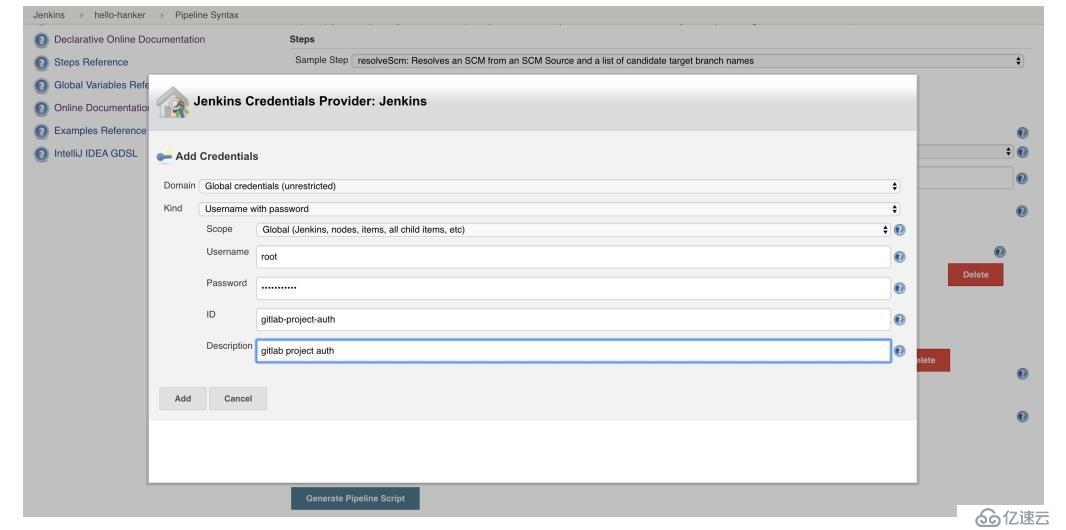
2)harbor 信息
操作指引:【Credentials】-> 【System】-> 【Global credentials】-> 【Add Credentials】
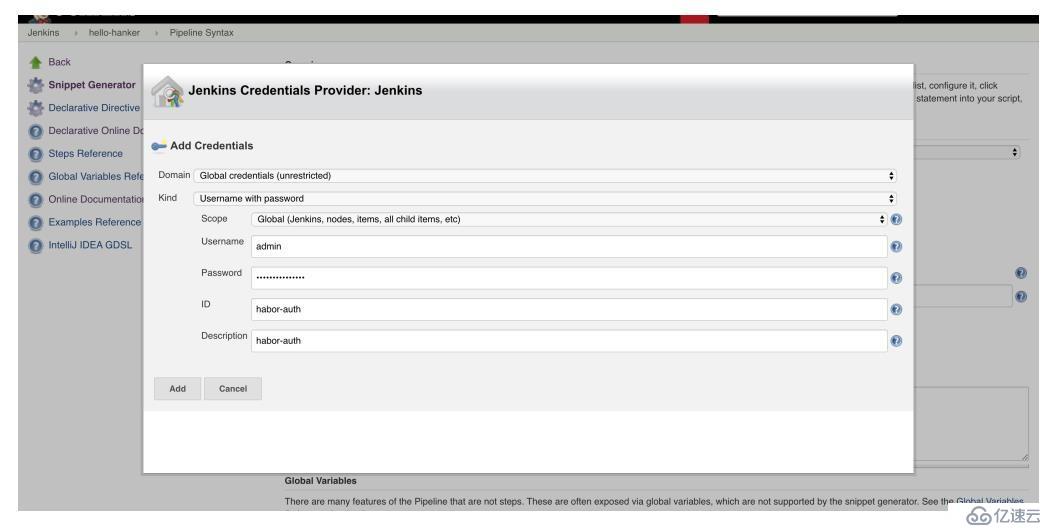
3) k8s namespace验证信息
在你的k8s master节点上执行如下操作:
1.创建serviceaccount
$ kubectl -n devops create serviceaccount jenkins-robot命令输出:
serviceaccount/jenkins-robot created2.角色绑定
$ kubectl -n devops create rolebinding jenkins-robot-binding --clusterrole=cluster-admin --serviceaccount=devops:jenkins-robot命令输出:
rolebinding.rbac.authorization.k8s.io/jenkins-robot-binding created3.获取 ServiceAccount
$ kubectl -n devops get serviceaccount jenkins-robot -o go-template --template='{{range .secrets}}{{.name}}{{"\n"}}{{end}}'jenkins-robot-token-n8w6b
4.基于base64解码 ServiceToken
$ kubectl -n devops get secrets jenkins-robot-token-n8w6b -o go-template --template '{{index .data "token"}}' | base64 --decode命令输出:
eyJhbGciOiJSUzI1NiIsImtpZCI6IiJ9.eyJpc3MiOiJrdWJlcm5ldGVzL3NlcnZpY2VhY2NvdW50Iiwia3ViZXJuZXRlcy5pby9zZXJ2aWNlYWNjb3VudC9uYW1lc3BhY2UiOiJkZXZvcHMiLCJrdWJlcm5ldGVzLmlvL3NlcnZpY2VhY2NvdW50L3NlY3JldC5uYW1lIjoiamVua2lucy1yb2JvdC10b2tlbi1uOHc2YiIsImt1YmVybmV0ZXMuaW8vc2VydmljZWFjY291bnQvc2VydmljZS1hY2NvdW50Lm5hbWUiOiJqZW5raW5zLXJvYm90Iiwia3ViZXJuZXRlcy5pby9zZXJ2aWNlYWNjb3VudC9zZXJ2aWNlLWFjY291bnQudWlkIjoiOTcyZTY0OGYtMTYxZC00NmM5LWI0ZjgtYjFkNTdlOWY4NTBjIiwic3ViIjoic3lzdGVtOnNlcnZpY2VhY2NvdW50OmRldm9wczpqZW5raW5zLXJvYm90In0.ArQvcaEqCaeU1ZcJ6nOC5rLaTZr_vLDrpLCt87asltMUWj2gSli_mXUTrl09hBnBDXI3A1D4rJXHKLHjIAA4nN8qRIRGbpqSNzDwmqJr-jmmmWWZFrZ3n3Al9-13KJnNOK8pcWr70rt3Rsigt4B6CIQ0-ZLK8BZhvROJSifeOfJ6xe2KBqdXBv1ccZZZfEhPLgGbaR5yWm5jLvOMr2MQiPDrZoHOEkcMt-C0xipytOp4sJCJ4bQhb-UoMu1owYydxbd6O7xO71fvqP_bMDpZXC601nA2ggK7h-vi6CJffHv5MM59q8X_DWe1NnZS6KXiMmkXqAmBn10Yu20PNj-kjg5.添加 Secret text验证信息
操作指引:【首页】->【Credentials】-> 【System】-> 【Global credentials】-> 【Add Credentials】-> 选择【Secret text】类型
然后将上一步 解码的结果 更新至 Secret, Pipeline 中

操作指引:【首页】->【New Item】
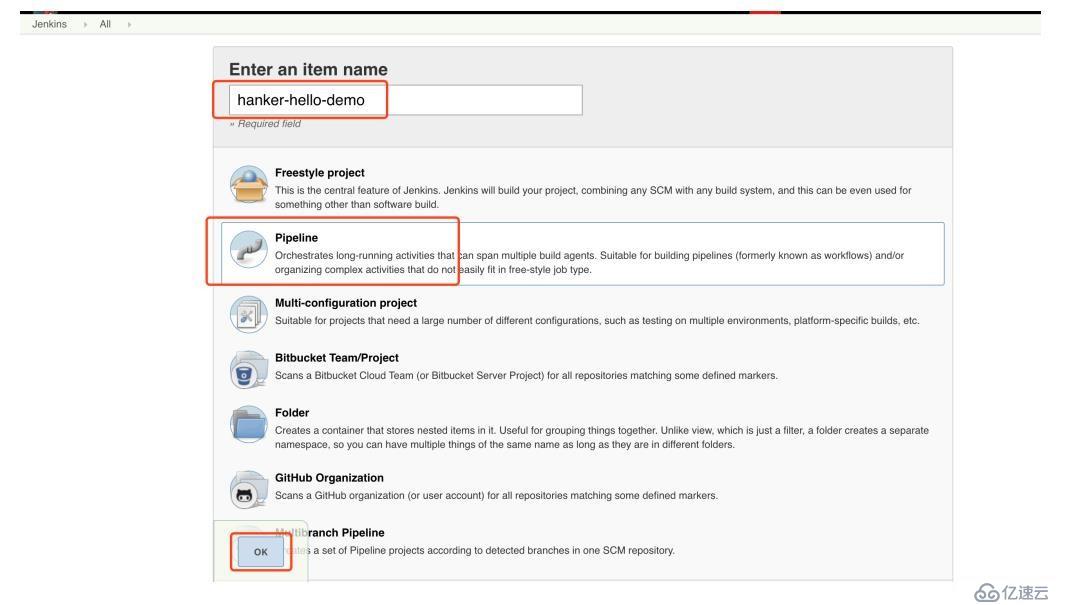
注: pipeline主要包含三个阶段(检出代码、制作镜像、部署服务),下面跟大家解释下,如何编写pipeline, 借助Pipeline Syntax生成的只是部分代码,你可以根据语言规范将其完善。
1.阶段1,检出代码
操作指引:【首页】->【hanker-hello-demo】-> 【Pipeline Syntax】
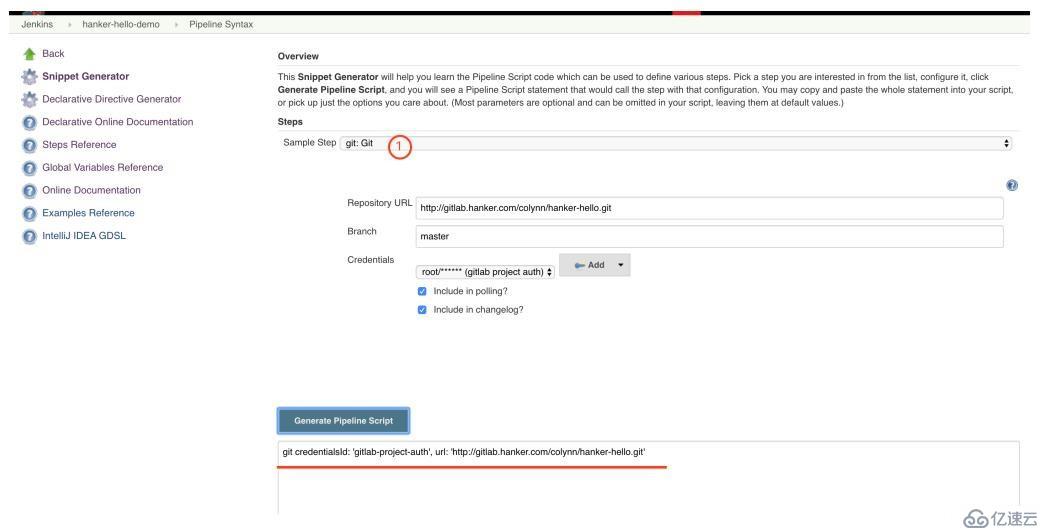
注: 本实践中选取的 git: Git 类型,当然你也可以选择 checkout: Check out from version control
获取到该步骤的脚本
git credentialsId: 'gitlab-project-auth', url: 'http://gitlab.hanker.com/colynn/hanker-hello.git'2.阶段2,构建镜像
操作指引:类似于 阶段1,
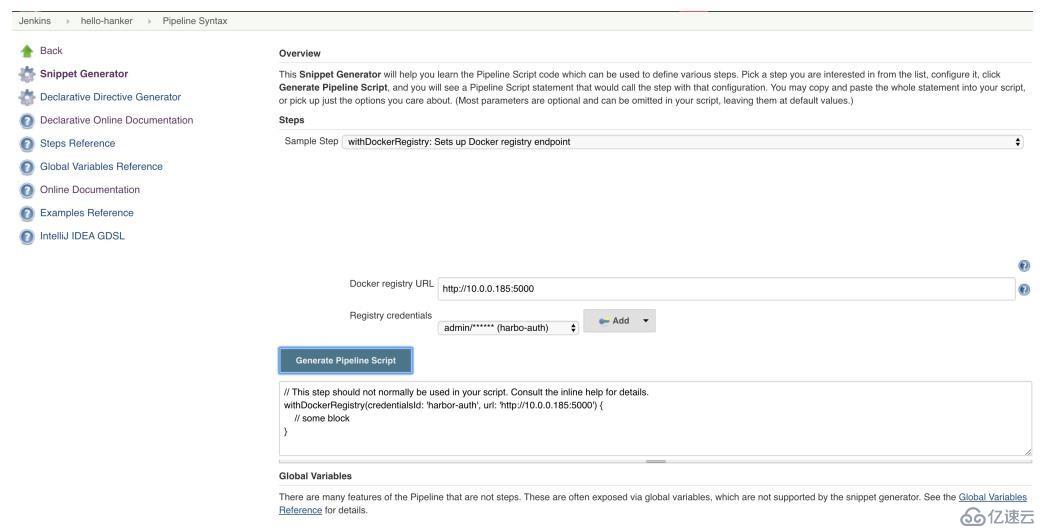
完善获取该步骤脚本
script {
    withDockerRegistry(credentialsId: 'harbor-auth', url: 'http://10.0.0.185:5000') {
        def customImage =  docker.build("10.0.0.185:5000/devops/hanker-hello:v1")
        customImage.push()
    }
}注: 支持本阶段需要jenkins-agent镜像里包含docker命令。
3.阶段3. 部署服务
参考: jenkins kubernetes cli plugin
注: 支持本阶段需要jenkins-agent镜像里包含kubectl命令。
注:
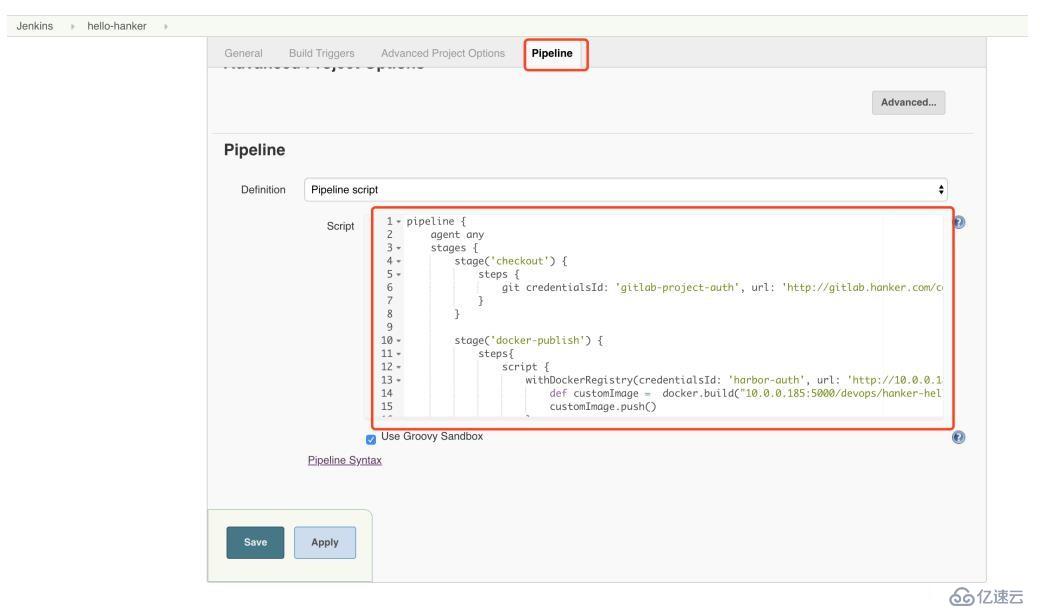
合并后的pipeline脚本内容如下:
pipeline {
    agent any
    stages {
        stage('checkout') {
            steps {
                git credentialsId: 'gitlab-project-auth', url: 'http://gitlab.hanker.com/colynn/hanker-hello.git'
            }
        }

        stage('docker-publish') {
            steps{
                script {
                    withDockerRegistry(credentialsId: 'harbor-auth', url: 'http://10.0.0.185:5000') {
                        def customImage =  docker.build("10.0.0.185:5000/devops/hanker-hello:v1")
                        customImage.push()
                    }
                }
            }
        }

        stage('application-deploy') {
            steps {
                withKubeConfig([credentialsId: '5a5517f3-3d38-459d-bafc-12b55beeb588', serverUrl: 'https://10.0.0.182:6443']) {
                    sh '/usr/bin/kubectl apply -f k8s-setup.yml'
                }
            }
        }
    }
}
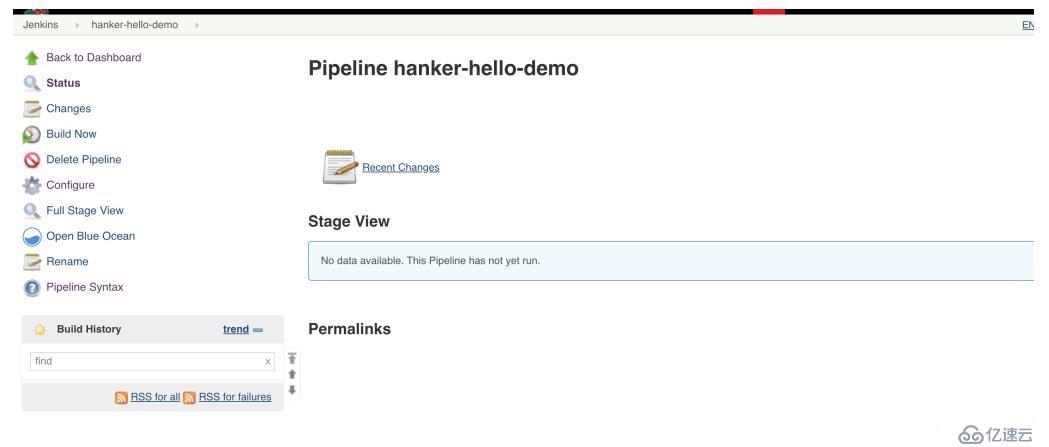
1.确认 jenkina-agent 启动状态;
$ kubectl -n devops get pods |grep jnlp
jnlp-sh8zl                                 1/1     Running   0          14s

// 查看jenkins-agent pod日志
$ kubectl -n devops logs -f [jenkins-agent-pod-name]注: 如果长时间没有启动jenkins-agent, 可以确认下集群内是否有足够的资源。
2.确认pipeline 执行状态;
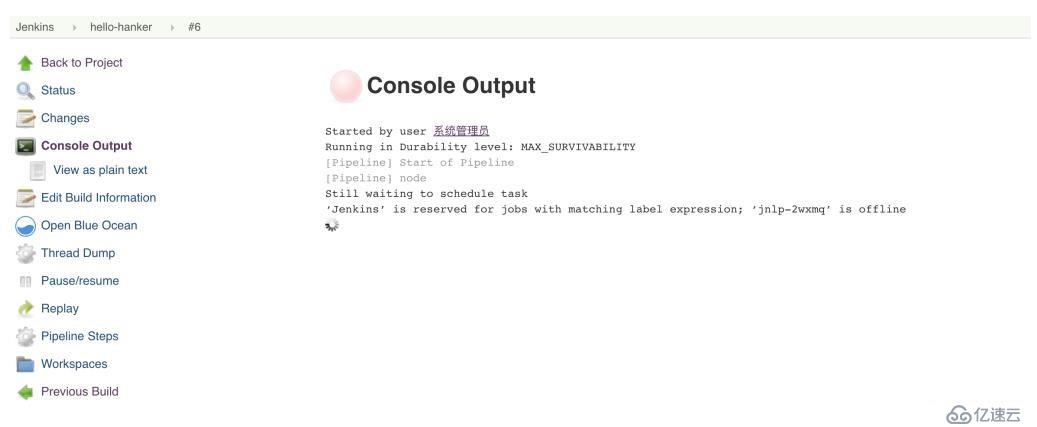
3.确认harbor镜像仓库里是否已经有新推送的镜像

注: harbor里的项目是需要你先创建好的,不然推送时会报错。
4.确认部署的服务状态
k8s master节点上执行如下操作:
$ kubectl -n devops get pod,deployment,svc,ingress |grep hanker-hello

pod/hanker-hello-5b7586f86d-5j7kk              1/1     Running   0          173m

deployment.extensions/hanker-hello              1/1     1            1           3h8m
service/hanker-hello-svc          ClusterIP   10.233.22.19    <none>        8080/TCP             3h8m
ingress.extensions/hanker-hello-ingress              hanker-hello-demo.dev.hanker.net                   80      3h8m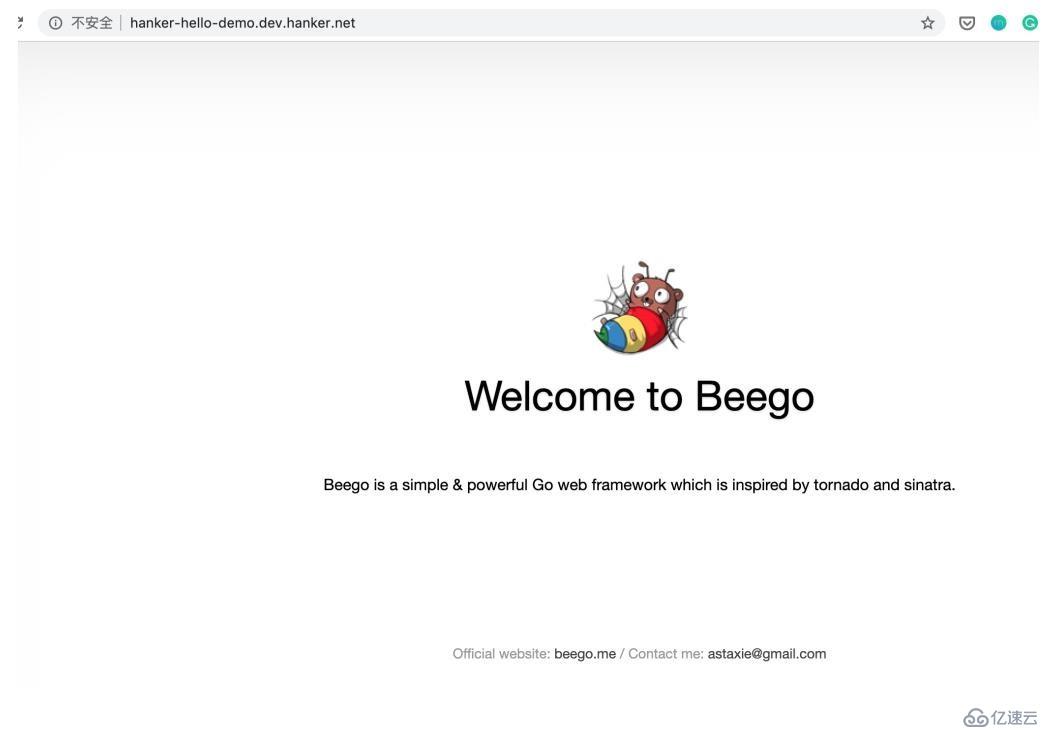
## 基于 https://github.com/Kubernetes-Best-Pratice/jenkins-jnlp-agent.git

$ git checkout  https://github.com/Kubernetes-Best-Pratice/jenkins-jnlp-agent.git

$ cd jenkins-jnlp-agent
$ docker build .
$ docker tag tag-name custom-private-repository-addr
注: 你也可以基于基础镜像创建自定义的镜像
免责声明:本站发布的内容(图片、视频和文字)以原创、转载和分享为主,文章观点不代表本网站立场,如果涉及侵权请联系站长邮箱:is@yisu.com进行举报,并提供相关证据,一经查实,将立刻删除涉嫌侵权内容。