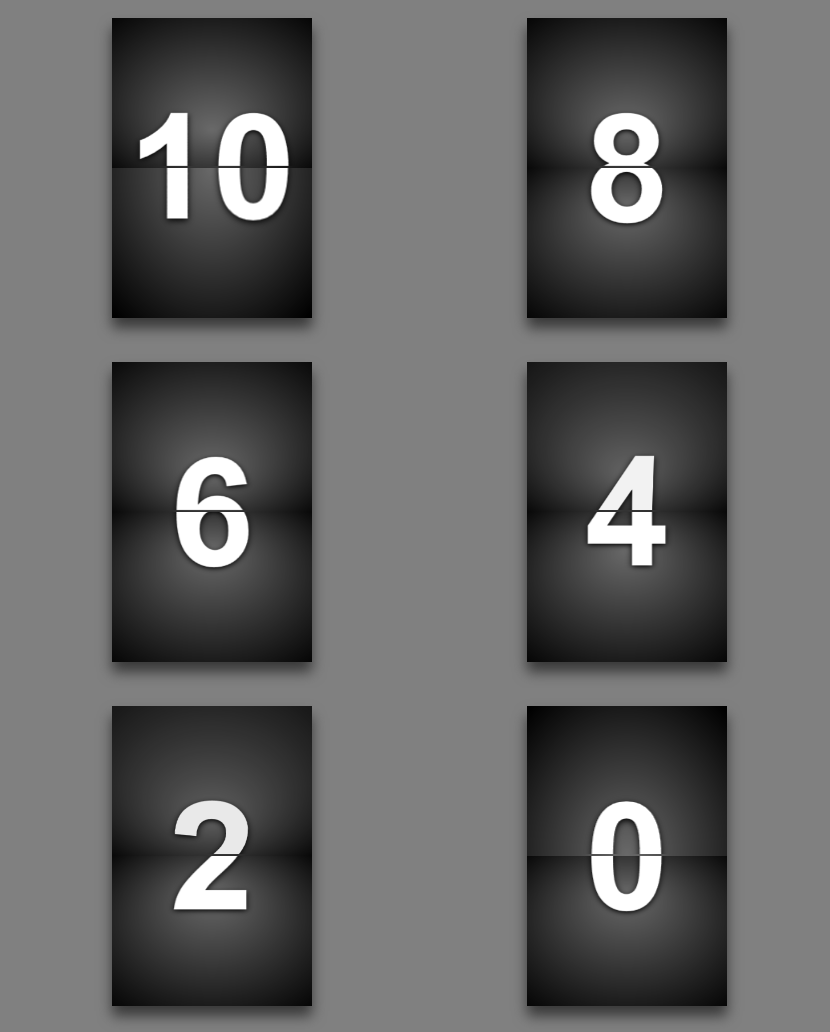
本文实例为大家分享了WPF实现3D翻牌式倒计时的具体代码,供大家参考,具体内容如下
实现效果如下:

思路:使用自定义控件,设置一个背板 MyCardControlBottom,一个卡牌翻动的前部 MyCardControlFront,一个卡牌翻动后的背部 MyCardControlBack,另外实现卡牌翻动的MyCardControl;在主窗体中设置一计时器,根据卡牌上的数字和计时器时间启动翻牌动作。
主要代码:
1、自定义控件MyCardControlBottom
<UserControl x:Class="TurnOverCards.MyCardControlBottom"
    xmlns="http://schemas.microsoft.com/winfx/2006/xaml/presentation"
    xmlns:x="http://schemas.microsoft.com/winfx/2006/xaml"
    xmlns:mc="http://schemas.openxmlformats.org/markup-compatibility/2006"
    xmlns:d="http://schemas.microsoft.com/expression/blend/2008"
    x:Name="MyUserControl"
    Height="300" Width="200">
 <Border BorderThickness="0">
  <Border.Effect>
   <DropShadowEffect BlurRadius="20" Color="Gray" Direction="-90" ShadowDepth="10"></DropShadowEffect>
  </Border.Effect>
  <Border.Background>
   <RadialGradientBrush GradientOrigin="0.5,0.5" Center="0.5,0.5" RadiusX="0.75" RadiusY="0.65">
    <GradientStop Color="DimGray" Offset="0" />
    <GradientStop Color="Black" Offset="1" />
   </RadialGradientBrush>
  </Border.Background>
  <Grid>
   <Grid.RowDefinitions>
    <RowDefinition></RowDefinition>
    <RowDefinition></RowDefinition>
   </Grid.RowDefinitions>
   <TextBlock Grid.Row="0" Text="{Binding ElementName=MyUserControl,Path=BottomText}" FontFamily="Arial" Foreground="White" FontSize="150" FontWeight="Bold" HorizontalAlignment="Center" VerticalAlignment="Top" Margin="0,65,0,2">
    <TextBlock.Effect>
     <DropShadowEffect BlurRadius="10" Color="Black" Direction="-90" ShadowDepth="2"></DropShadowEffect>
    </TextBlock.Effect>
   </TextBlock>
   <TextBlock Grid.Row="1" Text="{Binding ElementName=MyUserControl,Path=BottomText}" FontFamily="Arial" Foreground="White" FontSize="150" FontWeight="Bold" HorizontalAlignment="Center" VerticalAlignment="Bottom" Margin="0,0,0,65">
    <TextBlock.Effect>
     <DropShadowEffect BlurRadius="10" Color="Black" Direction="-90" ShadowDepth="2"></DropShadowEffect>
    </TextBlock.Effect>
   </TextBlock>
  </Grid>
 </Border>
</UserControl>其中BottomText为自定义属性。
public static readonly DependencyProperty BottomTextProperty = DependencyProperty.Register("BottomText", typeof(string), typeof(MyCardControlBottom), new PropertyMetadata(null));
  public string BottomText
  {
   get { return (string)GetValue(BottomTextProperty); }
   set { SetValue(BottomTextProperty, value); }
}2、自定义控件MyCardControlFront
<UserControl x:Class="TurnOverCards.MyCardControlFront"
    xmlns="http://schemas.microsoft.com/winfx/2006/xaml/presentation"
    xmlns:x="http://schemas.microsoft.com/winfx/2006/xaml"
    xmlns:mc="http://schemas.openxmlformats.org/markup-compatibility/2006"
    xmlns:d="http://schemas.microsoft.com/expression/blend/2008"
    x:Name="MyUserControl"
    Height="150" Width="200">
 <Border BorderThickness="0" ClipToBounds="True">
  <Border.Background>
   <RadialGradientBrush GradientOrigin="0.5,0.75" Center="0.5,0.5" RadiusX="0.75" RadiusY="0.75">
    <GradientStop Color="DimGray" Offset="0" />
    <GradientStop Color="Black" Offset="1" />
   </RadialGradientBrush>
  </Border.Background>
  <TextBlock Text="{Binding ElementName=MyUserControl,Path=FrontText}" FontFamily="Arial" Foreground="White" FontSize="150" FontWeight="Bold" HorizontalAlignment="Center" VerticalAlignment="Top" Margin="0,65,0,2">
   <TextBlock.Effect>
    <DropShadowEffect BlurRadius="10" Color="Black" Direction="-90" ShadowDepth="2"></DropShadowEffect>
   </TextBlock.Effect>
  </TextBlock>
 </Border>
</UserControl>其中FrontText为自定义属性。
3、自定义控件MyCardControlBack
窗体大部分布局与MyCardControlFront 相同,字体部分需要进行翻转显示,其中BackText为自定义属性。
<TextBlock Text="{Binding ElementName=MyUserControl,Path=BackText}" FontFamily="Arial" Foreground="White" FontSize="150" FontWeight="Bold" HorizontalAlignment="Center" VerticalAlignment="Bottom" Margin="0,0,0,-85"
     RenderTransformOrigin="0.5,0.5">
   <TextBlock.Effect>
    <DropShadowEffect BlurRadius="10" Color="Black" Direction="-90" ShadowDepth="2"></DropShadowEffect>
   </TextBlock.Effect>
   <TextBlock.RenderTransform >
    <ScaleTransform ScaleX="-1" ScaleY="-1"/>
   </TextBlock.RenderTransform>
</TextBlock>4、自定义控件MyCardControl
卡牌翻转动作在这里实现。
<UserControl x:Class="TurnOverCards.MyCardControl"
    xmlns="http://schemas.microsoft.com/winfx/2006/xaml/presentation"
    xmlns:x="http://schemas.microsoft.com/winfx/2006/xaml"
    xmlns:mc="http://schemas.openxmlformats.org/markup-compatibility/2006"
    xmlns:d="http://schemas.microsoft.com/expression/blend/2008"
    xmlns:local="clr-namespace:TurnOverCards"
    x:Name="UserControl"
    Loaded="MyUserControl_Loaded">
 <Viewport3D Width="200" Height="300">
  <Viewport3D.Camera>
   <PerspectiveCamera Position="0 -150 480" LookDirection="0 0 -1"/>
  </Viewport3D.Camera>
  <Viewport3D.Children>
   <ModelVisual3D>
    <ModelVisual3D.Content>
     <DirectionalLight Color="Transparent"/>
    </ModelVisual3D.Content>
   </ModelVisual3D>
   <ContainerUIElement3D>
    <Viewport2DVisual3D>
     <Viewport2DVisual3D.Geometry>
      <MeshGeometry3D Positions="-200 150 0 -200 -150 0 200 -150 0 200 150 0" TriangleIndices="0 1 2 0 2 3" TextureCoordinates="0 0 0 1 1 1 1 0"/>
     </Viewport2DVisual3D.Geometry>
     <Viewport2DVisual3D.Material>
      <DiffuseMaterial Viewport2DVisual3D.IsVisualHostMaterial="True"/>
     </Viewport2DVisual3D.Material>
     <Viewport2DVisual3D.Visual>
      <local:MyCardControlFront x:Name="frontControl" Width="200" Height="150"/>
     </Viewport2DVisual3D.Visual>
    </Viewport2DVisual3D>
    <Viewport2DVisual3D>
     <Viewport2DVisual3D.Geometry>
      <MeshGeometry3D Positions="200 150 0 200 -150 0 -200 -150 0 -200 150 0" TriangleIndices="0 1 2 0 2 3" TextureCoordinates="0 0 0 1 1 1 1 0"/>
     </Viewport2DVisual3D.Geometry>
     <Viewport2DVisual3D.Material>
      <DiffuseMaterial Viewport2DVisual3D.IsVisualHostMaterial="True"/>
     </Viewport2DVisual3D.Material>
     <Viewport2DVisual3D.Visual>
      <local:MyCardControlBack x:Name="backControl" Width="200" Height="150"/>
     </Viewport2DVisual3D.Visual>
    </Viewport2DVisual3D>
    <ContainerUIElement3D.Transform>
     <Transform3DGroup>
      <RotateTransform3D CenterX="0" CenterY="-150" CenterZ="0">
       <RotateTransform3D.Rotation>
        <AxisAngleRotation3D x:Name="MyAxisAngleRotation3D" Angle="0" Axis="1 0 0"/>
       </RotateTransform3D.Rotation>
      </RotateTransform3D>
     </Transform3DGroup>
    </ContainerUIElement3D.Transform>
   </ContainerUIElement3D>
  </Viewport3D.Children>
 </Viewport3D>
</UserControl>加载时赋值:
public int ShowValue { get; set; }

  private void MyUserControl_Loaded(object sender, RoutedEventArgs e)
  {
   this.frontControl.FrontText = ShowValue.ToString();
}5、主窗体交互逻辑
private int Count = 10;
private DispatcherTimer frameTimer;
private int TimeValue = 0;

  private void Window_Loaded(object sender, RoutedEventArgs e)
  {
   this.bottomControl.BottomText = Count.ToString();

   for (int i = 1; i <= Count; i++)
   {
    var card = new MyCardControl();
    card.ShowValue = i;
    this.mainGrid.Children.Add(card);
    Canvas.SetZIndex(card, i);
   }

   frameTimer = new DispatcherTimer();
   frameTimer.Tick += OnFrame;
   frameTimer.Interval = TimeSpan.FromSeconds(1);
   frameTimer.Start();
  }

  private void OnFrame(object sender, EventArgs e)
  {
   if (TimeValue >= Count)
   {
    if (frameTimer != null)
     frameTimer.Stop();
    return;
   }

   if(TimeValue == Count - 1)
   {
    this.bottomControl.BottomText = 0.ToString();
   }

   List<MyCardControl> cardList = GetChildObjects<MyCardControl>(this.mainGrid);
   foreach (var item in cardList)
   {
    if(item.ShowValue == Count - TimeValue)
    {
     Canvas.SetZIndex(item, Count + TimeValue);

     DoubleAnimation da = new DoubleAnimation();
     da.Duration = new Duration(TimeSpan.FromSeconds(1));
     da.To = 180d;
     item.ShowValue--;
     item.backControl.BackText = item.ShowValue.ToString();

     AxisAngleRotation3D aar = item.FindName("MyAxisAngleRotation3D") as AxisAngleRotation3D;
     if (aar != null)
      aar.BeginAnimation(AxisAngleRotation3D.AngleProperty, da);

     break;
    }
   }

   TimeValue++;
}以上就是本文的全部内容,希望对大家的学习有所帮助,也希望大家多多支持亿速云。
亿速云「云服务器」,即开即用、新一代英特尔至强铂金CPU、三副本存储NVMe SSD云盘,价格低至29元/月。点击查看>>
免责声明:本站发布的内容(图片、视频和文字)以原创、转载和分享为主,文章观点不代表本网站立场,如果涉及侵权请联系站长邮箱:is@yisu.com进行举报,并提供相关证据,一经查实,将立刻删除涉嫌侵权内容。