今天就跟大家聊聊有关springboot如何实现集成与使用Sentinel,可能很多人都不太了解,为了让大家更加了解,小编给大家总结了以下内容,希望大家根据这篇文章可以有所收获。
进入Sentinel的git,点击下载提供的dashboard,最新的为1.8
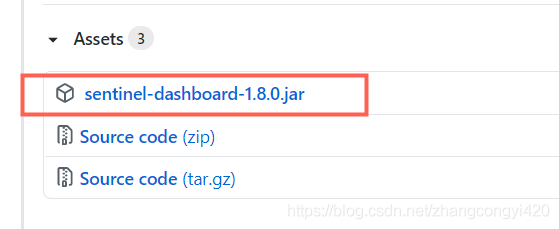
下载到本地之后,其实就是一个springboot打成的jar包,windows环境下,cmd窗口,直接通过下面的命令启动即可,
java -jar -Dserver.port=9100 sentinel-dashboard-1.8.0.jar
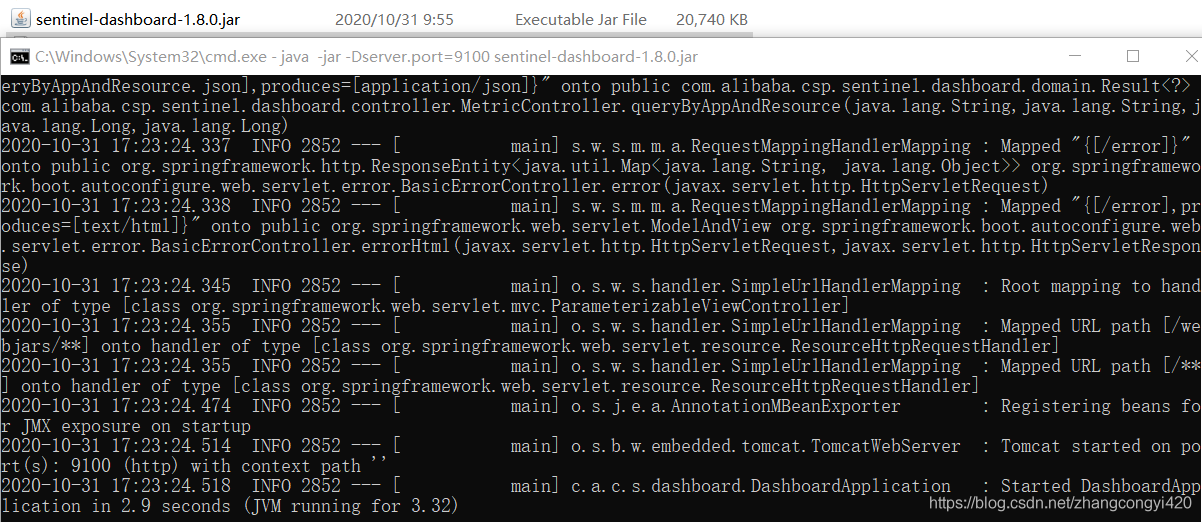
启动成功后,访问一下吧,初次访问,需要登录用户名和密码,均为 : sentinel/sentinel
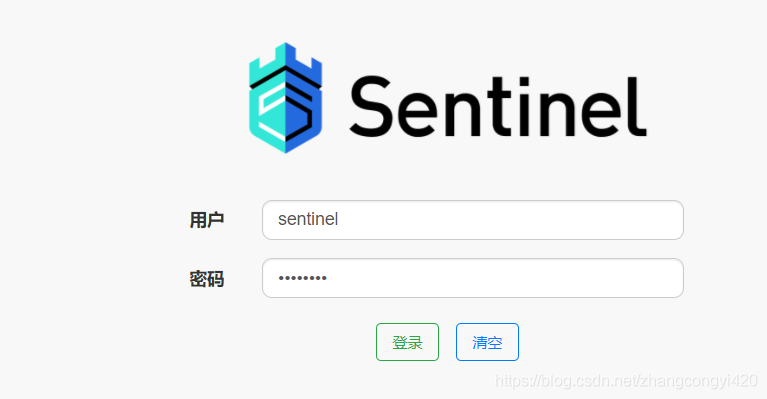
但是进来之后发现空空如也,别紧张,这个dashboard默认是懒加载的,意思就是没有应用接入进来,它就不展示任何信息,等到我们将本地的服务通过配置接入的时候就能看到效果了

springboot工程快速接入dashboard
1、导入基本的依赖
 <dependency>
      <groupId>org.springframework.boot</groupId>
      <artifactId>spring-boot-starter-web</artifactId>
      <version>2.2.1.RELEASE</version>
    </dependency>

    <dependency>
      <groupId>org.springframework.boot</groupId>
      <artifactId>spring-boot-starter-test</artifactId>
      <scope>test</scope>
    </dependency>

    <dependency>
      <groupId>mysql</groupId>
      <artifactId>mysql-connector-java</artifactId>
      <version>${mysql-connector-java.version}</version>
    </dependency>

		<dependency>
      <groupId>com.alibaba.cloud</groupId>
      <artifactId>spring-cloud-alibaba-sentinel</artifactId>
    </dependency>

    <dependency>
      <groupId>org.springframework.boot</groupId>
      <artifactId>spring-boot-starter-actuator</artifactId>
    </dependency>

    <dependency>
      <groupId>com.alibaba.cloud</groupId>
      <artifactId>spring-cloud-starter-alibaba-nacos-discovery</artifactId>
</dependency>2、yml配置
server:
 port: 8082

spring:
 datasource:
  driver-class-name: com.mysql.cj.jdbc.Driver
  url: jdbc:mysql://IT:3306/test?autoReconnect=true&useUnicode=true&characterEncoding=utf8&serverTimezone=GMT%2B8&useSSL=false
  username: root
  password: root

#logging:
# config: classpath:logback-spring.xml #日志

 application:
  name: service-order

 #注册中心使用nacos
 cloud:
  nacos:
   discovery:
    server-addr: IP:8848

  #连接sentinel的dashboard
  sentinel:
   transport:
    dashboard: localhost:9100

 #设置单个文件最大上传大小
 servlet:
  multipart:
   max-file-size: 20MB

mybatis-plus:
 mapper-locations: classpath*:mapper/*.xml
 global-config:
  db-column-underline: true #开启驼峰转换
  db-config:
   id-type: uuid
   field-strategy: not_null
  refresh: true
 configuration:
  map-underscore-to-camel-case: true
  log-impl: org.apache.ibatis.logging.stdout.StdOutImpl #打印sql语句便于调试

#暴露的健康检查服务端点
management:
 endpoints:
  web:
   exposure:
include: '*'3、编写简单的controller接口
@RestController
public class FlowController {

  @Autowired
  private FlowService flowService;

  @GetMapping("/testFlow")
  public String testFlow(){
    return flowService.doFlow();
  }

}浏览器访问一次:localhost:8082/testFlow 之后,这次再观察dashboard,发现相关的可配置菜单和可视化界面的参数就都展示了出来
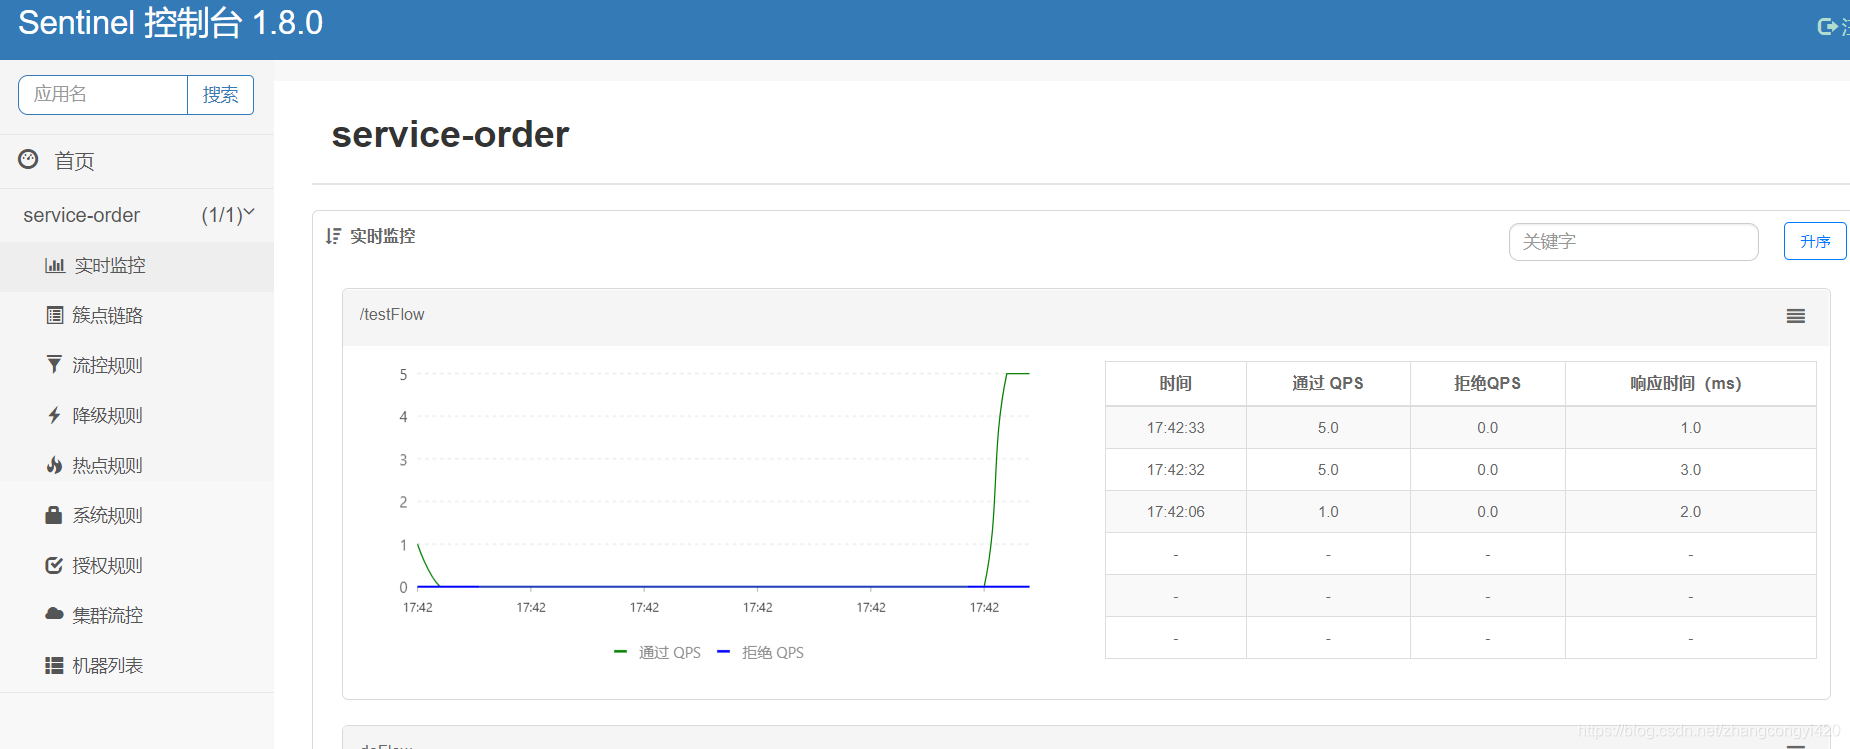
dashboard使用简单说明
其实在上一篇中,我们谈到了使用Sentinel提供的API配置的多种限流规则,比如基于QPS下的快速失败,预热,匀速队列,关联链路等,而dashboard上面的配置则正好对应其底层的各种配置规则,下面我们演示几种常用的场景吧

在簇点链路这一栏,图中可以看到我们的后端服务接口即刚刚调用过的接口就会展示在这里,配置限流规则可以通过加号中的”添加流控“进行配置,
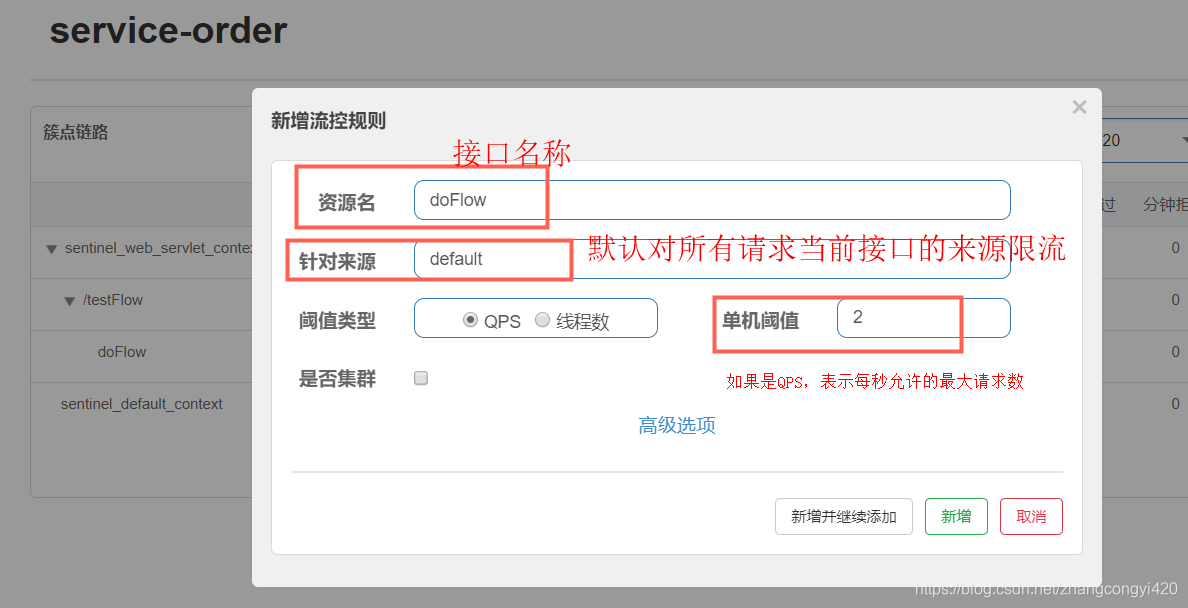
规则1:QPS,如上所示,我们配置了针对访问testFlow这个接口的所有来源的请求进行QPS的限流,每秒最大允许通过2个请求,

配置完毕后,当我们再次快速访问接口时,会出现下面的结果,很明显,我们的配置规则生效了

在上面的演示中,其实我们用到的就是最基本的降级策略,就是基于QPS的快速降级,我们不妨点开高级选项,是不是发现这里有了更多的配置,其实在可视化界面下,使用它做限流规则配置时就是使用它提供的不同配置项组合使用
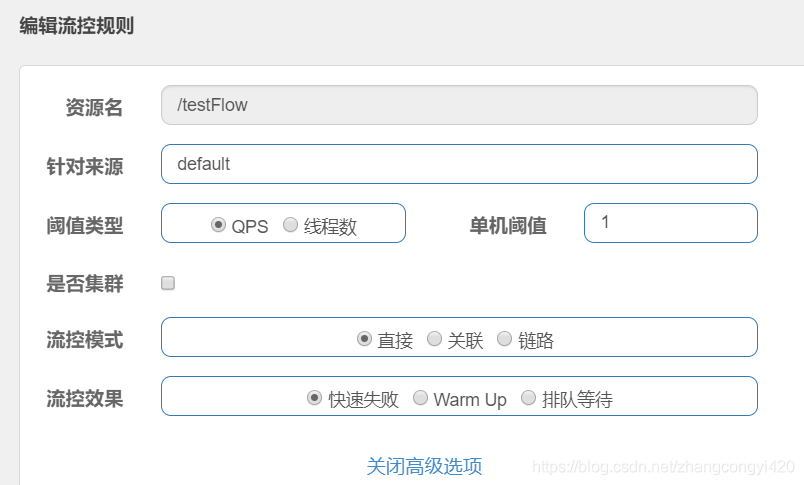
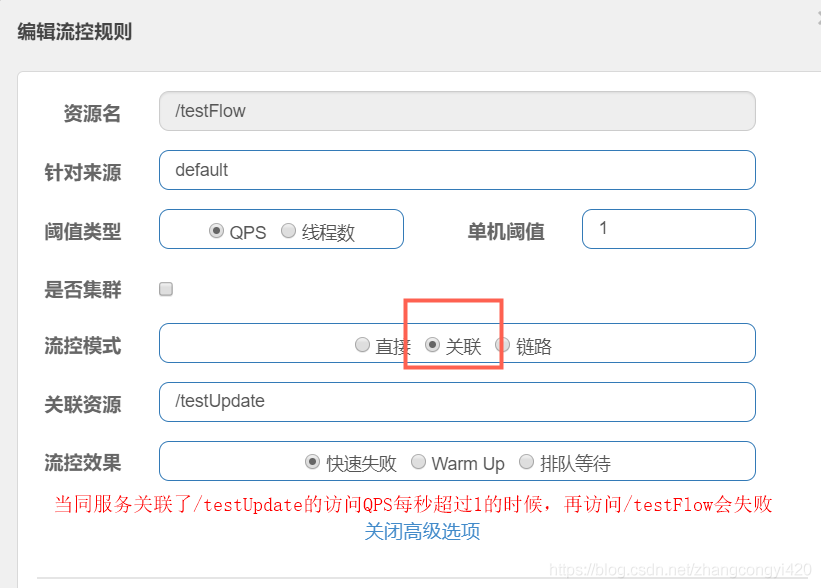
关联配置
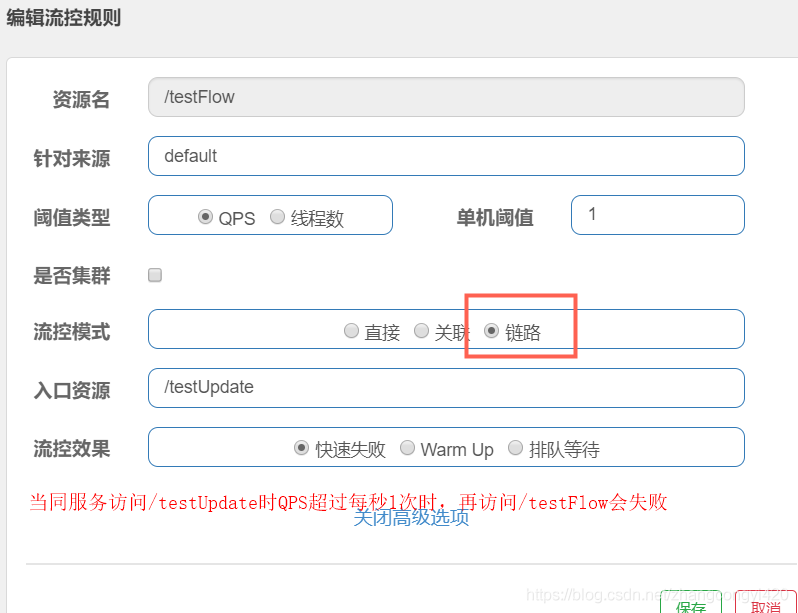
链路配置,比如多个微服务之间存在多级调用时,请求第一个服务接口,而第一个服务再调用第二个服务接口,第一个服务请求接口失败了,这时候再访问第二个服务接口时就会快速失败,通过这种配置规则可以避免服务的雪崩
关于流控效果,在前一篇中我们通过简单的demo演示了效果,就不再赘述了
关于降级
还以前面的 /testFlow接口为例:
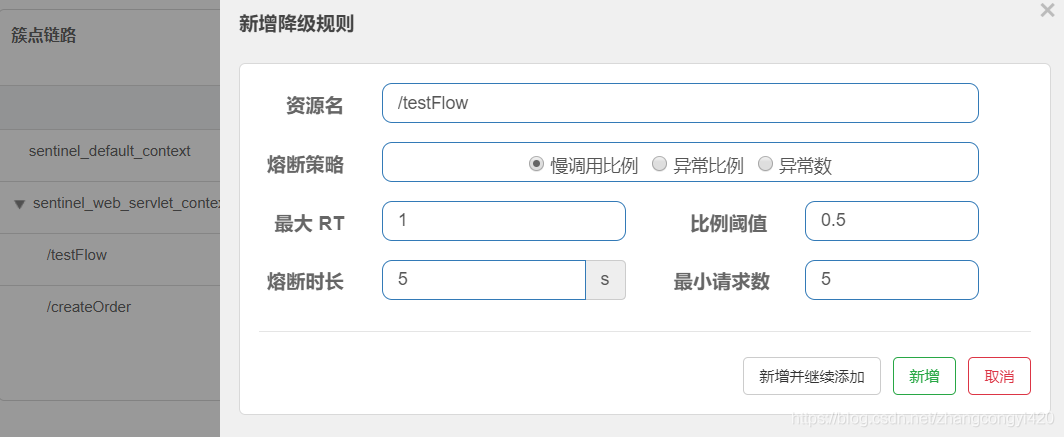
服务降级可能大家并不陌生,即在一个应用中,当请求到某个服务接口长时间没有响应时,为了避免更多的请求进来造成服务的雪崩,我们采取一种机制,让程序快速返回结果,或者干脆抛出友好的提示,让调用者知道当前的服务不可用,这样就不至于出现服务端的线程资源被耗尽的情况
对于上述图中的配置,解释起来就是:超过了每秒请求的阈值之后,后面的请求再过来的时候,在5秒之内,服务处于不可用的状态,5秒之后,服务恢复,我们通过快速刷新接口,可以看到效果

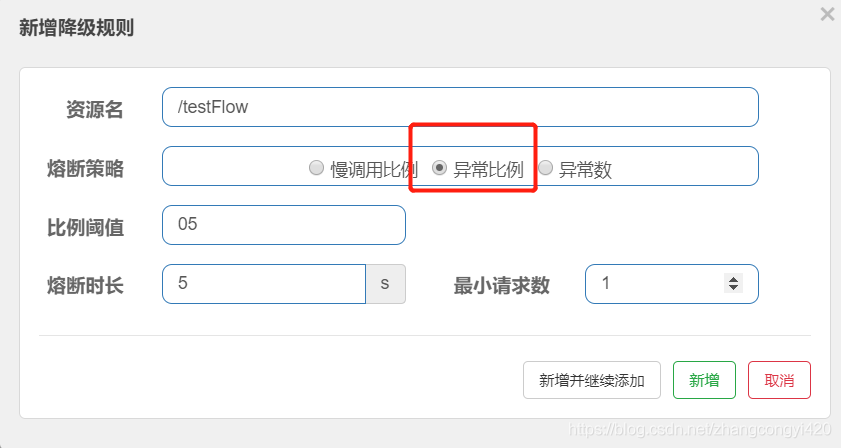
如果是异常数的配置,则触发条件如下:
Sentinel异常处理、注解使用、与限流
在上面我们为 /testFlow这个接口配置了限流的规则,当请求超过每秒2个时,后端返回了下面的异常,这个异常是由Sentinel框架自身返回的提示
Blocked by Sentinel (flow limiting)
但在真实的开发中,这样做并不友好,而且对于调用者来说,并不知道到底出了什么问题,甚至前端的同学也不知道怎么做后续的处理,因此需要服务端对Sentinel的异常进行处理
@SentinelResource
使用这个注解,可以对我们要进行限流的资源接口当出现异常时进行捕获,比如下面的这个接口 getByResource,@SentinelResource的使用很简单,最基本的就是配置资源名称,加上blockHandler ,blockHandler 里面是触发限流规则时的方法,即在这个方法中进行后续的业务处理,如抛出友好的提示等
@RestController
public class RateLimitController {

  @GetMapping("/getByResource")
  @SentinelResource(value = "getByResource",blockHandler = "handleException")
  public ResponseResult getByResource(){
    return ResponseResult.success("this is success result");
  }

  public ResponseResult handleException(BlockException blockExe){
    return ResponseResult.fail(412,"is block:" + blockExe.getMessage());
  }

}同样,我们在dashboard中对这个接口进行配置,每秒1次的QPS,正常访问时,

快速访问时,就走到了降级后的方法中了

但是如果这么做的话,很明显的一个问题就是,异常处理的逻辑和业务耦合在一起,代码会越来越膨胀,后续不方便管理,因此我们单独提供一个类,这个类专门用于提供不同的异常方法,
public class CustomerBlockHandler {

  public static ResponseResult handleException(BlockException exe){
    return ResponseResult.fail(412,"is block:" + exe.getMessage());
  }
}那么在接口中我们就可以这样调用
@GetMapping("/getByResource1")
  @SentinelResource(value = "customerBlockHandler",
  blockHandlerClass = CustomerBlockHandler.class,
  blockHandler = "handleException")
  public ResponseResult getByResource1(){
    return ResponseResult.success("this is success result");
}同样,再在控制台配置限流规则后可以达到我们的效果,

Sentinel降级处理
有这么一种情况,当调用接口时,由于参数校验不通过,或者后端抛出了运行时的异常,如果没有合适的处理,将会出现下面的结果,
@GetMapping("/createOrder")
  @SentinelResource(value = "fallback")
  public String createOrder(String id){
    if(id.equals("2")){
      throw new IllegalArgumentException("参数异常");
    }
    return orderService.createOrder(id);
  }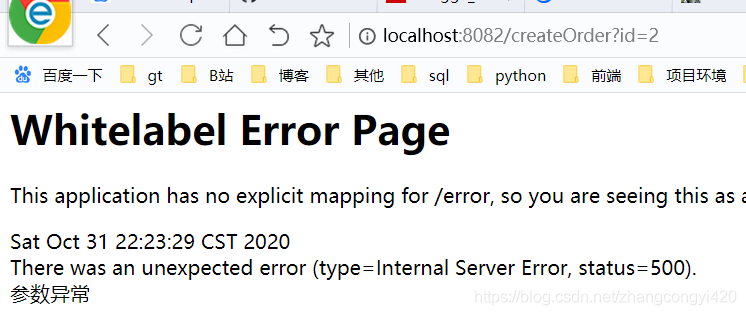
显然,这是一种不太友好的情况,对于这种情况,就可以使用Sentinel的服务降级进行处理了,改造后的接口如下:
@GetMapping("/createOrder")
  @SentinelResource(value = "fallback",fallback = "getFallBack")
  public String createOrder(String id){
    if(id.equals("2")){
      throw new IllegalArgumentException("参数异常");
    }
    return orderService.createOrder(id);
  }

  public static String getFallBack(String id,Throwable t){
    return id + ":=====>" + t.getMessage();
}再次访问时,可以看到出现了我们的降级方法,也可以理解为兜底的方法

同样我们可以利用一个单独的类,统一处理这样的降级,如下:
@GetMapping("/createOrder")
  @SentinelResource(value = "fallback",fallbackClass = MyFallBackHandler.class,fallback = "getFallBack")
  public String createOrder(String id){
    if(id.equals("2")){
      throw new IllegalArgumentException("参数异常");
    }
    return orderService.createOrder(id);
}public class MyFallBackHandler {
public static String getFallBack(String id,Throwable t){
return id + ":=====>" + t.getMessage();
}
}其实在真实的开发中,不管是单应用还是微服务之间的调用,一般情况下可能出现的异常我们基本上都是可以提前预知的,如超时异常,系统参数异常等,这样我们就可以预设部分的降级处理方法,在适当的接口上面进行引用即可
Sentinel降级处理结合feign的使用
在上一篇和本次的dashboard的讲解使用中,我们提到了链路的处理规则,对应于不同的微服务来说就是不同的服务之间的调用,当调用某个服务接口失败时的情况,以openfeign的使用为例,本例我们在createOrder接口中,还调用了storage服务中的接口,
@Component
@FeignClient(value = "service-storage")
public interface StorageFeignService {

  @GetMapping(value = "/storage/get/{id}")
  public Integer getPaymentById(@PathVariable("id") String id);
} @Autowired
private StorageFeignService feignService;
@Override
public String createOrder(String id) {
int storage = feignService.getPaymentById(id);
log.info("storage is = {}",storage);
return "success";
}设想,假如在调用getPaymentById接口失败时,为了不至于因为报错或者长时间的超时等待造成雪崩,我们可以统一feignService中进行处理,这里需要提供一个类,比如FallBackStorageService,这个类实现了StorageFeignService 接口
@Component
@FeignClient(value = "service-storage",fallback = FallBackStorageService.class)
public interface StorageFeignService {

  @GetMapping(value = "/storage/get/{id}")
  public Integer getPaymentById(@PathVariable("id") String id);
}@Component
public class FallBackStorageService implements StorageFeignService {
@Override
public Integer getPaymentById(String id) {
return 1001;
}
}即当storage模块中的getPaymentById服务接口异常或者不可用时,将会由FallBackStorageService 中的getPaymentById进行降级,俗称兜底
当然不要忘了在yml中添加如下这一句配置,让Sentinel支持在feign调用时对于异常的生效
feign:
 sentinel:
enabled: true那我们简单测试下吧,正常访问时:

这时我们停掉storage服务,再次访问上面的接口时,很明显就走到了我们的降级逻辑中,当然我这里只是做了很简单的处理,可以在降级逻辑中添加更友好的提示信息

当然上面是服务不可用的时候的降级逻辑,当情况是异常时候,我们可以通过实现FallbackFactory接口进行处理
@Component
public class FeignFallbackHandler implements FallbackFactory<StorageFeignService> {

  @Override
  public StorageFeignService create(Throwable throwable) {
    return new StorageFeignService(){
      @Override
      public Integer getPaymentById(String id) {
        System.out.println("异常触发:" + throwable.getMessage());
        return 1001;
      }
    };
  }
}看完上述内容,你们对springboot如何实现集成与使用Sentinel有进一步的了解吗?如果还想了解更多知识或者相关内容,请关注亿速云行业资讯频道,感谢大家的支持。
亿速云「云服务器」,即开即用、新一代英特尔至强铂金CPU、三副本存储NVMe SSD云盘,价格低至29元/月。点击查看>>
免责声明:本站发布的内容(图片、视频和文字)以原创、转载和分享为主,文章观点不代表本网站立场,如果涉及侵权请联系站长邮箱:is@yisu.com进行举报,并提供相关证据,一经查实,将立刻删除涉嫌侵权内容。