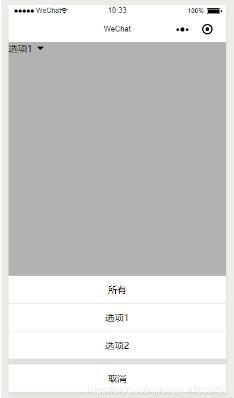
本篇文章给大家分享的是有关小程序开发中如何实现自定义底部弹出框,小编觉得挺实用的,因此分享给大家学习,希望大家阅读完这篇文章后可以有所收获,话不多说,跟着小编一起来看看吧。
具体内容如下

1. wxml代码
<view class="wrap">
 <view bindtap="showModal">
 <text>{{value}}</text>
 <icon class="arrow"></icon>
 </view>

 <!-- modal -->
 <view class="modal modal-bottom-dialog" hidden="{{hideFlag}}">
 <view class="modal-cancel" bindtap="hideModal"></view>
 <view class="bottom-dialog-body bottom-positon" animation="{{animationData}}">
  <!-- -->
  <view class='Mselect'>
  <view wx:for="{{optionList}}" wx:key="unique" data-value='{{item}}' bindtap='getOption'>
   {{item}}
  </view>
  </view>
  <view></view>
  <view class='Mcancel' bindtap='mCancel'>
  <text>取消</text>
  </view>

 </view>
 </view>

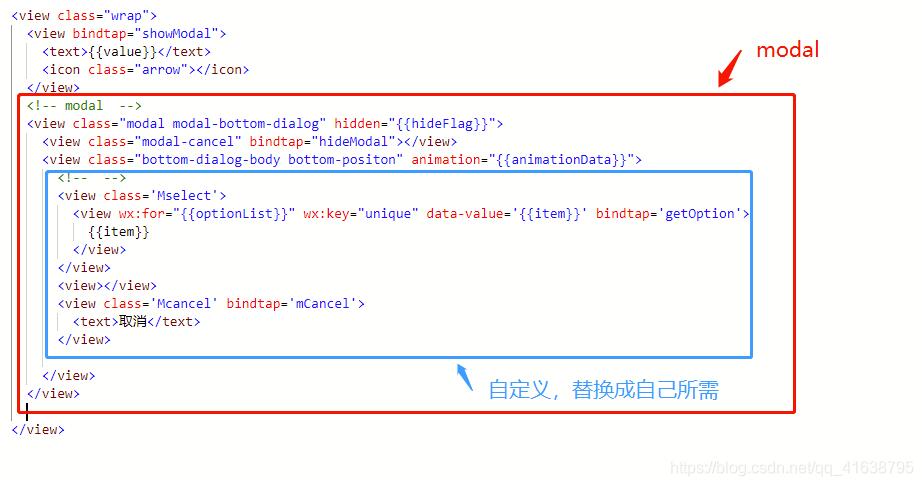
</view>modal中,蓝色框框起来的,可按需替换。

2. wxss代码
.arrow{
 display:inline-block;
 border:6px solid transparent;
 border-top-color:#000;
 margin-left:8px;
 position:relative;
 top:6rpx;
}
/* ---------------------------- */
/*模态框*/
.modal{position:fixed; top:0; right:0; bottom:0; left:0; z-index:1000;}
.modal-cancel{position:absolute; z-index:2000; top:0; right:0; bottom: 0; left:0; background:rgba(0,0,0,0.3);}
.bottom-dialog-body{width:100%; position:absolute; z-index:3000; bottom:0; left:0;background:#dfdede;}
/*动画前初始位置*/
.bottom-positon{-webkit-transform:translateY(100%);transform:translateY(100%);}


/* 底部弹出框 */
.bottom-positon{
 text-align: center;
}
.Mselect{
 margin-bottom: 20rpx;
}
.Mselect view{
 padding: 26rpx 0;
 background: #fff;
}
.Mselect view:not(:last-of-type){
 border-bottom: 1px solid #dfdede;
}
.Mcancel{
 background: #fff;
 padding: 26rpx 0;
}如果项目中,多个页面使用了同样效果弹出框,如下的代码可以放到公共样式文件app.wxss中。

3. js代码
Page({

 /**
 * 页面的初始数据
 */
 data: {
 optionList:['所有','选项1','选项2'],
 value:'所有',

 hideFlag: true,//true-隐藏 false-显示
 animationData: {},//
 },
 // 点击选项
 getOption:function(e){
 var that = this;
 that.setData({
  value:e.currentTarget.dataset.value,
  hideFlag: true
 })
 },
 //取消
 mCancel: function () {
 var that = this;
 that.hideModal();
 },

 // ----------------------------------------------------------------------modal
 // 显示遮罩层
 showModal: function () {
 var that = this;
 that.setData({
  hideFlag: false
 })
 // 创建动画实例
 var animation = wx.createAnimation({
  duration: 400,//动画的持续时间
  timingFunction: 'ease',//动画的效果 默认值是linear->匀速,ease->动画以低速开始,然后加快,在结束前变慢
 })
 this.animation = animation; //将animation变量赋值给当前动画
 var time1 = setTimeout(function () {
  that.slideIn();//调用动画--滑入
  clearTimeout(time1);
  time1 = null;
 }, 100)
 },

 // 隐藏遮罩层
 hideModal: function () {
 var that = this;
 var animation = wx.createAnimation({
  duration: 400,//动画的持续时间 默认400ms
  timingFunction: 'ease',//动画的效果 默认值是linear
 })
 this.animation = animation
 that.slideDown();//调用动画--滑出
 var time1 = setTimeout(function () {
  that.setData({
  hideFlag: true
  })
  clearTimeout(time1);
  time1 = null;
 }, 220)//先执行下滑动画,再隐藏模块

 },
 //动画 -- 滑入
 slideIn: function () {
 this.animation.translateY(0).step() // 在y轴偏移,然后用step()完成一个动画
 this.setData({
  //动画实例的export方法导出动画数据传递给组件的animation属性
  animationData: this.animation.export()
 })
 },
 //动画 -- 滑出
 slideDown: function () {
 this.animation.translateY(300).step()
 this.setData({
  animationData: this.animation.export(),
 })
 },

})以上就是小程序开发中如何实现自定义底部弹出框,小编相信有部分知识点可能是我们日常工作会见到或用到的。希望你能通过这篇文章学到更多知识。更多详情敬请关注亿速云行业资讯频道。
亿速云「云服务器」,即开即用、新一代英特尔至强铂金CPU、三副本存储NVMe SSD云盘,价格低至29元/月。点击查看>>
免责声明:本站发布的内容(图片、视频和文字)以原创、转载和分享为主,文章观点不代表本网站立场,如果涉及侵权请联系站长邮箱:is@yisu.com进行举报,并提供相关证据,一经查实,将立刻删除涉嫌侵权内容。