这篇文章将为大家详细讲解有关ASP.NET中怎么利用DropDownList和ListBox实现两级联动功能,文章内容质量较高,因此小编分享给大家做个参考,希望大家阅读完这篇文章后对相关知识有一定的了解。
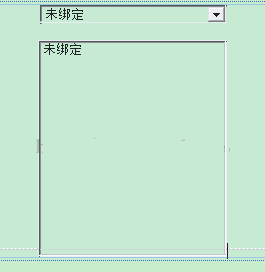
一、设置前台界面,在Web窗体中添加DropDownList和ListBox两个控件。
界面图如下所示。

二、编写后台代码
在这,后台代码编写在其窗体的Page_Load事件中
<span > protected void Page_Load(object sender, EventArgs e)
 {
  if (!Page.IsPostBack ) //判断页面是否第一次加载
  {
  SqlConnection con = DB.createConnection(); //此方法在上一篇文章中已经介绍,调用一个已经编写好的创建数据库连接的方法。
  SqlCommand cmd = new SqlCommand("select * from province",con);
  SqlDataReader sdr = cmd.ExecuteReader();
  this.DropDownList1.DataTextField = "proName";
  this.DropDownList1.DataValueField = "proID"; //主键字段
  this.DropDownList1.DataSource = sdr;
  this.DropDownList1.DataBind();
  sdr.Close();

  }

 }</span>
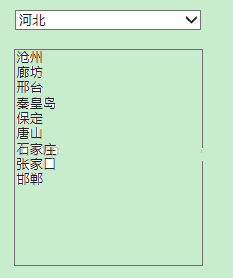
编写DropDownList1_SelectedIndexChanged事件代码,实现单击“省”,ListBox自动添加该“省”所具有的“市”
<span > protected void DropDownList1_SelectedIndexChanged(object sender, EventArgs e)
 {
  this.ListBox1.Items.Clear();
  SqlConnection con2 = DB.createConnection();
  SqlCommand cmd1 = new SqlCommand("select * from city where proID=" + this.DropDownList1.SelectedValue, con2);
  SqlDataReader sdr1 = cmd1.ExecuteReader();
  while (sdr1.Read())
  {
  this.ListBox1.Items.Add(new ListItem(sdr1.GetString(2),sdr1.GetInt32(0).ToString()));
  }
 }</span>
运行文件,效果图如下所示

关于ASP.NET中怎么利用DropDownList和ListBox实现两级联动功能就分享到这里了,希望以上内容可以对大家有一定的帮助,可以学到更多知识。如果觉得文章不错,可以把它分享出去让更多的人看到。
免责声明:本站发布的内容(图片、视频和文字)以原创、转载和分享为主,文章观点不代表本网站立场,如果涉及侵权请联系站长邮箱:is@yisu.com进行举报,并提供相关证据,一经查实,将立刻删除涉嫌侵权内容。