使用Django怎么编写一个图片上传下载功能?针对这个问题,这篇文章详细介绍了相对应的分析和解答,希望可以帮助更多想解决这个问题的小伙伴找到更简单易行的方法。
#新建工程
python manage.py startapp test30
#修改 settings.py
INSTALLED_APPS = [
'django.contrib.admin',
'django.contrib.auth',
'django.contrib.contenttypes',
'django.contrib.sessions',
'django.contrib.messages',
'django.contrib.staticfiles',
'stu'
]
#修改urls.py
from django.conf.urls import url, include
from django.contrib import admin
urlpatterns = [
url(r'^admin/', admin.site.urls),
url(r'student/',include('stu.urls')),
]
#新增加 stu/urls.py
#coding:utf-8
from django.conf.urls import url
import views
urlpatterns = [
url(r'^$',views.index_view)
]
#编辑 stu/views.py
# -*- coding: utf-8 -*-
from __future__ import unicode_literals
from django.http import HttpResponse
from django.shortcuts import render
# Create your views here.
#原生上传文件方式
def index_view(request):
if request.method == 'GET':
return render(request,'index.html')
elif request.method == 'POST':
#获取请求参数
uname = request.POST.get('uname','')
photo = request.FILES.get('photo','')
print photo.name
import os
print os.getcwd()
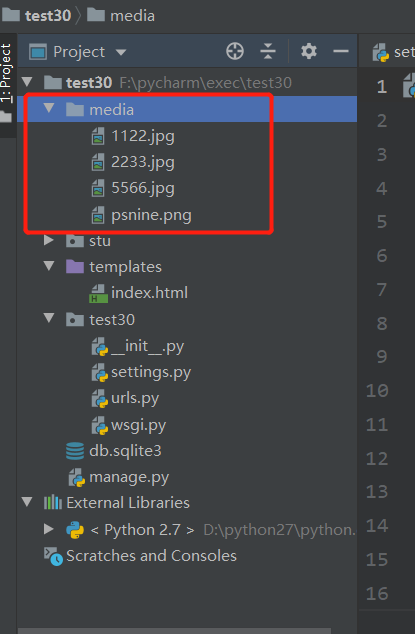
if not os.path.exists('media'):
os.mkdir('media')
#拼接路径
with open(os.path.join(os.getcwd(),'media',photo.name),'wb') as fw:
# photo.read() #一次性读取文件到内存
# fw.write(photo.read())
#分块读取,性能高
for ck in photo.chunks():
fw.write(ck)
return HttpResponse('It is post request,上传成功')
else:
return HttpResponse('It is not post and get request!')
#新增加模板文件 templates/index.html
<!DOCTYPE html>
<html lang="en">
<head>
<meta charset="UTF-8">
<title>Title</title>
</head>
<body>
<form action="/student/" method="post" enctype="multipart/form-data">
{% csrf_token %}
<p>
<label for="ua">姓名: </label> <input type="text" name="uname" id="ua"/>
</p>
<p>
<label for="ph">头像: </label> <input type="file" name="photo" id="ph"/>
</p>
<p>
     <input type="submit" value="注册"/>
</p>
</form>
</body>
</html>
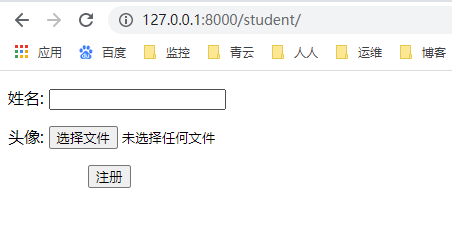
#效果如下:
访问: http://127.0.0.1:8000/student/


需求:
效果: 访问 http://127.0.0.1:8000/student/ 通过注册将姓名、头像地址传入数据库中;
访问 http://127.0.0.1:8000/student/showall 将数据库信息通过表格形式展示
###过程
#修改 settings.py ,templates 新增加 'django.template.context_processors.media'
TEMPLATES = [
{
'BACKEND': 'django.template.backends.django.DjangoTemplates',
'DIRS': [os.path.join(BASE_DIR, 'templates')]
,
'APP_DIRS': True,
'OPTIONS': {
'context_processors': [
'django.template.context_processors.debug',
'django.template.context_processors.request',
'django.contrib.auth.context_processors.auth',
'django.contrib.messages.context_processors.messages',
'django.template.context_processors.media'
],
},
},
]
末尾增加:
# global_settings
#指定上传文件存储相对路径(读取文件)
MEDIA_URL = '/media/'
#指定上传文件存储绝对路径(存储文件)
MEDIA_ROOT = os.path.join(BASE_DIR,'media')
#创建数据库模型 stu/models.py
# -*- coding: utf-8 -*-
from __future__ import unicode_literals
from django.db import models
# Create your models here.
class Student(models.Model):
sno = models.AutoField(primary_key=True)
sname = models.CharField(max_length=30)
photo = models.ImageField(upload_to='imgs')
def __unicode__(self):
return u'Student:%s'%self.sname
#生成数据库迁移文件,查看数据库表结构
python makemigrations stu
python migrate
#修改 urls.py 因为显示问题,增加 DEBUG 内容
from django.conf.urls import url, include
from django.contrib import admin
from test30.settings import DEBUG, MEDIA_ROOT
urlpatterns = [
url(r'^admin/', admin.site.urls),
url(r'student/',include('stu.urls')),
]
from django.views.static import serve
if DEBUG:
urlpatterns+=url(r'^media/(?P<path>.*)/$', serve, {"document_root": MEDIA_ROOT}),
#修改 urls, stu/urls.py
#coding:utf-8
from django.conf.urls import url
import views
urlpatterns = [
url(r'^$',views.index_view),
url(r'^upload/$',views.upload_view),
url(r'^showall/$',views.showall_view)
]
# 修改 stu/views.py
#django 上传文件方式
def upload_view(request):
uname = request.POST.get('uname','')
photo = request.FILES.get('photo','')
#入库操作
Student.objects.create(sname=uname,photo=photo)
return HttpResponse('上传成功!')
#显示图片
def showall_view(request):
stus = Student.objects.all()
print stus
return render(request,'show.html',{'stus':stus})
# 修改 index.html
<!DOCTYPE html>
<html lang="en">
<head>
<meta charset="UTF-8">
<title>Title</title>
</head>
<body>
<form action="/student/upload/" method="post" enctype="multipart/form-data">
{% csrf_token %}
<p>
<label for="ua">姓名: </label> <input type="text" name="uname" id="ua"/>
</p>
<p>
<label for="ph">头像: </label> <input type="file" name="photo" id="ph"/>
</p>
<p>
     <input type="submit" value="注册"/>
</p>
</form>
</body>
</html>
# 增加模板文件 show.html
<!DOCTYPE html>
<html lang="en">
<head>
<meta charset="UTF-8">
<title>Title</title>
</head>
<body>
<table width="500px" border="1" cellspacing="0">
<tr>
<th>编号</th>
<th>姓名</th>
<th>头像</th>
<th>操作</th>
</tr>
{% for stu in stus %}
<tr>
<td>{{ forloop.counter }}</td>
<td>{{ stu.sname }}</td>
<td><img src="{{ MEDIA_URL }}{{ stu.photo }}"/></td>
<td> 下载</td>
</tr>
{% endfor %}
</table>
</body>
</html>
效果图:
http://127.0.0.1:8000/student/ 注册实现数据库录入操作(点击提交通过index.html 中action="/student/upload/" 将url 转发至函数upload_view ,实现上传功能)
http://127.0.0.1:8000/student/showall/ 实现数据库信息展示图片下载功能
### 需求
在显示页面点击下载实现图片的下载功能
过程:

#修改 show.html ,加入 下载的超链接
<!DOCTYPE html>
<html lang="en">
<head>
  <meta charset="UTF-8">
  <title>Title</title>
</head>
<body>
<table width="500px" border="1" cellspacing="0">
  <tr>
    <th>编号</th>
    <th>姓名</th>
    <th>头像</th>
    <th>操作</th>
  </tr>
  {% for stu in stus %}
  <tr>
  <td>{{ forloop.counter }}</td>
  <td>{{ stu.sname }}</td>
  <td><img  src="{{ MEDIA_URL }}{{ stu.photo }}"/></td>
  <td><a href="/student/download/?photo={{ stu.photo }}" rel="external nofollow" >下载</a></td>
  </tr>
  {% endfor %}

</table>
</body>
</html>


#因为 show.html href="/student/download ,所以要修改urls
#修改 stu/urls.py,新增加 url
url(r'^download/$',views.download_view)

#修改 stu/views.py

def download_view(request):
  # 获取请求参数(图片存储位置) imgs/5566.jpg
  photo = request.GET.get('photo','')
  print photo

  # 获取图片文件名5566.jpg ; rindex 为字符 '/' 在 photo 中最后出现的位置索引;例如
  # txt = "imgs/5566.jpg"
  # x = txt.rindex("/")
  # print txt[x + 1:]  输出结果为 5566.jpg
  filename = photo[photo.rindex('/')+1:]
  print filename
  #开启一个流
  import os
  path = os.path.join(os.getcwd(),'media',photo.replace('/','\\'))
  print path

  with open(path,'rb') as fr:
    response = HttpResponse(fr.read())
    response['Content-Type']='image/png'
    response['Content-Disposition'] = 'attachment;filename=' + filename

  return response

#访问 http://127.0.0.1:8000/student/showall/ ,点击下载
关于使用Django怎么编写一个图片上传下载功能问题的解答就分享到这里了,希望以上内容可以对大家有一定的帮助,如果你还有很多疑惑没有解开,可以关注亿速云行业资讯频道了解更多相关知识。
免责声明:本站发布的内容(图片、视频和文字)以原创、转载和分享为主,文章观点不代表本网站立场,如果涉及侵权请联系站长邮箱:is@yisu.com进行举报,并提供相关证据,一经查实,将立刻删除涉嫌侵权内容。