Unix Study之案例--配置Solaris 10下的SAMBA
Samba服务可以快速实现Unix和Windows环境之间文件共享,在Solaris 10下配置Samba非常简单,以下为具体的配置步骤。
1、配置samba的主配置文件smb.conf
默认smb.conf文件不存在,但在/etc/sfw下有个smb.conf.example文件,可以生成smb.conf
[root@node1:/export/home/oracle]# cd /etc/sfw

[root@node1:/etc/sfw]# ls

a2ps-site.cfg     foomatic          openssl           ser               zebra

a2ps.cfg          mysql             private           smb.conf-example

[root@node1:/etc/sfw]# cp smb.conf-example smb.conf[root@node1:/etc/sfw]# cat smb.conf
"smb.conf" [Read only] 271 lines, 9662 characters
# This is the main Samba configuration file. You should read the
# smb.conf(5) manual page in order to understand the options listed
# here. Samba has a huge number of configurable options (perhaps too
# many!) most of which are not shown in this example
#
# For a step to step guide on installing, configuring and using samba,
# read the Samba-HOWTO-Collection. This may be obtained from:
# http://www.samba.org/samba/docs/Samba-HOWTO-Collection.pdf
#
# Many working examples of smb.conf files can be found in the
# Samba-Guide which is generated daily and can be downloaded from:
# http://www.samba.org/samba/docs/Samba-Guide.pdf
#
# Any line which starts with a ; (semi-colon) or a # (hash)
# is a comment and is ignored. In this example we will use a #
# for commentry and a ; for parts of the config file that you
# may wish to enable
#
# NOTE: Whenever you modify this file you should run the command "testparm"
# to check that you have not made any basic syntactic errors.
#
#======================= Global Settings =====================================
[global]
# workgroup = NT-Domain-Name or Workgroup-Name, eg: MIDEARTH
workgroup = MYGROUP
# server string is the equivalent of the NT Description field
server string = Samba Server
# Security mode. Defines in which mode Samba will operate. Possible
# values are share, user, server, domain and ads. Most people will want
# user level security. See the Samba-HOWTO-Collection for details.
security = user
# This option is important for security. It allows you to restrict
# connections to machines which are on your local network. The
# following example restricts access to two C class networks and
# the "loopback" interface. For more examples of the syntax see
# the smb.conf man page
; hosts allow = 192.168.1. 192.168.2. 127.
# If you want to automatically load your printer list rather
# than setting them up individually then you'll need this
load printers = yes
# you may wish to override the location of the printcap file
; printcap name = /etc/printcap
# on SystemV system setting printcap name to lpstat should allow
# you to automatically obtain a printer list from the SystemV spool
# system
; printcap name = lpstat
# It should not be necessary to specify the print system type unless
# it is non-standard. Currently supported print systems include:
# bsd, cups, sysv, plp, lprng, aix, hpux, qnx
; printing = cups
# Uncomment this if you want a guest account, you must add this to /etc/passwd
# otherwise the user "nobody" is used
; guest account = pcguest
/share
# if you enable domain logons then you may want a per-machine or
# per user logon script
# run a specific logon batch file per workstation (machine)
; logon script = %m.bat
# run a specific logon batch file per username
; logon script = %U.bat
# Where to store roving profiles (only for Win95 and WinNT)
# %L substitutes for this servers netbios name, %U is username
# You must uncomment the [Profiles] share below
; logon path = \\%L\Profiles\%U
# Windows Internet Name Serving Support Section:
# WINS Support - Tells the NMBD component of Samba to enable it's WINS Server
; wins support = yes
# WINS Server - Tells the NMBD components of Samba to be a WINS Client
# Note: Samba can be either a WINS Server, or a WINS Client, but NOT both
; wins server = w.x.y.z
# WINS Proxy - Tells Samba to answer name resolution queries on
/
# machine to add or delete corresponding unix accounts
; add user script = /usr/sbin/useradd %u
; add group script = /usr/sbin/groupadd %g
; add machine script = /usr/sbin/adduser -n -g machines -c Machine -d /dev/null -s /bin/false %u
; delete user script = /usr/sbin/userdel %u
; delete user from group script = /usr/sbin/deluser %u %g
; delete group script = /usr/sbin/groupdel %g
#============================ Share Definitions ==============================
[homes]
comment = Home Directories
browseable = no
writable = yes
# Un-comment the following and create the netlogon directory for Domain Logons
; [netlogon]
; comment = Network Logon Service
; path = /usr/sfw/lib/netlogon
; guest ok = yes
; writable = no
; share modes = no
......
---以上为默认的smb.conf的配置信息,默认samba共享系统用户的home目录,如果只是共享系统用户home目录,可以使用默认配2、启动samba相关process
Samba的启动进程为smbd和nmbd
[root@node1:/etc/sfw]# find / -name samba

/var/spool/samba

/var/samba

/usr/sfw/lib/webmin/blue-theme/samba

/usr/sfw/lib/webmin/caldera/samba

/usr/sfw/lib/webmin/mscstyle3/samba

/usr/sfw/lib/webmin/samba

/etc/webmin/samba

[root@node1:/etc/sfw]# find / -name smbd

/usr/sfw/sbin/smbd


[root@node1:/etc/sfw]# find / -name nmbd

/usr/sfw/sbin/nmbd


[root@node1:/etc/sfw]# /usr/sfw/sbin/smbd start

[root@node1:/etc/sfw]# ps -ef |grep smb

    root   774     1   0 10:15:21 ?           0:00 /usr/sfw/sbin/smbd start

    root   775   774   0 10:15:22 ?


[root@node1:/etc/sfw]# /usr/sfw/sbin/nmbd start
[root@node1:/etc/sfw]# ps -ef |grep nmb

    root   777     1   0 10:15:29 ?           0:00 /usr/sfw/sbin/nmbd start

[root@node1:/etc/sfw]# netstat -an|grep 45

*.445 *.* 0 0 49152 0 LISTEN3、配置访问samba共享的用户(首先必须是系统用户)
[root@node1:/etc/sfw]# ls /usr/sfw/bin|grep smb

findsmb

smbcacls

smbclient

smbcontrol

smbcquotas

smbget

smbpasswd

smbspool

smbstatus

smbtar

smbtree

[root@node1:/etc/sfw]# /usr/sfw/bin/smbpasswd -a oracle

New SMB password:

Retype new SMB password:
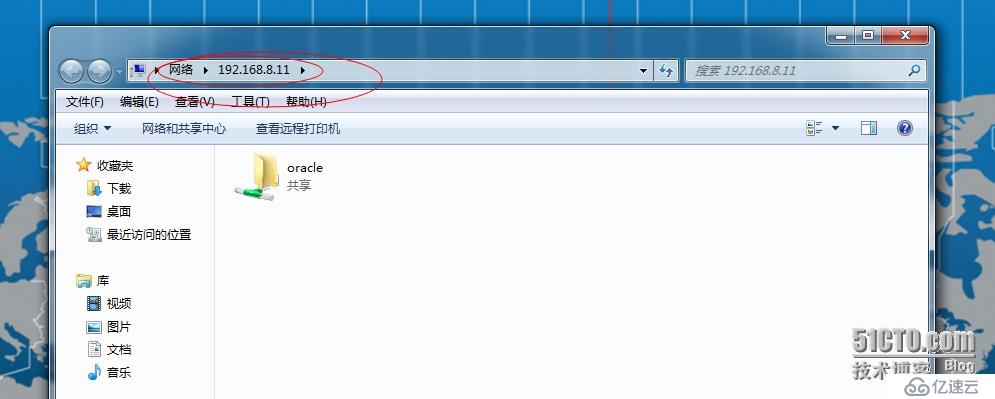
Added user oracle.4、客户端共享 访问
亿速云「云服务器」,即开即用、新一代英特尔至强铂金CPU、三副本存储NVMe SSD云盘,价格低至29元/月。点击查看>>
免责声明:本站发布的内容(图片、视频和文字)以原创、转载和分享为主,文章观点不代表本网站立场,如果涉及侵权请联系站长邮箱:is@yisu.com进行举报,并提供相关证据,一经查实,将立刻删除涉嫌侵权内容。


 计算
计算 安全
安全 数据库
数据库 网络和加速
网络和加速 企业服务
企业服务


