如何使用TensorFlow进行训练识别视频图像中物体,相信很多没有经验的人对此束手无策,为此本文总结了问题出现的原因和解决方法,通过这篇文章希望你能解决这个问题。
注意: windows用户名不能出现中文!!!
安装Python
注意: Windows平台的TensorFlow仅支持3.5.X版本的Python 进入Python3.5.2下载页,选择 Files 中Windows平台的Python安装包,下载并安装。 
安装TensorFlow
进入TensorFlow on Windows下载页,本教程使用最简便的组合 CPU support only + Native pip。
打开cmd,输入以下指令即进行TensorFlow的下载安装,下载位置为python\Lib\site-packages\tensorflow:  打开 IDLE,输入以下指令:
  如果出现如下结果则安装成功:
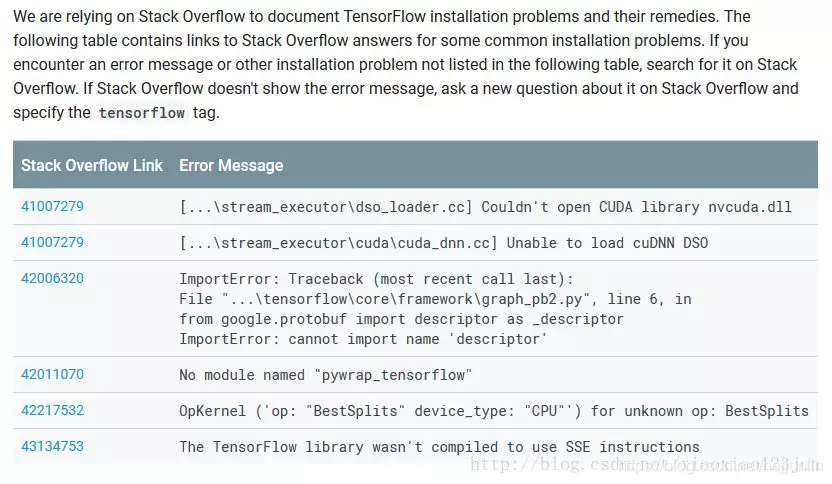
  若出现问题,请参考TensorFlow on Windows下载页底端的常见问题。
安装Protoc
Protoc用于编译相关程序运行文件,进入Protoc下载页,下载类似下图中带win32的压缩包。  解压后将bin文件夹内的protoc.exe拷贝到c:\windows\system32目录下(用于将protoc.exe所在的目录配置到环境变量当中)。
安装git
进入git官网下载Windows平台的git,详细安装及配置注意事项可参考此文。 
安装其余组件
在cmd内输入如下指令下载并安装相关API运行支持组件:  注意: Native pip会受电脑中另外Python应用的影响,博主因为之前做仿真安装了Anaconda,导致下载的jupyter等相关组件安装到了Anaconda内的site-packages文件夹,后期调用失败。
下载代码并编译
在cmd中输入如下代码:  从github下载谷歌tensorflow/models的代码,一般默认下载到C盘。
同样在cmd进入到models文件夹,编译Object Detection API的代码: 
运行notebook demo
继续在models文件夹下运行如下命令:  浏览器自动开启,显示如下界面:
 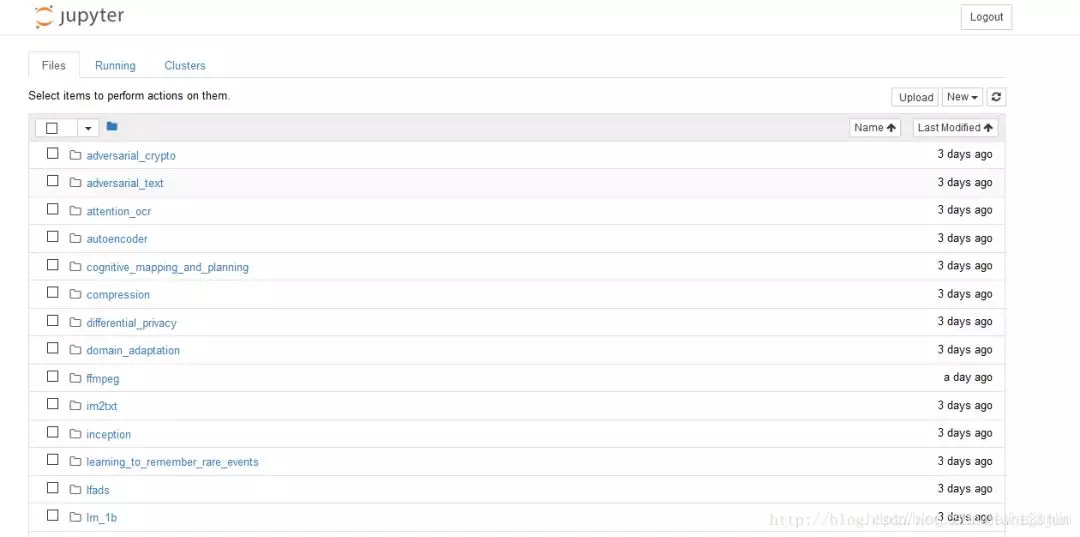 进入object_detection文件夹中的object_detection_tutorial.ipynb:
  点击Cell内的Run All,等待三分钟左右(博主电脑接近报废),即可显示如下结果:
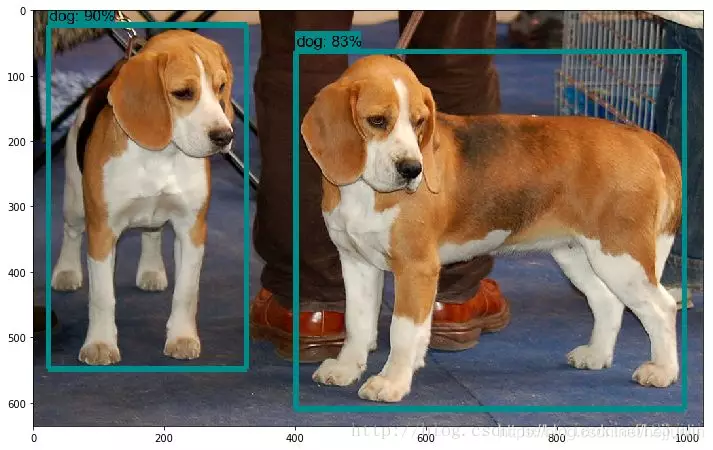
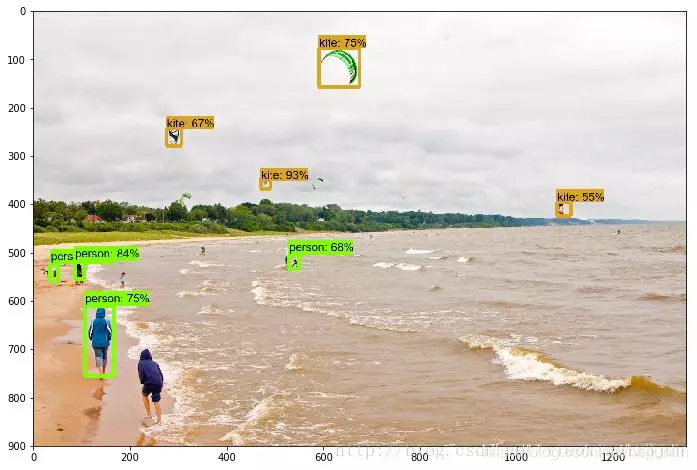 修改文件路径,即可检测自己的图片:
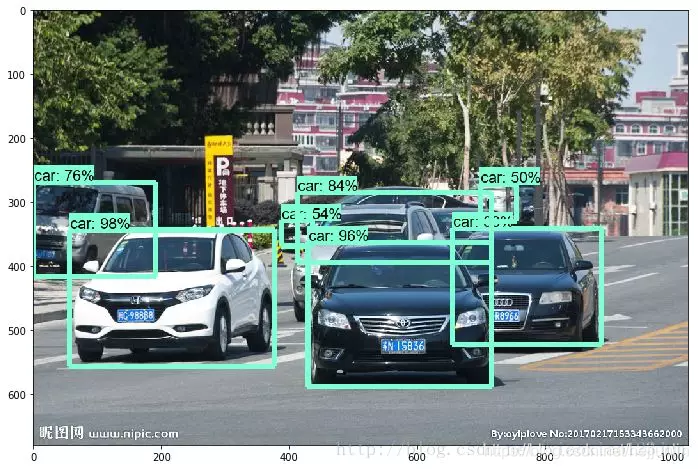
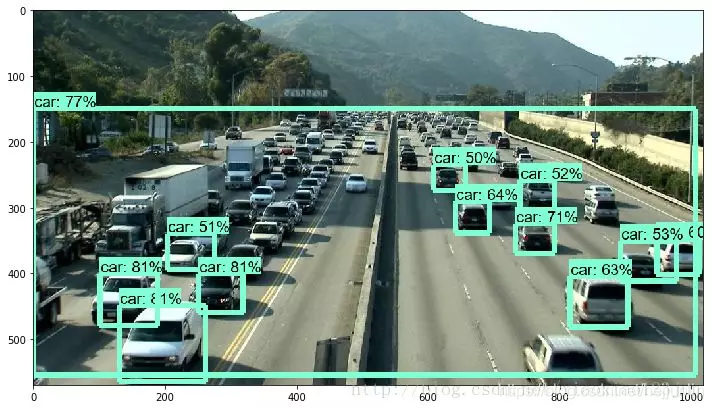 注意:要将图片名称设置的和代码描述相符合,如image1.jpg
  TensorFlow Object Detection API中提供了五种可直接调用的识别模型,默认的是最简单的ssd + mobilenet模型。
 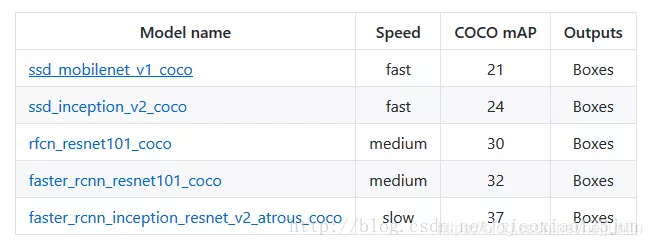 可直接将MODEL_NAME修改为如下值调用其他模型:
MODEL_NAME = 'ssd_inception_v2_coco_11_06_2017'

MODEL_NAME = 'rfcn_resnet101_coco_11_06_2017'

MODEL_NAME = 'faster_rcnn_resnet101_coco_11_06_2017'

MODEL_NAME = 'faster_rcnn_inception_resnet_v2_atrous_coco_11_06_2017'将模型换为faster_rcnn_inception_resnet,结果如下: 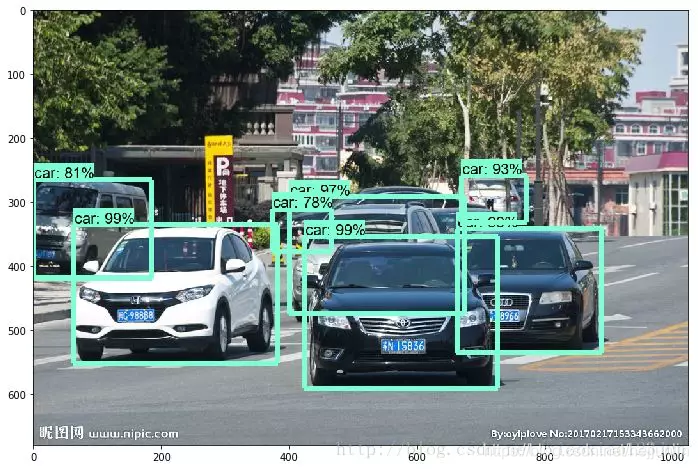
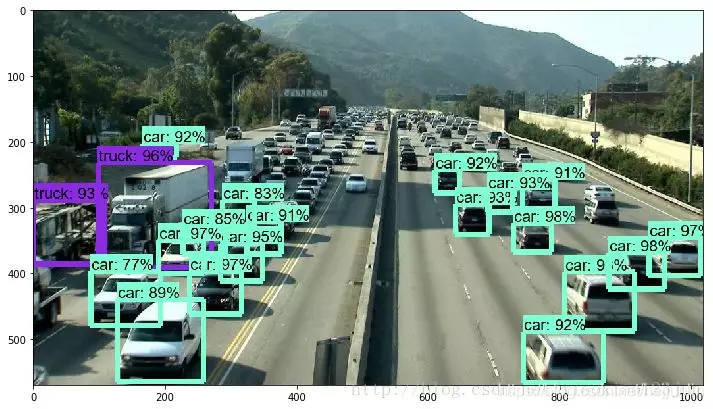 准确率确实获得了极大提高,但是速度却下降了,在博主的老爷机上需要五分钟才能跑出结果。
视频物体识别
谷歌在github上公布了此项目的完整代码,接下来我们将在现有代码基础上添加相应模块实现对于视频中物体的识别。
第一步:下载opencv的cv2包 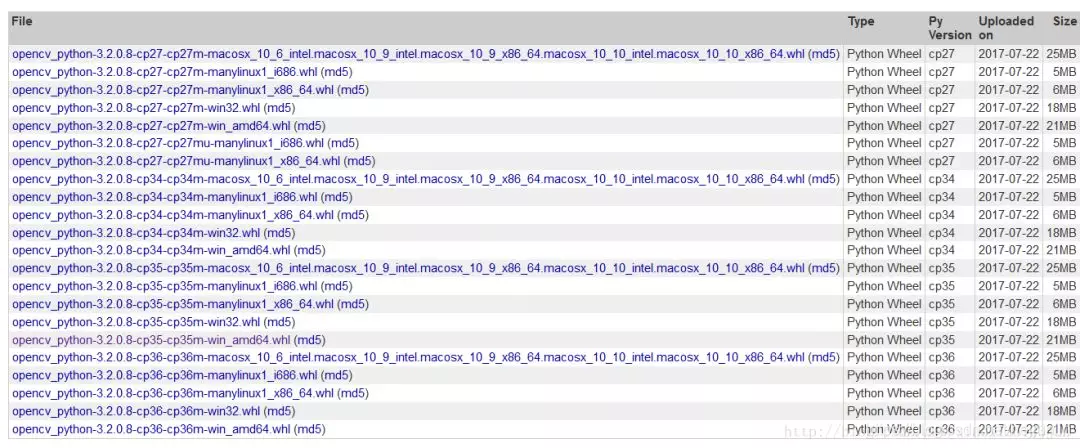 在Python官网即可下载opencv相关库,点击此处直接进入。
博主安装的版本如下:  下载完成后,在cmd中执行安装命令
pip install opencv_python-3.2.0.8-cp35-cp35m-win_amd64.whl
安装完成后,进入IDLE输入命令
import cv2若未报错,则opencv-python库成功导入,环境搭配成功。
第二步:在原代码中引入cv2包  第三步:添加视频识别代码 主要步骤如下: 1.使用 VideoFileClip 函数从视频中抓取图片。 2.用fl_image函数将原图片替换为修改后的图片,用于传递物体识别的每张抓取图片。 3.所有修改的剪辑图像被组合成为一个新的视频。
在原版代码基础上,在最后面依次添加如下代码(可从完整代码 处复制,但需要作出一些改变,当然也可以直接从下文复制修改后的代码): 
# Import everything needed to edit/save/watch video clips
import imageio
imageio.plugins.ffmpeg.download()

from moviepy.editor import VideoFileClip
from IPython.display import HTML此处会下载一个剪辑必备的程序ffmpeg.win32.exe,内网下载过程中容易断线,可以使用下载工具下载完然后放入如下路径:
C:\Users\ 用户名 \AppData\Local\imageio\ffmpeg\ffmpeg.win32.exe

def detect_objects(image_np, sess, detection_graph):
    # Expand dimensions since the model expects images to have shape: [1, None, None, 3]
    image_np_expanded = np.expand_dims(image_np, axis=0)
    image_tensor = detection_graph.get_tensor_by_name('image_tensor:0')

    # Each box represents a part of the image where a particular object was detected.
    boxes = detection_graph.get_tensor_by_name('detection_boxes:0')

    # Each score represent how level of confidence for each of the objects.
    # Score is shown on the result image, together with the class label.
    scores = detection_graph.get_tensor_by_name('detection_scores:0')
    classes = detection_graph.get_tensor_by_name('detection_classes:0')
    num_detections = detection_graph.get_tensor_by_name('num_detections:0')

    # Actual detection.
    (boxes, scores, classes, num_detections) = sess.run(
        [boxes, scores, classes, num_detections],
        feed_dict={image_tensor: image_np_expanded})

    # Visualization of the results of a detection.
    vis_util.visualize_boxes_and_labels_on_image_array(
        image_np,
        np.squeeze(boxes),
        np.squeeze(classes).astype(np.int32),
        np.squeeze(scores),
        category_index,
        use_normalized_coordinates=True,
        line_thickness=8)
return image_np处理图像
def process_image(image):
    # NOTE: The output you return should be a color image (3 channel) for processing video below
    # you should return the final output (image with lines are drawn on lanes)
    with detection_graph.as_default():
        with tf.Session(graph=detection_graph) as sess:
            image_process = detect_objects(image, sess, detection_graph)
return image_process输入视频文件
white_output = 'video1_out.mp4'
clip1 = VideoFileClip("video1.mp4").subclip(25,30)
white_clip = clip1.fl_image(process_image) #NOTE: this function expects color images!!s
%time white_clip.write_videofile(white_output, audio=False)
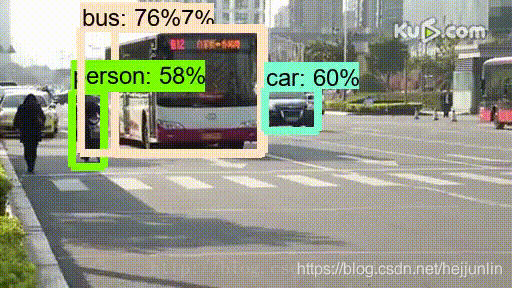
其中video1.mp4已经从电脑中上传至object_detection文件夹,subclip(25,30)代表识别视频中25-30s这一时间段。原版视频:  展示识别完毕的视频:
from moviepy.editor import *
clip1 = VideoFileClip("video1_out.mp4")
clip1.write_gif("final.gif")将识别完毕的视频导为gif格式,并保存至object_detection文件夹。
看完上述内容,你们掌握如何使用TensorFlow进行训练识别视频图像中物体的方法了吗?如果还想学到更多技能或想了解更多相关内容,欢迎关注亿速云行业资讯频道,感谢各位的阅读!
亿速云「云服务器」,即开即用、新一代英特尔至强铂金CPU、三副本存储NVMe SSD云盘,价格低至29元/月。点击查看>>
免责声明:本站发布的内容(图片、视频和文字)以原创、转载和分享为主,文章观点不代表本网站立场,如果涉及侵权请联系站长邮箱:is@yisu.com进行举报,并提供相关证据,一经查实,将立刻删除涉嫌侵权内容。
原文链接:https://my.oschina.net/u/4192546/blog/3212090