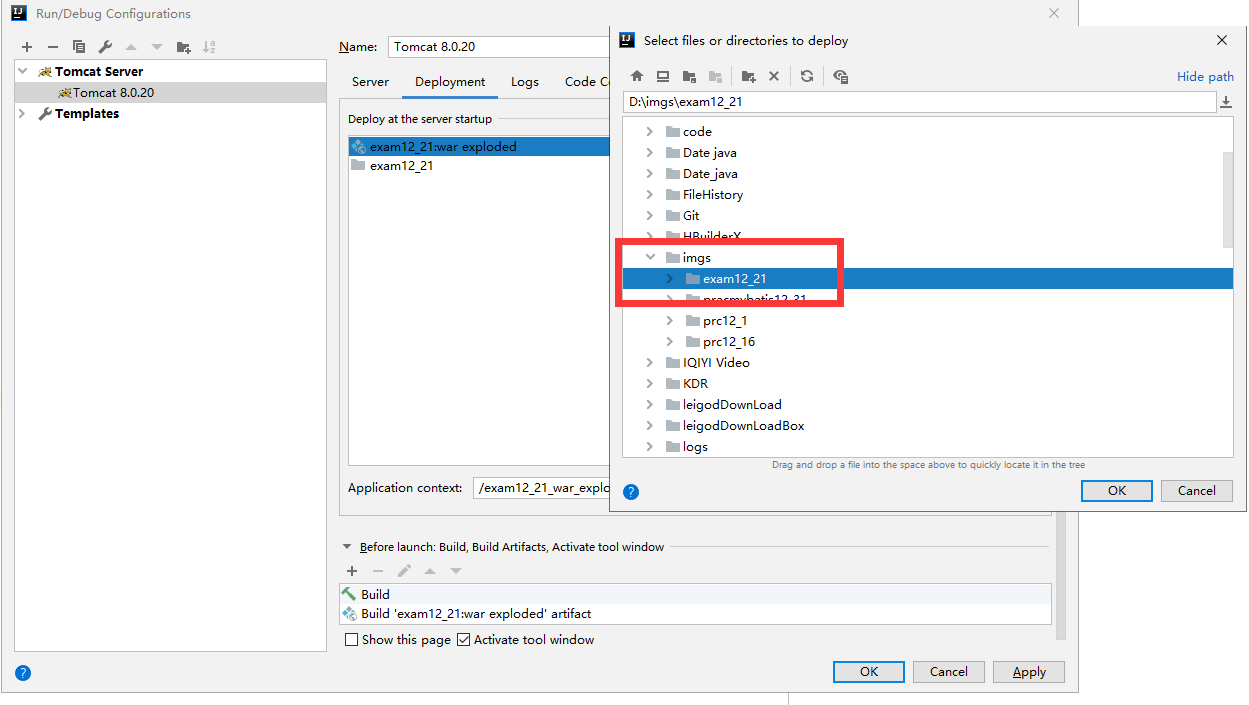
今天就跟大家聊聊有关java中run/debug configurations上传图片文件的示例分析,可能很多人都不太了解,为了让大家更加了解,小编给大家总结了以下内容,希望大家根据这篇文章可以有所收获。
上传图片步骤:
1.设置图片服务器(在tomcat中加入虚拟路径)


2.导入依赖
需要导入io和fileupload
<dependency>
  <groupId>commons-io</groupId>
  <artifactId>commons-io</artifactId>
  <version>2.4</version></dependency><dependency>
  <groupId>commons-fileupload</groupId>
  <artifactId>commons-fileupload</artifactId>
  <version>1.2.2</version></dependency>
3.修改jsp页面 method的请求必须为post请求,并且必须加上enctype="multipart/form-data" ,并将type为file的input标签的name值改为pictureFile改(这个名字不会出问题,也可以使用其他名字)
<form action="${pageContext.request.contextPath}/add" method="post" enctype="multipart/form-data">服装名称:<input type="text" name="name"><br>商品价格:<input type="text" name="price"><br>供应商:<input type="text" name="pro"><br>进货时间:<input type="date" name="getTime"><br>进货数量:<input type="number" name="getNumber"><br>商品图片:<input type="file" name="pictureFile"><br><input type="submit" value="添加"></form>4.在springmvc.xml中加入上传文件解析器(解析器的id一定要固定)
<bean id="multipartResolver" class="org.springframework.web.multipart.commons.CommonsMultipartResolver">//最大上传大小<property name="maxUploadSize" value="5000000"/></bean>
5.从Controller写上传的代码
@RequestMapping("add")
//MultipartFile进行参数绑定时与前端页面的input的name属性值一致public String add(Clothing clothing, MultipartFile pictureFile){if(pictureFile.getSize()>0){
        //根据上传文件的对象获取文件的名称
        String pname=pictureFile.getOriginalFilename();
        //重新设置文件的名称(uuid)
        String name= UUID.randomUUID().toString().replace("-","").toUpperCase()+pname.substring(pname.lastIndexOf("."));try {
            //上传文件(文件路径+文件名称)(new File("D:\\imgs\\"+图片全名称))
            pictureFile.transferTo(new File("D:\\imgs\\exam12_21\\"+name));
        } catch (IOException e) {
            e.printStackTrace();
        }
    //把文件名设置到pojo
        clothing.setImg(name);
    }try {
        //进行数据库操作cloService.add(clothing);
    } catch (SQLException e) {
        e.printStackTrace();
    }return "redirect:/findAll";
用到的实体类
public class Clothing {  private Integer id;  private String name;  private Double price;  private String pro;  @DateTimeFormat(pattern = "yyyy-MM-dd")  private Date getTime;  private Integer getNumber;  private String img;  public Integer getId() {return id;
  }  public void setId(Integer id) {this.id = id;
  }  public String getName() {return name;
  }  public void setName(String name) {this.name = name;
  }  public Double getPrice() {return price;
  }  public void setPrice(Double price) {this.price = price;
  }  public String getPro() {return pro;
  }  public void setPro(String pro) {this.pro = pro;
  }  public Date getGetTime() {return getTime;
  }  public void setGetTime(Date getTime) {this.getTime = getTime;
  }  public Integer getGetNumber() {return getNumber;
  }  public void setGetNumber(Integer getNumber) {this.getNumber = getNumber;
  }  public String getImg() {return img;
  }  public void setImg(String img) {this.img = img;
  }
}
看完上述内容,你们对java中run/debug configurations上传图片文件的示例分析有进一步的了解吗?如果还想了解更多知识或者相关内容,请关注亿速云行业资讯频道,感谢大家的支持。
免责声明:本站发布的内容(图片、视频和文字)以原创、转载和分享为主,文章观点不代表本网站立场,如果涉及侵权请联系站长邮箱:is@yisu.com进行举报,并提供相关证据,一经查实,将立刻删除涉嫌侵权内容。