本篇内容主要讲解“Vue作用域插槽应用实例分析”,感兴趣的朋友不妨来看看。本文介绍的方法操作简单快捷,实用性强。下面就让小编来带大家学习“Vue作用域插槽应用实例分析”吧!
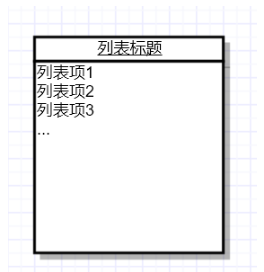
简单的展示列表
现在我们做一个纯展示用途的列表组件,如下图所示:
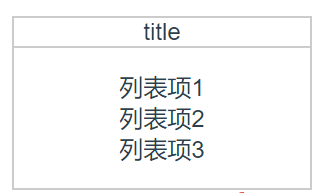
第一个例子先用slot来分发内容
<template>
 <div class="list">
  <div class="list-title">
   <slot name="title"></slot>
  </div>
  <div class="list-content">
   <slot name="content"></slot>
  </div>
 </div>
</template>

<script>
 export default {
  name: "MyList"
 }
</script>在父组件中使用MyList
<template>
 <MyList>
  <span slot="title">title</span>
  <ul slot="content">
   <li v-for="item in listData">{{item}}</li>
  </ul>
 </MyList>
</template>

<script>
 import myList from './List.vue';
 export default {
  name: 'HelloWorld',
  components: {
   'MyList': myList
  },
  data() {
   return {
    listData: [
      '列表项1',
      '列表项2',
      '列表项3'
    ]
   }
  }
 }
</script>省略了其中的样式代码,结果如图所示
满足了基本的需求,但是作为组件的使用者,这样的一个组件会让我觉得非常麻烦,content中循环的逻辑还需要我自己动手来写,这样的使用毫无便利性。于是有了下面第二个版本
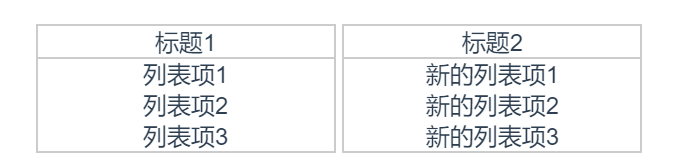
使用prop来传递数据
因为考虑到列表的内容总是一个数组,我把循环结构写进了组件中
列表组件第二版:
<template>
 <div class="list">
  <div class="list-title">{{title}}</div>
  <ul class="list-content">
   <li v-for="(item ,index) in content" :key="index">{{item}}</li>
  </ul>
 </div>
</template>

<script>
 export default {
  name: "MyList",
  props: {
   title: {
    type: String,
    required: true
   },
   content: {
    type: Array,
    required: true
   }
  }
 }
</script>使用起来也非常方便,只需通过prop将数据传入组件中
<template>
 <div>
  <MyList title="标题1" :content="listData"></MyList>
  <MyList title="标题2" :content="newListData"></MyList>
 </div>
</template>

<script>
 import myList from './List.vue';
 export default {
  name: 'HelloWorld',
  components: {
   'MyList': myList
  },
  data() {
   return {
    listData: [
      '列表项1',
      '列表项2',
      '列表项3'
    ],
    newListData: [
      '新的列表项1',
      '新的列表项2',
      '新的列表项3'
    ],
   }
  }
 }
</script>改进之后,每当我使用组件只需一行代码,大大简化了工作量
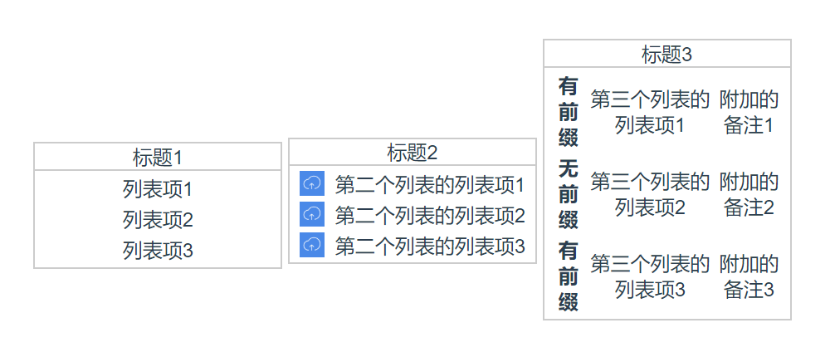
易用性的需求也满足了,但现在又有了新的问题,组件的拓展性不好!每次只能生成相同结构的列表,一旦业务需求发生了变化,组件就不再适用了。比如我现在有了新的需求,在一个列表的每个列表项前加入了一个小logo,我总不可能又写一个新的组件来适应需求的变化吧?假如需要更多的定制化场景呢?
作用域插槽
这里就有了第三版的列表组件,使用作用域插槽将子组件中的数据传递出去
<template>
 <div class="list">
  <div class="list-title">{{title}}</div>
  <ul class="list-content">
   <li v-for="(item ,index) in content" :key="index">
    <!--这里将content中的每一项数据绑定到slot的item变量上,在父组件中可以获取到item变量-->
    <slot :item="item">{{item}}</slot>
   </li>
  </ul>
 </div>
</template>使用组件时,将业务所需的content模板传入
<template>
 <div>
  <MyList title="标题1" :content="listData1"></MyList>
  <MyList title="标题2" :content="listData2">
   <template slot-scope="scope">
    <img :src="scope.item.img" width="20">
    <span>{{scope.item.text}}</span>
   </template>
  </MyList>
  <MyList title="标题3" :content="listData3">
   <template slot-scope="scope">
    <b>{{scope.item.prefix ? '有前缀' : '无前缀'}}</b>
    <span>{{scope.item.text}}</span>
    <span>{{scope.item.remark}}</span>
   </template>
  </MyList>
 </div>
</template>

<script>
 import myList from './List.vue';

 export default {
  name: 'HelloWorld',
  components: {
   'MyList': myList
  },
  data() {
   return {
    listData1: [
     '列表项1',
     '列表项2',
     '列表项3'
    ],
    listData2: [
     {text: '第二个列表的列表项1', img: 'example.png'},
     {text: '第二个列表的列表项2', img: 'example.png'},
     {text: '第二个列表的列表项3', img: 'example.png'}
    ],
    listData3: [
     {text: '第三个列表的列表项1', prefix: true, remark: '附加的备注1'},
     {text: '第三个列表的列表项2', prefix: false, remark: '附加的备注2'},
     {text: '第三个列表的列表项3', prefix: true, remark: '附加的备注3'}
    ],
   }
  }
 }
</script>实现了定制化的列表
再回到开始的问题,作用域插槽到底是干嘛用的?很显然,它的作用就如官网所说的一样:将组件的数据暴露出去。而这么做,给了组件的使用者根据数据定制模板的机会,组件不再是写死成一种特定的结构。
到此,相信大家对“Vue作用域插槽应用实例分析”有了更深的了解,不妨来实际操作一番吧!这里是亿速云网站,更多相关内容可以进入相关频道进行查询,关注我们,继续学习!
亿速云「云服务器」,即开即用、新一代英特尔至强铂金CPU、三副本存储NVMe SSD云盘,价格低至29元/月。点击查看>>
免责声明:本站发布的内容(图片、视频和文字)以原创、转载和分享为主,文章观点不代表本网站立场,如果涉及侵权请联系站长邮箱:is@yisu.com进行举报,并提供相关证据,一经查实,将立刻删除涉嫌侵权内容。
原文链接:https://my.oschina.net/u/4581492/blog/4371790


 计算
计算 安全
安全 数据库
数据库 网络和加速
网络和加速 企业服务
企业服务


