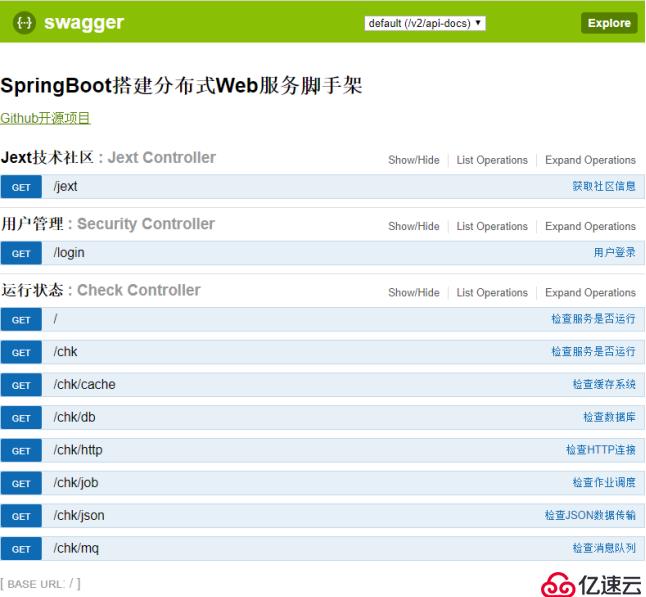
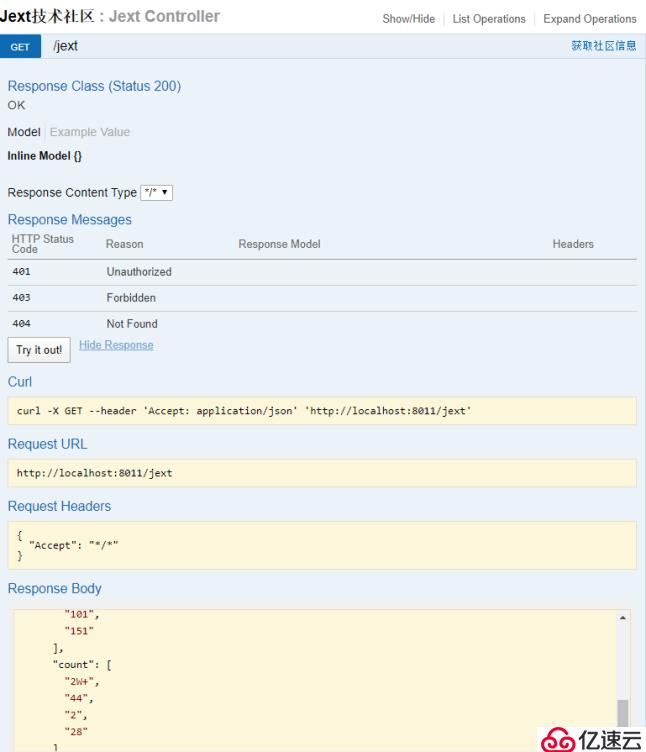
在Sping开发REST接口服务时,API文档是不可缺少的一个重要部分。Swagger框架定义了完整的REST接口文档规范,提供了强大的页面测试功能,能够调试和可视化API接口服务,并且将文档融合到代码中,让维护文档和修改代码整合为一体,使得修改代码逻辑的同时方便的修改文档说明。
Spring集成Swagger只需3步配置,就能在线生成接口文档,调试API功能。
代码文件 | 功能要点 | |
SpringBoot集成Swagger | pom.xml | 引入Swagger依赖:springfox-swagger2, springfox-swagger-ui |
SwaggerConfig.java | 配置Swagger信息和扫描包路径 | |
可以使用Swagger注解增加API文档 | @Api(tags={“xxx”}) @ApiOperation(“xxx”) @ApiParam(“xxx”) ...... | |
Swagger自动生成接口文档 | http://localhost:8011/swagger-ui.html | 页面可调用API,功能调试 |
l 代码
Github下载:https://github.com/jextop/StarterApi/
l SpringBoot集成Swagger
1. 在pom.xml中添加Swagger依赖
<dependency>
<groupId>io.springfox</groupId>
<artifactId>springfox-swagger-ui</artifactId>
<version>2.7.0</version>
</dependency>
<dependency>
<groupId>io.springfox</groupId>
<artifactId>springfox-swagger2</artifactId>
<version>2.7.0</version>
</dependency>
2. 添加SwaggerConfig.java,配置文档信息和扫描包路径
@Configuration
@EnableSwagger2
public class SwaggerConfig {
@Bean
public Docket docket() {
return new Docket(DocumentationType.SWAGGER_2)
.apiInfo(apiInfo())
.select()
.apis(RequestHandlerSelectors.basePackage("com.starter"))
.paths(PathSelectors.any())
.build();
}
private ApiInfo apiInfo() {
return new ApiInfoBuilder()
.title("SpringBoot搭建分布式Web服务脚手架")
.license("Github开源项目")
.licenseUrl("https://github.com/jextop")
.build();
}
}
3. (可选)代码中引用Swagger注解,增加接口文档。
- 不添加这些注解时,Swagger自动生成在线文档将使用默认信息。
- 修改代码功能逻辑时,同时维护文档信息。
@Api(tags = {"用户管理"})
@RestController
@RequestMapping("/")
public class SecurityController {
@ApiOperation("用户登录")
@GetMapping(value = "/login")
public Object login(
@RequestParam(required = false) String username,
@ApiParam("密码计算公式:md5(b64(username + password)") @RequestParam(required = false) String password
) {
// todo
}
}
l 启动Spring项目,打开文档页面
1. http://localhost:8011/swagger-ui.html

2. 展开API信息,点击按钮”Try it out!”,调试接口功能。

免责声明:本站发布的内容(图片、视频和文字)以原创、转载和分享为主,文章观点不代表本网站立场,如果涉及侵权请联系站长邮箱:is@yisu.com进行举报,并提供相关证据,一经查实,将立刻删除涉嫌侵权内容。