这篇文章主要介绍“vue单文件组件的实现方法”,在日常操作中,相信很多人在vue单文件组件的实现方法问题上存在疑惑,小编查阅了各式资料,整理出简单好用的操作方法,希望对大家解答”vue单文件组件的实现方法”的疑惑有所帮助!接下来,请跟着小编一起来学习吧!
最近翻阅了一下vue。发觉有一个单文件组件之前基本忽视掉了。vue.js中的单文件组件允许在一个文件中定义一个组件的所有内容。也就是说,一个页面或者是一个组件,我们想将他们捆绑在一起,那么vue的这个单文件组件可以做到。正如vue的官网说的,“在很多 Vue 项目中,我们使用 app.component 来定义全局组件,紧接着用 app.mount('#app') 在每个页面内指定一个容器元素。”这里的组件,都是相对简单的,而面对一个比较复杂的项目,这种方式就行不通。原因如下:
全局定义 (Global definitions) 强制要求每个 component 中的命名不得重复;
字符串模板 (String templates) 缺乏语法高亮,在 HTML 有多行的时候,需要用到丑陋的 \;
不支持 CSS (No CSS support) 意味着当 HTML 和 JavaScript 组件化时,CSS 明显被遗漏;
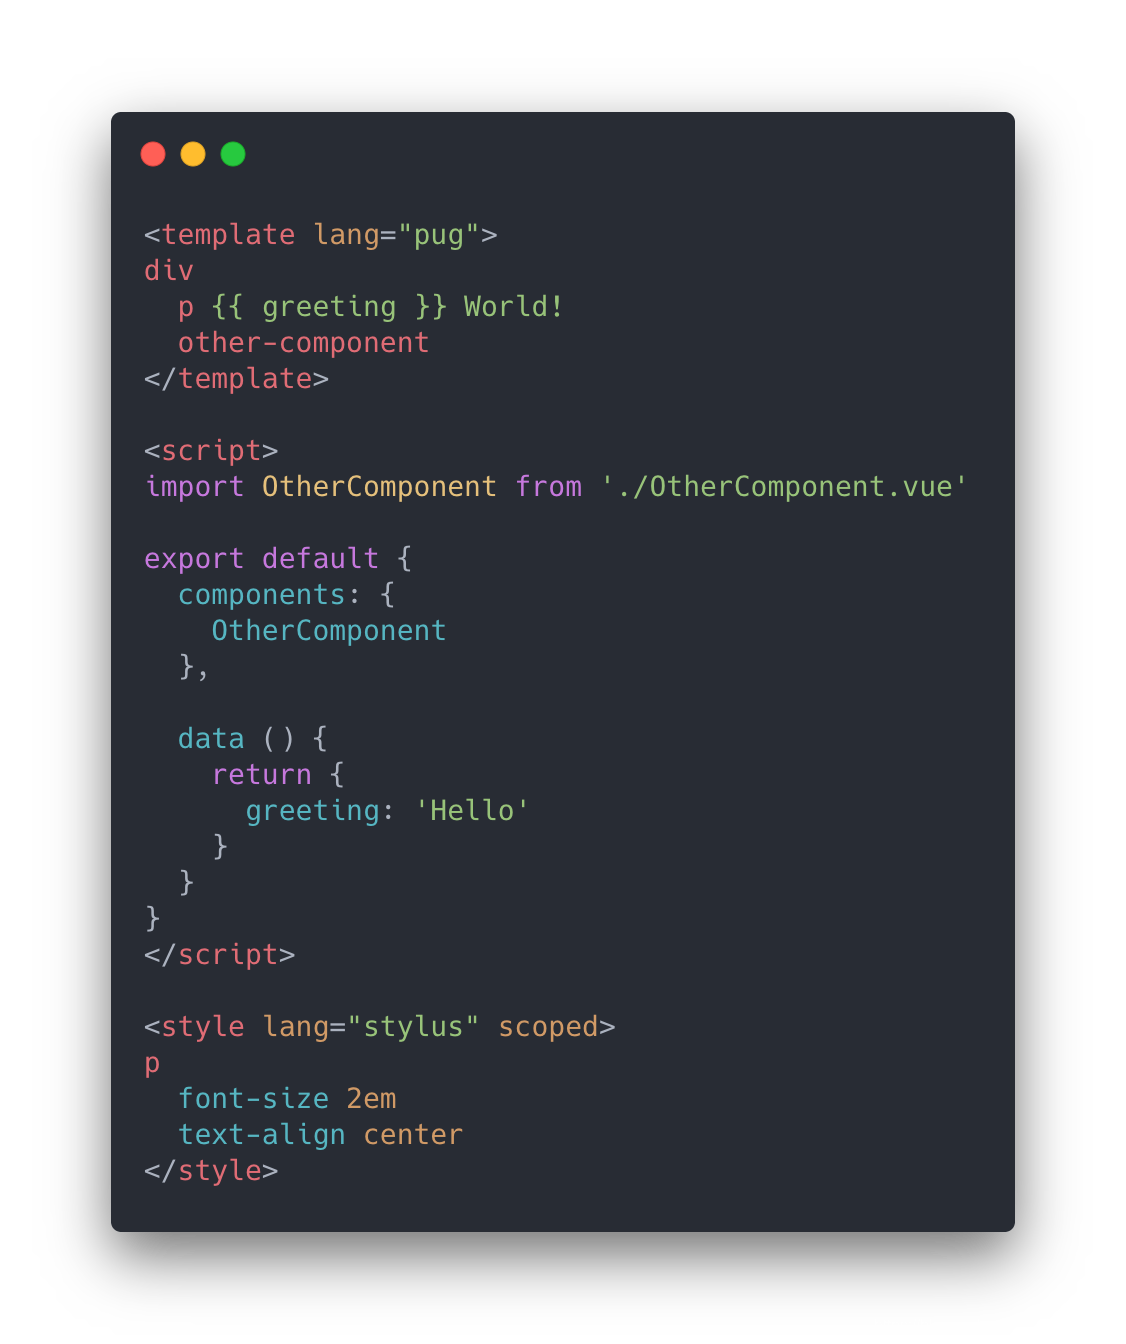
没有构建步骤 (No build step) 限制只能使用 HTML 和 ES5 JavaScript,而不能使用预处理器,如 Pug
(曾经的 Jade) 和 Babel。
所有这些都可以通过扩展名为 .vue 的 single-file components (单文件组件) 来解决,并且还可以使用 webpack 或 Browserify 等构建工具。
那么vue项目中的单文件组件需要如何创建呢?
npm install -D @vue/compiler-sfc
在控制台上输入上述的代码,然后就会出现一个文件夹和另一个json文件。如下:

我们要构建单文件组件,就要自个制定文件。同时对webpack也要有一定的了解才行。
比如说,我们自己安装一些需要的依赖。比如说,css-loader、css的预编译处理器等等。因为需要项目对vue文件进行解析,那么vue-loader是必须的。
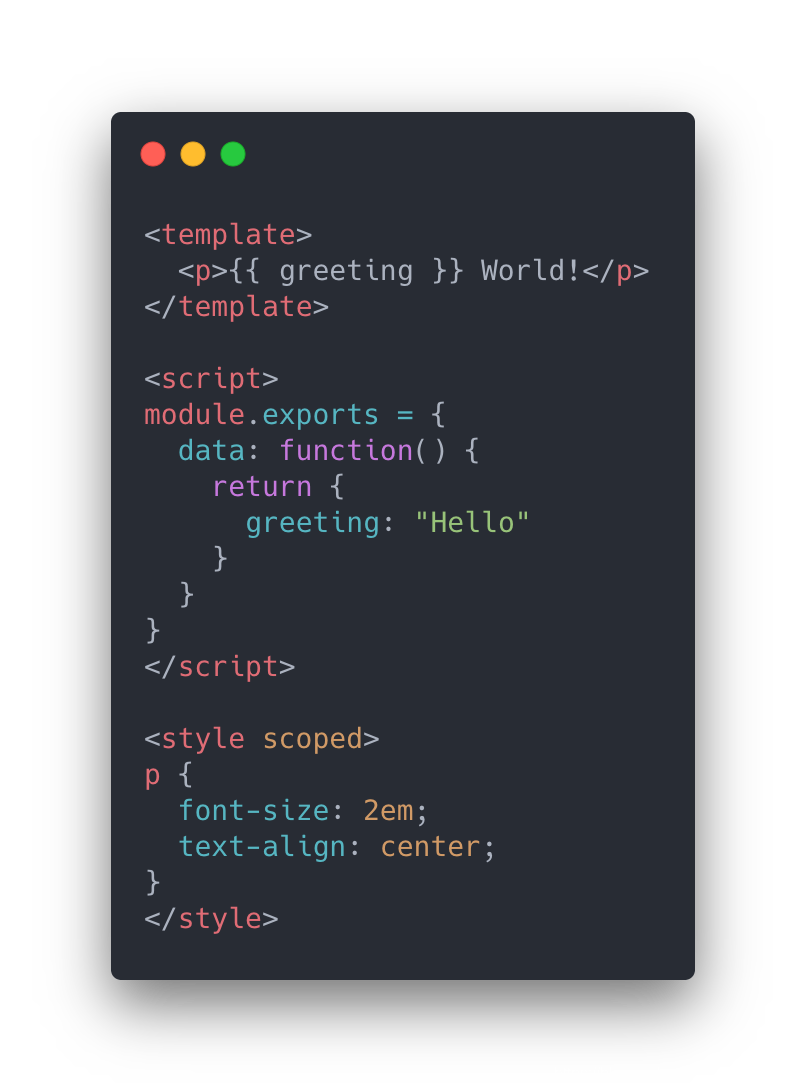
这些文件其实都是vue的简单版本。比如简单版的hello.vue文件,可以如下

由此可以看见: 三个部分组成。而template这个部分是不可缺少的,其它的两个部分,style和script还可以忽略掉。
script让你的页面js可以跟vue完美结合,而style可以使用预处理器来构建简洁和功能更丰富的组件。(这个单文件组件很像最初前端开发中的html文档,它有自己的style标签和script标签,只是表现层使用一个template标签。由于使用了简单的方式,得到一个强大的分层组件(内容/模板:,表现:

可能有的小伙伴喜欢将不同模块拆分开来,也就是vue文档说的关注点分离。那么没有关系,你可以拆开那些文档,将css和js拆开到另一个文件,之后引入进组件中。如下:
<!-- my-component.vue -->
<template>
  <div>This will be pre-compiled</div>
</template>
<script src="./my-component.js"></script>
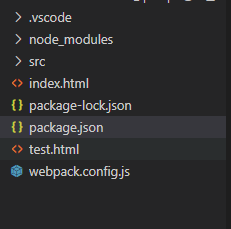
<style src="./my-component.css"></style>项目大致目录如下:

其中,index.html
<!DOCTYPE html>
<html lang="en">
  <head>
    <meta charset="utf-8" />
    <title>Vue Simple Todo App with SFC</title>
    <link
      rel="stylesheet"
      href="https://cdnjs.cloudflare.com/ajax/libs/normalize/8.0.1/normalize.min.css" rel="external nofollow"  rel="external nofollow"
    />
    <link rel="stylesheet" href="/dist/main.css" rel="external nofollow"  rel="external nofollow"  />
  </head>
  <body>
    <div id="app"></div>
    <script src="/dist/main.js"></script>
  </body>
</html>package.json
{
    "private": true,
    "scripts": {
      "dev": "webpack-dev-server",
      "build": "webpack --env.prod"
    },
    "dependencies": {
      "vue": "^3.1.1"
    },
    "devDependencies": {
      "@vue/compiler-sfc": "^3.1.1",
      "css-loader": "^3.5.2",
      "file-loader": "^6.0.0",
      "mini-css-extract-plugin": "^0.9.0",
      "stylus": "^0.54.7",
      "stylus-loader": "^3.0.2",
      "url-loader": "^4.1.0",
      "vue-loader": "^16.0.0-alpha.3",
      "vue-style-loader": "^4.1.2",
      "webpack": "^4.42.1",
      "webpack-cli": "^3.3.11",
      "webpack-dev-server": "^3.10.3"
    },
    "keywords": ["todo", "vue"],
    "name": "vue-todo-list-app-with-single-file-component",
    "description": "A simple todo list application written in Vue with Single File Component (SFC) support."
}webpack.config.js
const path = require("path");
const { VueLoaderPlugin } = require("vue-loader");
const MiniCssExtractPlugin = require("mini-css-extract-plugin");

module.exports = (env = {}) => ({
  mode: env.prod ? "production" : "development",
  devtool: env.prod ? "source-map" : "cheap-module-eval-source-map",
  entry: [
    env.prod ? false : require.resolve(`webpack-dev-server/client`),
    path.resolve(__dirname, "./src/main.js")
  ].filter(Boolean),
  output: {
    path: path.resolve(__dirname, "./dist"),
    publicPath: "/dist/"
  },
  resolve: {
    alias: {
      // this isn't technically needed, since the default `vue` entry for bundlers
      // is a simple `export * from '@vue/runtime-dom`. However having this
      // extra re-export somehow causes webpack to always invalidate the module
      // on the first HMR update and causes the page to reload.
      vue: "@vue/runtime-dom"
    }
  },
  module: {
    rules: [
      {
        test: /\.vue$/,
        use: "vue-loader"
      },
      {
        test: /\.png$/,
        use: {
          loader: "url-loader",
          options: { limit: 8192 }
        }
      },
      {
        test: /\.css$/,
        use: [
          {
            loader: MiniCssExtractPlugin.loader,
            options: { hmr: !env.prod }
          },
          "css-loader"
        ]
      },
      {
        test: /\.stylus$/,
        use: ["vue-style-loader", "css-loader", "stylus-loader"]
      },
      {
        test: /\.pug$/,
        loader: "pug-plain-loader"
      }
    ]
  },
  plugins: [
    new VueLoaderPlugin(),
    new MiniCssExtractPlugin({
      filename: "[name].css"
    })
  ],
  devServer: {
    inline: true,
    hot: true,
    stats: "minimal",
    contentBase: __dirname,
    overlay: true,
    injectClient: false,
    disableHostCheck: true
  }
});test.html
<!DOCTYPE html>
<html lang="en">
  <head>
    <meta charset="utf-8" />
    <title>Vue Simple Todo App with SFC</title>
    <link
      rel="stylesheet"
      href="https://cdnjs.cloudflare.com/ajax/libs/normalize/8.0.1/normalize.min.css" rel="external nofollow"  rel="external nofollow"
    />
    <link rel="stylesheet" href="/dist/main.css" rel="external nofollow"  rel="external nofollow"  />
  </head>
  <body>
    <div id="app222">test pages</div>
    <script src="/dist/main.js"></script>
  </body>
</html>src文件夹里边有三个文件,App.vue main.js 和TodoItem.vue
其中:App.vue
<template>
  <div class="wrapper">
    <h2>My Todo List</h2>
    <form @submit.prevent="addTodo">
      <input type="text" name="todo-text" v-model="newTodoText" placeholder="New todo">
    </form>
    <ul v-if="todos.length">
      <TodoItem v-for="todo in todos" :key="todo.id" :todo="todo" @remove="removeTodo"/>
    </ul>
    <p class="none" v-else>Nothing left in the list. Add a new todo in the input above.</p>
  </div>
</template>

<script>
import TodoItem from "./TodoItem.vue"

let nextTodoId = 1

const createTodo = text => ({
  text,
  id: nextTodoId++
})

export default {
  components: {
    TodoItem
  },

  data() {
    return {
      todos: [
        createTodo("Learn Vue"),
        createTodo("Learn about single-file components"),
        createTodo("Fall in love ❤️")
      ],

      newTodoText: ""
    }
  },

  methods: {
    addTodo() {
      const trimmedText = this.newTodoText.trim()

      if (trimmedText) {
        this.todos.push(createTodo(trimmedText))
      }

      this.newTodoText = ""
    },

    removeTodo(item) {
      this.todos = this.todos.filter(todo => todo !== item)
    }
  }
}
</script>

<style lang="stylus">
*, *::before, *::after
  box-sizing border-box

html, body
  font 16px/1.2 BlinkMacSystemFont, -apple-system, "Segoe UI", Roboto, Helvetica, Arial, sans-serif
  padding 10px

.wrapper
  width 75%
  margin 0 auto

form
  margin-bottom 20px

input[type="text"]
  width 100%
  padding 10px
  border 1px solid #777

ul, li
  margin 0
  padding 0

p.none
  color #888
  font-size small
</style>main.js
import { createApp } from 'vue'
import App from './App.vue'

createApp(App).mount('#app')TodoItem.vue
<template>
  <li>
    <span>{{ todo.text }}</span>
    <button @click.prevent="$emit('remove', todo)">Remove</button>
  </li>
</template>

<script>
export default {
  props: {
    todo: {
      required: true,
      type: Object
    }
  }
}
</script>


<style lang="stylus" scoped>
li
  display flex
  margin 5px 0

  span
    flex 1

  button
    border 1px solid orange
    background orange
    color white
    font-size 0.8rem
    padding 2px 4px
    cursor pointer

    &:hover
      border-color #ff8100
      background #ff8100
</style>注意
如果不懂得webpack,建议还是按照官网的指示,用vue的脚手架安装基本的工具。
或者是按照我给的pakage.json放到项目上,npm install一下,安装好最基本的环境,然后可以通过npm run dev进行本地开发。
其实,我觉得这个单文件组件用处已经比较小。除非就是一个纯js的项目,用的库和组件都已经非常的古老,那么这个时候用这个单文件组件来进行新的功能开发,效果还是不错的,前提是你要对vue比较熟悉。同时,我建议还是要学习一下webpack。不要对bable都一窍不通,然后还要通过node去启动项目。
其实,用一个文件就将html/css/JavaScript分层管理,统一到了一个文件,着实能够让我们的项目看起来更加的有条理,规范性更加好。因为我们的jq时代,常常会将css混杂在html中,而且,简单的一个点击事件都要将它们分割开,这体验当然没有“分层而治”那么分明。
参考文献:
1、https://v3.cn.vuejs.org/guide/single-file-component.html#%E5%9C%A8%E7%BA%BF%E6%BC%94%E7%A4%BA
2、https://www.cnblogs.com/houxianzhou/p/14510450.html
到此,关于“vue单文件组件的实现方法”的学习就结束了,希望能够解决大家的疑惑。理论与实践的搭配能更好的帮助大家学习,快去试试吧!若想继续学习更多相关知识,请继续关注亿速云网站,小编会继续努力为大家带来更多实用的文章!
亿速云「云服务器」,即开即用、新一代英特尔至强铂金CPU、三副本存储NVMe SSD云盘,价格低至29元/月。点击查看>>
免责声明:本站发布的内容(图片、视频和文字)以原创、转载和分享为主,文章观点不代表本网站立场,如果涉及侵权请联系站长邮箱:is@yisu.com进行举报,并提供相关证据,一经查实,将立刻删除涉嫌侵权内容。