这篇文章主要讲解了“jQuery怎么实现表格行数据滚动效果”,文中的讲解内容简单清晰,易于学习与理解,下面请大家跟着小编的思路慢慢深入,一起来研究和学习“jQuery怎么实现表格行数据滚动效果”吧!
HTML代码:
<div class="box">
  <div class="box-header">
    <div class="col">测试1</div>
    <div class="col">测试2</div>
    <div class="col">测试3</div>
    <div class="col">测试4</div>
  </div>
  <div id="font-scroll">
    <div class="box-body">
      <div class="row">
        <div class="col">测试文字</div>
        <div class="col">测试文字</div>
        <div class="col">测试文字</div>
        <div class="col">测试文字</div>
      </div>
      <div class="row">
        <div class="col">测试文字</div>
        <div class="col">测试文字</div>
        <div class="col">测试文字</div>
        <div class="col">测试文字</div>
      </div>
      <div class="row">
        <div class="col">测试文字</div>
        <div class="col">测试文字</div>
        <div class="col">测试文字</div>
        <div class="col">测试文字</div>
      </div>
      <div class="row">
        <div class="col">测试文字</div>
        <div class="col">测试文字</div>
        <div class="col">测试文字</div>
        <div class="col">测试文字</div>
      </div>
      <div class="row">
        <div class="col">测试文字</div>
        <div class="col">测试文字</div>
        <div class="col">测试文字</div>
        <div class="col">测试文字</div>
      </div>
      <div class="row">
        <div class="col">测试文字</div>
        <div class="col">测试文字</div>
        <div class="col">测试文字</div>
        <div class="col">测试文字</div>
      </div>
      <div class="row">
        <div class="col">测试文字</div>
        <div class="col">测试文字</div>
        <div class="col">测试文字</div>
        <div class="col">测试文字</div>
      </div>
      <div class="row">
        <div class="col">测试文字</div>
        <div class="col">测试文字</div>
        <div class="col">测试文字</div>
        <div class="col">测试文字</div>
      </div>
      <div class="row">
        <div class="col">测试文字</div>
        <div class="col">测试文字</div>
        <div class="col">测试文字</div>
        <div class="col">测试文字</div>
      </div>
    </div>
  </div>
</div>
CSS样式代码:
.box {
      width: 400px;
      text-align: center;
      font-size: 14px;
      border: 1px solid rgba(0, 0, 0, .3);
    }

    .box .box-header {
      display: flex;
      justify-content: space-evenly;
    }

    .box-body .row {
      display: flex;
      justify-content: space-evenly;
    }

    .box-header,
    .box-body .row {
      border-bottom: 1px dashed #404040;
    }

    .box .col {
      padding: 10px 0 10px 0;
    }

    .box .col:nth-child(1) {
      width: 80px;
    }

    .box .col:nth-child(2) {
      width: 60px;
    }

    .box .col:nth-child(3) {
      width: 80px;
    }

    .box .col:nth-child(4) {
      width: 60px;
    }

    /* 内容滚动 */

    #font-scroll {
      /* 内容滚动可视高度 */
      height: 199px;
      overflow: hidden;
    }
JS代码:
(function ($) {
  $.fn.FontScroll = function (options) {
    let d = { time: 1000 }
    $.extend(d, options);

    // 需要滚动的div父盒子
    let box = this[0]
    // 滚动间隔
    let _time = d.time

    // 这个办法只适合每行数据的高度都相同的情况
    // // 每次滚动的高度(一般是一条数据的高度)
    // let _contentChildHeight = box.children[0].children[0].offsetHeight
    // // 滚动总高度,即内容的总高度(所有数据的总高度)
    // let _contentTotalHeight = _contentChildHeight * box.children[0].children.length

    // 这种办法适合所有情况,包括每行数据的高度都不相同的情况
    // 获取所有行元素
    let all_row_el = box.children[0].children
    // 行总高度
    let _contentTotalHeight = 0
    // 每一行数据与前面所有行高度的叠加高度
    let _contentChildHeight = []
    for (let i in all_row_el) {
      if ((new RegExp("^\\d+$")).test(i)) {
        _itemHeight = all_row_el[i].offsetHeight
        _contentTotalHeight += _itemHeight
        i == 0 ? _contentChildHeight.push(_itemHeight) : _contentChildHeight.push(_contentChildHeight[i - 1] + _itemHeight)
      }
    }

    // 需要滚动的div子盒子
    let child1 = this.children('.box-body')
    // 克隆出来滚动的div子盒子
    // 克隆方法一
    // let child1 = this.children('.box-body')[0]
    // let child2 = this.children('.box-body')[1]
    // child2.innerHTML = child1.innerHTML
    // 克隆方法二
    if ((box.offsetHeight + 5) < _contentTotalHeight) {
      // 如果数据没有达到一定的高度,则不会执行滚动效果
      child1.clone().insertAfter(child1)
      /*启动定时器*/
      let timer = setInterval(autoScrollLine, 30)
      /*单行向上滚动效果*/
      function autoScrollLine() {
        /*判断滚动内容是否已经滚完,滚完了则滚动的值重新设置到0
        否则就每隔30毫秒向上滚动1px*/
        if (box.scrollTop >= _contentTotalHeight) {
          box.scrollTop = 0;
        } else {
          box.scrollTop++;
        }
        /*判断滚动的距离刚好为一条數據的高度时停掉定时器,
        隔 _time 之后重新启动定时器即可实现數據滚动停留效果 */
        if (_contentChildHeight.indexOf(box.scrollTop) >= 0) {
          clearInterval(timer)
          setTimeout(() => {
            timer = setInterval(autoScrollLine, 30)
          }, _time)
        }
      }
    }
  }
})(jQuery);
使用方法:
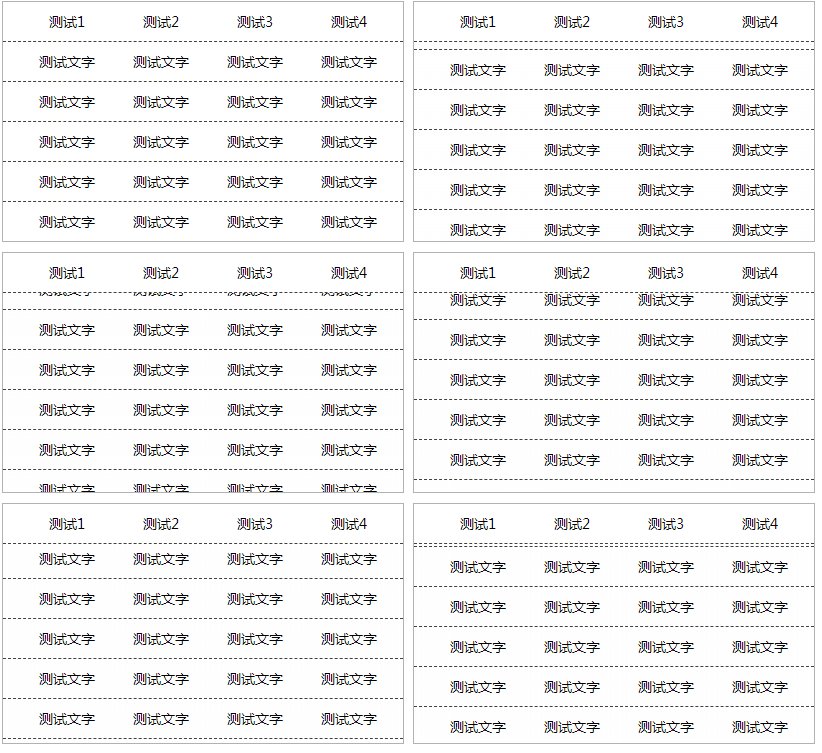
$('#font-scroll').FontScroll({ time: 1000 });效果图:

感谢各位的阅读,以上就是“jQuery怎么实现表格行数据滚动效果”的内容了,经过本文的学习后,相信大家对jQuery怎么实现表格行数据滚动效果这一问题有了更深刻的体会,具体使用情况还需要大家实践验证。这里是亿速云,小编将为大家推送更多相关知识点的文章,欢迎关注!
免责声明:本站发布的内容(图片、视频和文字)以原创、转载和分享为主,文章观点不代表本网站立场,如果涉及侵权请联系站长邮箱:is@yisu.com进行举报,并提供相关证据,一经查实,将立刻删除涉嫌侵权内容。