小编给大家分享一下Vue+Websocket如何实现聊天功能,相信大部分人都还不怎么了解,因此分享这篇文章给大家参考一下,希望大家阅读完这篇文章后大有收获,下面让我们一起去了解一下吧!
具体内容如下
效果图:

聊天室
此篇文章是针对Websocket的简单了解和应用,利用Nodejs简单搭建一个服务器加以实现。
首先创建一个vue项目
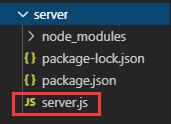
然后再创建一个server文件夹,在终端上打开该文件夹,输入vue init(一直敲 "回车" 键),最后再建一个server.js文件,如下图
代码如下:
server.js/
在server文件终端下 npm install --s ws
var userNum = 0; //统计在线人数
var chatList = [];//记录聊天记录
var WebSocketServer = require('ws').Server;
wss = new WebSocketServer({ port: 8181 }); //8181 与前端相对应
//调用 broadcast 广播,实现数据互通和实时更新
wss.broadcast = function (msg) {
    wss.clients.forEach(function each(client) {
        client.send(msg);
    });
};
wss.on('connection', function (ws) {
    userNum++;//建立连接成功在线人数 +1
    wss.broadcast(JSON.stringify({ funName: 'userCount', users: userNum, chat: chatList })); //建立连接成功广播一次当前在线人数
    console.log('Connected clients:', userNum);
    //接收前端发送过来的数据
    ws.on('message', function (e) {
        var resData = JSON.parse(e)
        console.log('接收到来自clent的消息:' + resData.msg)
        chatList.push({ userId: resData.userId, content: resData.msg });//每次发送信息,都会把信息存起来,然后通过广播传递出去,这样此每次进来的用户就能看到之前的数据
        wss.broadcast(JSON.stringify({ userId: resData.userId, msg: resData.msg })); //每次发送都相当于广播一次消息

    });
    ws.on('close', function (e) {
        userNum--;//建立连接关闭在线人数 -1
        wss.broadcast(JSON.stringify({ funName: 'userCount', users: userNum, chat: chatList }));//建立连接关闭广播一次当前在线人数
        console.log('Connected clients:', userNum);
        console.log('长连接已关闭')
    })
})
console.log('服务器创建成功')然后npm run start启动服务器
HelloWorld.vue(前端页面)
<template>
  <div class="chat-box">
    <header>聊天室人数:{{count}}</header>
    <div class="msg-box" ref="msg-box">
      <div
        v-for="(i,index) in list"
        :key="index"
        class="msg"
        :
      >
        <div class="user-head">
          <div
            class="head"
            :
          ></div>
        </div>
        <div class="user-msg">
          <span
            :
            :class="i.userId == userId?'right':'left'"
          >{{i.content}}</span>
        </div>
      </div>
    </div>
    <div class="input-box">
      <input type="text" ref="sendMsg" v-model="contentText" @keyup.enter="sendText()" />
      <div class="btn" :class="{['btn-active']:contentText}" @click="sendText()">发送</div>
    </div>
  </div>
</template>

<script>
export default {
  data() {
    return {
      ws: null,
      count: 0,
      userId: null, //当前用户ID
      list: [], //聊天记录的数组
      contentText: "" //input输入的值
    };
  },
  created() {
    this.getUserID();
  },
  mounted() {
    this.initWebSocket();
  },
  methods: {
    //根据时间戳作为当前用户ID
    getUserID() {
      let time = new Date().getTime();
      this.userId = time;
    },
    //根据userID生成一个随机头像
    getUserHead(id, type) {
      let ID = String(id);
      if (type == "bck") {
        return Number(ID.substring(ID.length - 3));
      }
      if (type == "polygon") {
        return Number(ID.substring(ID.length - 2));
      }
      if (type == "rotate") {
        return Number(ID.substring(ID.length - 3));
      }
    },
    //滚动条到底部
    scrollBottm() {
      let el = this.$refs["msg-box"];
      el.scrollTop = el.scrollHeight;
    },
    //发送聊天信息
    sendText() {
      let _this = this;
      _this.$refs["sendMsg"].focus();
      if (!_this.contentText) {
        return;
      }
      let params = {
        userId: _this.userId,
        msg: _this.contentText
      };
      _this.ws.send(JSON.stringify(params)); //调用WebSocket send()发送信息的方法
      _this.contentText = "";
      setTimeout(() => {
        _this.scrollBottm();
      }, 500);
    },
    //进入页面创建websocket连接
    initWebSocket() {
      let _this = this;
      //判断页面有没有存在websocket连接
      if (window.WebSocket) {
        // 192.168.0.115 是我本地IP地址 此处的 :8181 端口号 要与后端配置的一致
        let ws = new WebSocket("ws://192.168.0.115:8181");
        _this.ws = ws;
        ws.onopen = function(e) {
          console.log("服务器连接成功");
        };
        ws.onclose = function(e) {
          console.log("服务器连接关闭");
        };
        ws.onerror = function() {
          console.log("服务器连接出错");
        };
        ws.onmessage = function(e) {
          //接收服务器返回的数据
          let resData = JSON.parse(e.data);
          if (resData.funName == "userCount") {
            _this.count = resData.users;
            _this.list = resData.chat;
            console.log(resData.chat);
          } else {
            _this.list = [
              ..._this.list,
              { userId: resData.userId, content: resData.msg }
            ];
          }
        };
      }
    }
  }
};
</script>

<style lang="scss" scoped>
.chat-box {
  margin: 0 auto;
  background: #fafafa;
  position: absolute;
  height: 100%;
  width: 100%;
  max-width: 700px;
  header {
    position: fixed;
    width: 100%;
    height: 3rem;
    background: #409eff;
    max-width: 700px;
    display: flex;
    justify-content: center;
    align-items: center;
    font-weight: bold;
    color: white;
    font-size: 1rem;
  }
  .msg-box {
    position: absolute;
    height: calc(100% - 6.5rem);
    width: 100%;
    margin-top: 3rem;
    overflow-y: scroll;
    .msg {
      width: 95%;
      min-height: 2.5rem;
      margin: 1rem 0.5rem;
      position: relative;
      display: flex;
      justify-content: flex-start !important;
      .user-head {
        min-width: 2.5rem;
        width: 20%;
        width: 2.5rem;
        height: 2.5rem;
        border-radius: 50%;
        background: #f1f1f1;
        display: flex;
        justify-content: center;
        align-items: center;
        .head {
          width: 1.2rem;
          height: 1.2rem;
        }
        // position: absolute;
      }
      .user-msg {
        width: 80%;
        // position: absolute;
        word-break: break-all;
        position: relative;
        z-index: 5;
        span {
          display: inline-block;
          padding: 0.5rem 0.7rem;
          border-radius: 0.5rem;
          margin-top: 0.2rem;
          font-size: 0.88rem;
        }
        .left {
          background: white;
          animation: toLeft 0.5s ease both 1;
        }
        .right {
          background: #53a8ff;
          color: white;
          animation: toright 0.5s ease both 1;
        }
        @keyframes toLeft {
          0% {
            opacity: 0;
            transform: translateX(-10px);
          }
          100% {
            opacity: 1;
            transform: translateX(0px);
          }
        }
        @keyframes toright {
          0% {
            opacity: 0;
            transform: translateX(10px);
          }
          100% {
            opacity: 1;
            transform: translateX(0px);
          }
        }
      }
    }
  }
  .input-box {
    padding: 0 0.5rem;
    position: absolute;
    bottom: 0;
    width: 100%;
    height: 3.5rem;
    background: #fafafa;
    box-shadow: 0 0 5px #ccc;
    display: flex;
    justify-content: space-between;
    align-items: center;
    input {
      height: 2.3rem;
      display: inline-block;
      width: 100%;
      padding: 0.5rem;
      border: none;
      border-radius: 0.2rem;
      font-size: 0.88rem;
    }
    .btn {
      height: 2.3rem;
      min-width: 4rem;
      background: #e0e0e0;
      padding: 0.5rem;
      font-size: 0.88rem;
      color: white;
      text-align: center;
      border-radius: 0.2rem;
      margin-left: 0.5rem;
      transition: 0.5s;
    }
    .btn-active {
      background: #409eff;
    }
  }
}
</style>192.168.0.115是我本地的IP地址(默认是 localhost ),你可以改成你自己的

然后npm run dev,就可以实现局域网聊天了,有无线的话可以用手机连着无线访问你的IP地址访问,?没的话可以试下多开几个窗口,也是能看到效果的!!
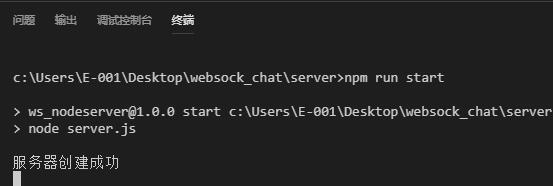
进入聊天室时和发送信息时服务器的打印日志
以上是“Vue+Websocket如何实现聊天功能”这篇文章的所有内容,感谢各位的阅读!相信大家都有了一定的了解,希望分享的内容对大家有所帮助,如果还想学习更多知识,欢迎关注亿速云行业资讯频道!
亿速云「云服务器」,即开即用、新一代英特尔至强铂金CPU、三副本存储NVMe SSD云盘,价格低至29元/月。点击查看>>
免责声明:本站发布的内容(图片、视频和文字)以原创、转载和分享为主,文章观点不代表本网站立场,如果涉及侵权请联系站长邮箱:is@yisu.com进行举报,并提供相关证据,一经查实,将立刻删除涉嫌侵权内容。


 计算
计算 安全
安全 数据库
数据库 网络和加速
网络和加速 企业服务
企业服务


