这篇文章给大家介绍怎么解析Vue2 cube-ui时间选择器,内容非常详细,感兴趣的小伙伴们可以参考借鉴,希望对大家能有所帮助。
vue2 整合 cube-ui 时间选择器(供有点点基础的看)
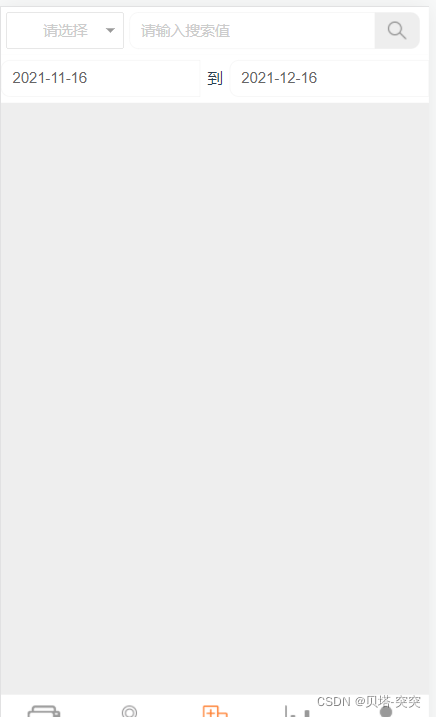
我们要在原搜索的情况下,加搜索时间
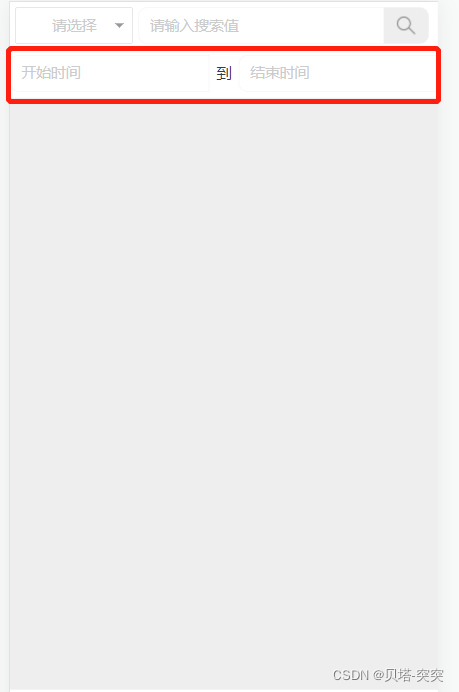
<div class="header">
      <cube-input v-on:focus="showMinPicker('startTime')" v-model="startTime" placeholder="开始时间" :maxlength=30 ></cube-input>
      <span>到</span>
      <cube-input v-on:focus="showMinPicker('endTime')" v-model="endTime" placeholder="结束时间" :maxlength=30 ></cube-input>
</div>解析:
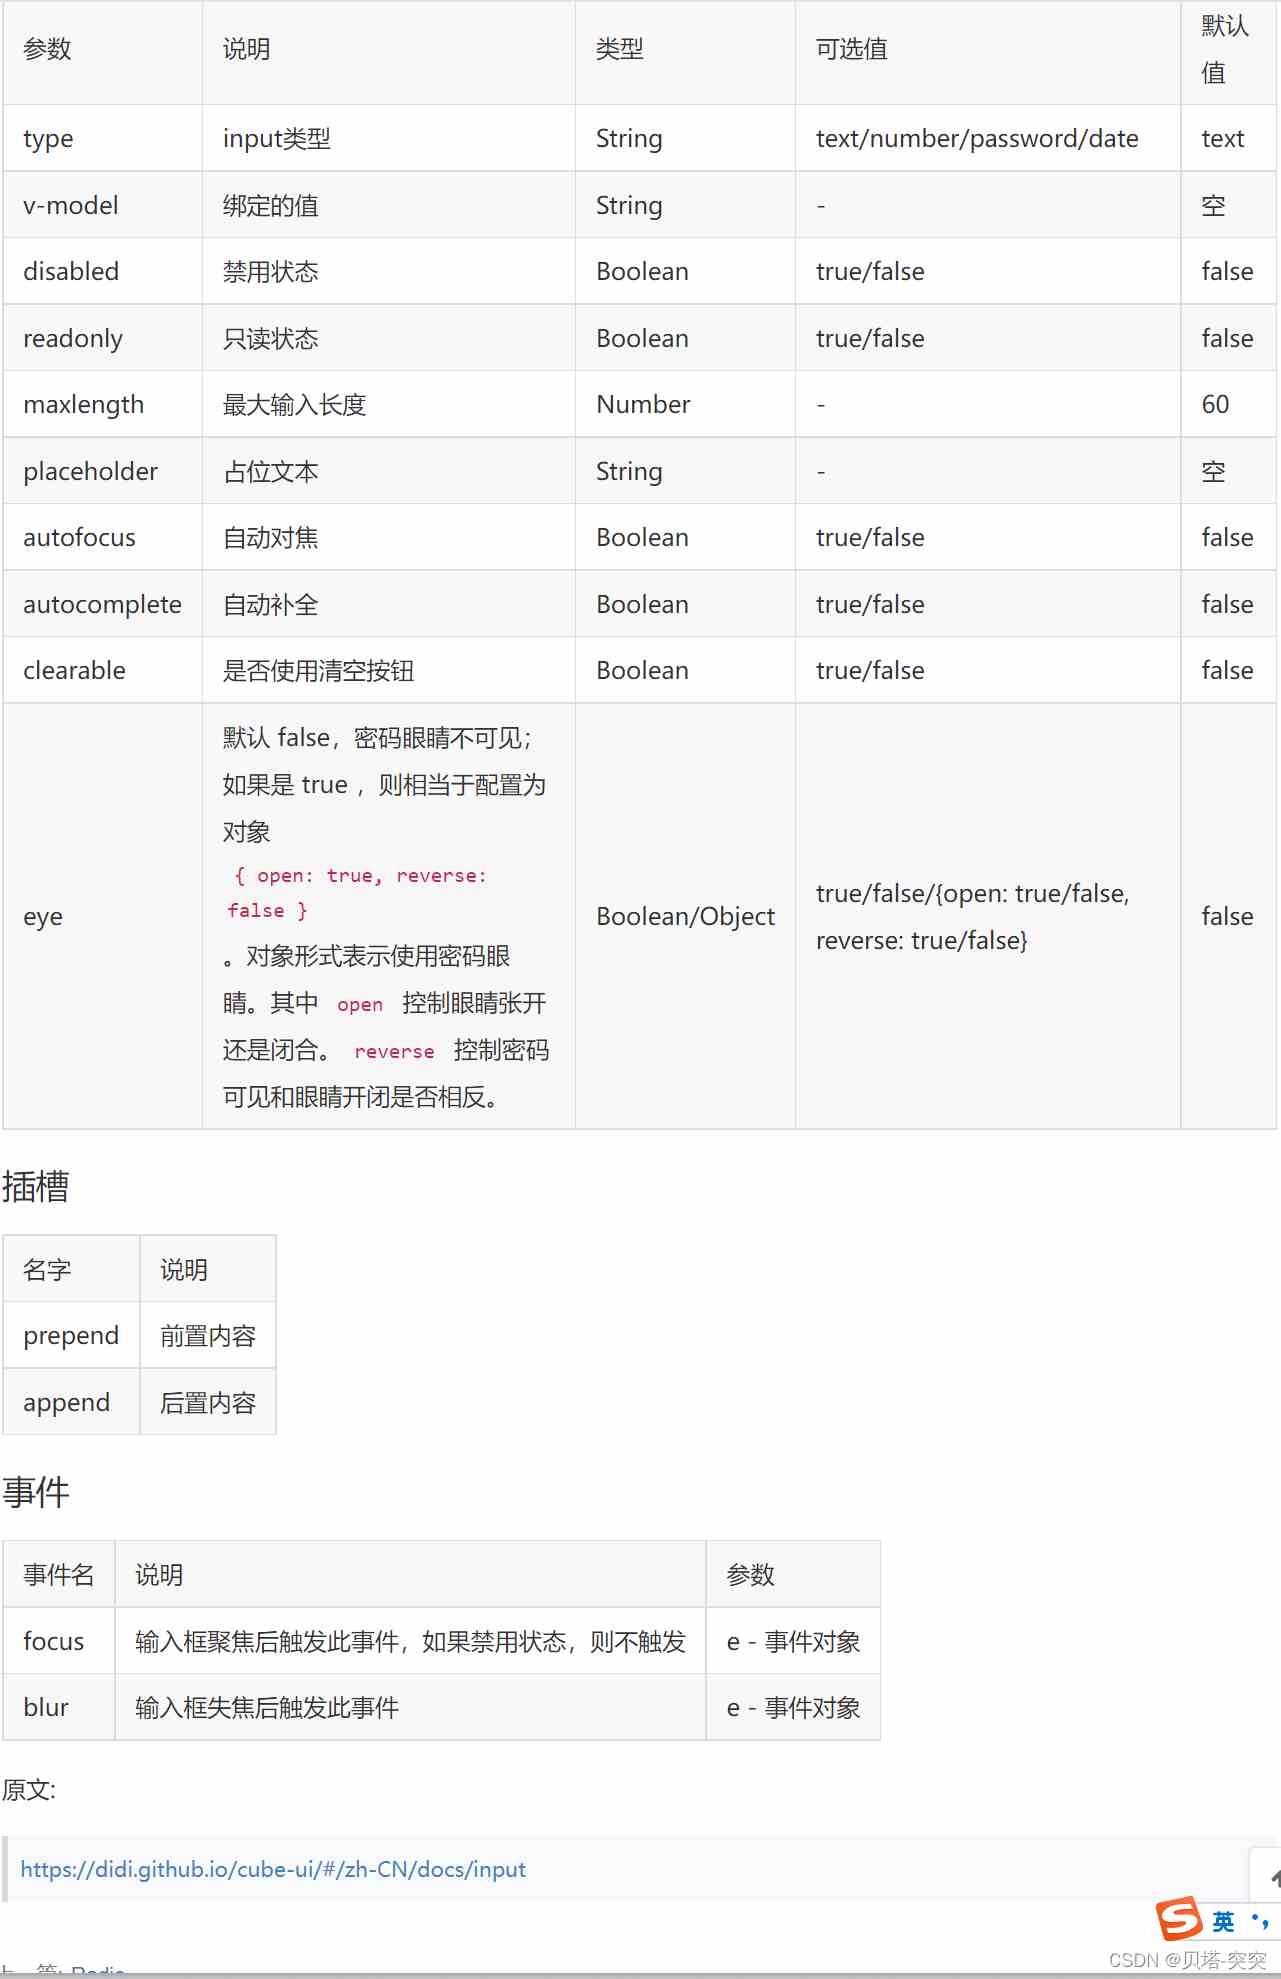
cube-input cube自带的输入框。
v-on:focus=“showMinPicker(‘startTime')” v-on监听事件,focus指的是输入框聚焦后触发此事件,如果禁用状态,则不触发。
v-model 双向绑定(用于时间显示)
maxlength 最大长度
data () {
    return {
      // 开始时间
      startTime: '',
      // 结束时间
      endTime: '',
      // 时间标识
      timeIdentifying: ''
    }
}methods: {
// 监听出发选择时间
showMinPicker (time) {
if (!this.minPicker) {
this.minPicker = this.$createDatePicker({
title: '选择时间',
visible: true,
// 最小时间
min: new Date(2000, 0, 1),
// 最大时间
max: new Date(2099, 12, 1),
// 当前时间
value: new Date(),
// 显示的格式
format: {
year: 'YYYY',
month: 'MM',
date: 'DD'
},
// 显示多少列
columnCount: 3,
// 选择时间确定后
onSelect: this.selectHandler,
// 选择时间取消后
onCancel: this.cancelHandler
})
}
// 选择时间标识
this.timeIdentifying = time
// 显示
this.minPicker.show()
},
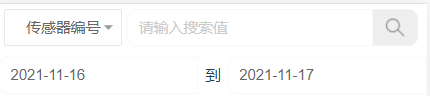
// 选择时间确定后 三个参数是不同的时间格式,可能根据自己需求定
selectHandler (selectedTime, selectedText, formatedTime) {
let time = ''
for (let index = 0; index < selectedText.length; index++) {
if (index === (selectedText.length - 1)) {
time += selectedText[index]
} else {
time += selectedText[index] + '-'
}
}
console.log('开始修改')
if (this.timeIdentifying === 'startTime') {
console.log('修改startTime')
this.startTime = time
} else if (this.timeIdentifying === 'endTime') {
console.log('修改endTime')
this.endTime = time
}
console.log('结束修改')
},
// 取消事件
cancelHandler () {
// 清空选择好的时间
this.startTime = ''
this.endTime = ''
}
}

关于怎么解析Vue2 cube-ui时间选择器就分享到这里了,希望以上内容可以对大家有一定的帮助,可以学到更多知识。如果觉得文章不错,可以把它分享出去让更多的人看到。
亿速云「云服务器」,即开即用、新一代英特尔至强铂金CPU、三副本存储NVMe SSD云盘,价格低至29元/月。点击查看>>
免责声明:本站发布的内容(图片、视频和文字)以原创、转载和分享为主,文章观点不代表本网站立场,如果涉及侵权请联系站长邮箱:is@yisu.com进行举报,并提供相关证据,一经查实,将立刻删除涉嫌侵权内容。


 计算
计算 安全
安全 数据库
数据库 网络和加速
网络和加速 企业服务
企业服务


