这篇文章主要介绍了Vue如何实现Google第三方登录的相关知识,内容详细易懂,操作简单快捷,具有一定借鉴价值,相信大家阅读完这篇Vue如何实现Google第三方登录文章都会有所收获,下面我们一起来看看吧。
1、进入开发者平台,首先前往Google API 控制台选择或者创建一个项目
谷歌开发者平台
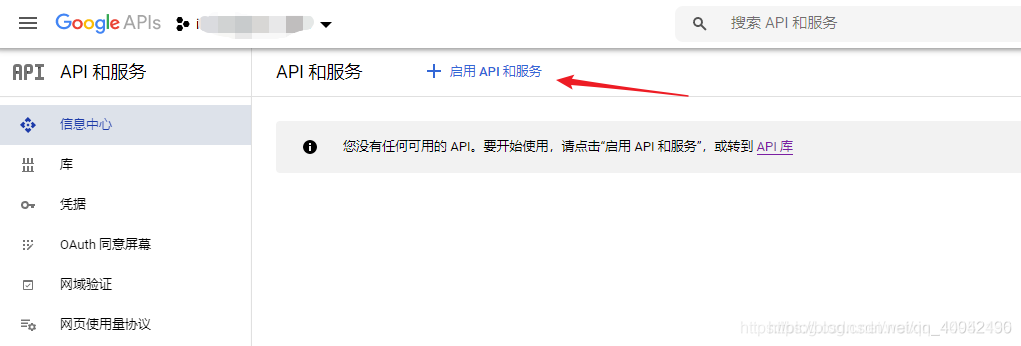
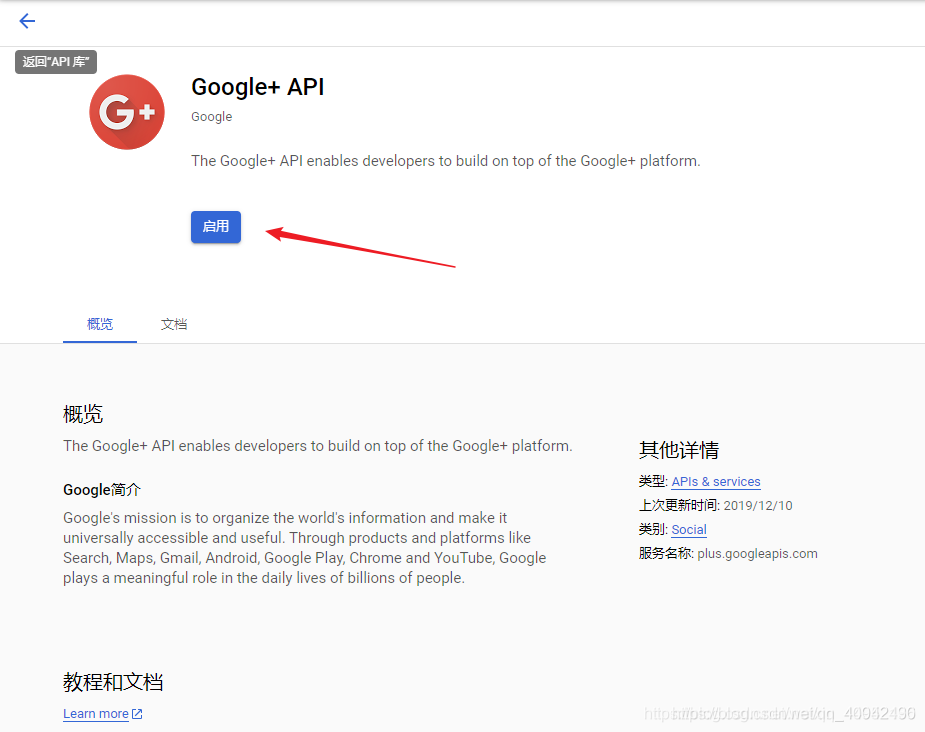
一堆眼花缭乱的API让你无从选择,但是你只要记住这次进来的目的是:社交API
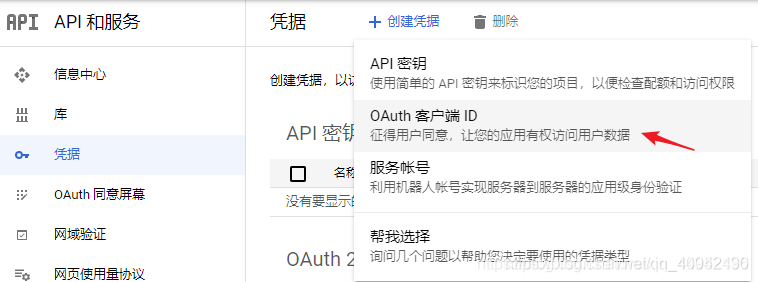
2.使用这个API之前还需要做一件事,那就是申请一个OAuth 2.0 客户端 ID
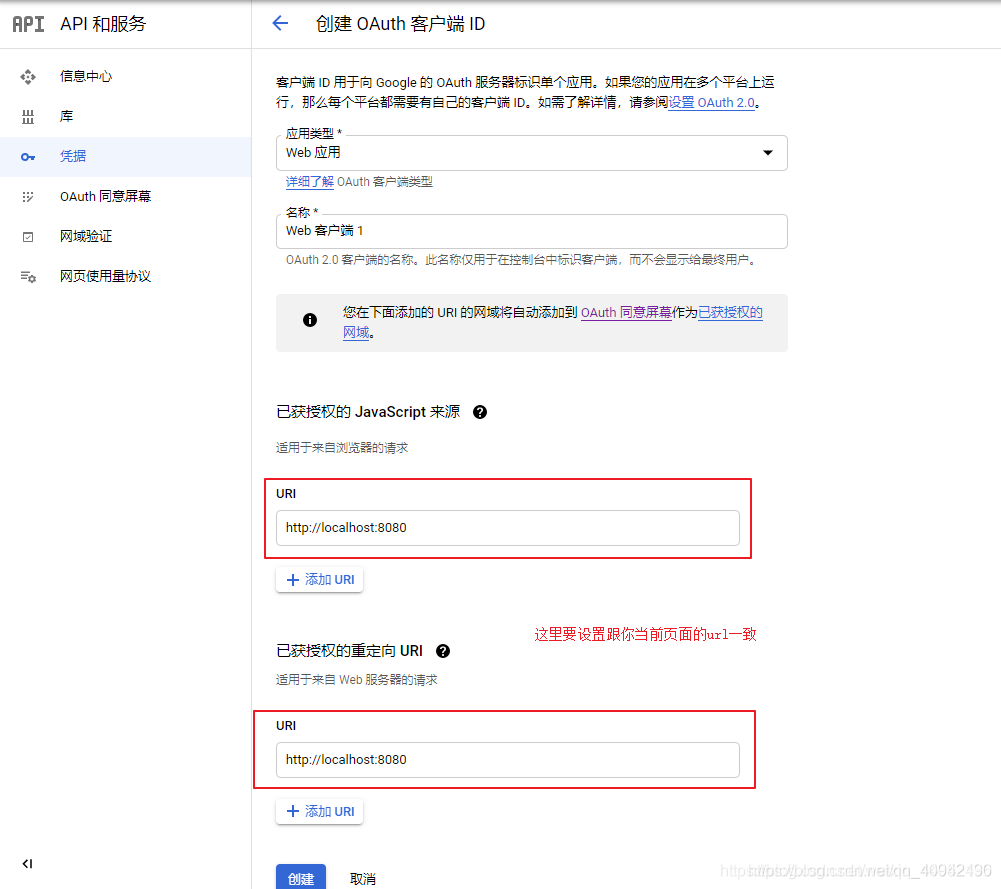
3按照要求填写你项目的类型、名称以及来源url
注:创建完成之后,页面也有一个弹窗将你申请的客户端ID已经密钥展示出来,没错这个就是一个生成的过程。
4、安装vue-google-signin-button
npm install vue-google-signin-button --save
5、在main.js中引入并注册
import GSignInButton from "vue-google-signin-button"
Vue.use(GSignInButton);
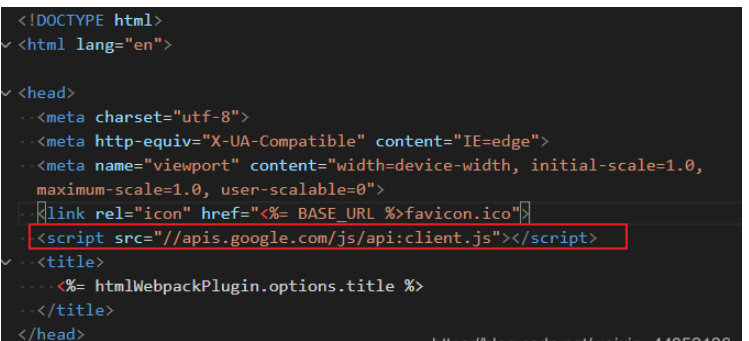
6.index.html引入js文件
<!--谷歌登录需要的依赖js-->
<script src="//apis.google.com/js/api:client.js"></script>
7、在login.vue中使用组件
<template>
  <g-signin-button
    :params="googleSignInParams"
    @success="onSignInSuccess"
    @error="onSignInError">
    Sign in with Google
  </g-signin-button>
</template>

<script>
export default {
  data () {
    return {
      /**
       * The Auth2 parameters, as seen on
       * https://developers.google.com/identity/sign-in/web/reference#gapiauth2initparams.
       * As the very least, a valid client_id must present.
       * @type {Object}
       */
      googleSignInParams: {
        client_id: "YOUR_APP_CLIENT_ID.apps.googleusercontent.com"
      }
    }
  },
  methods: {
    onSignInSuccess (googleUser) {
      console.log(googleUser)
      const profile = googleUser.getBasicProfile()
      console.log(profile)
    },
    onSignInError (error) {
      console.log("OH NOES", error)
    }
  }
}
</script>

<style>
.g-signin-button {
  /* This is where you control how the button looks. Be creative! */
  display: inline-block;
  padding: 4px 8px;
  border-radius: 3px;
  background-color: #3c82f7;
  color: #fff;
  box-shadow: 0 3px 0 #0f69ff;
}
</style>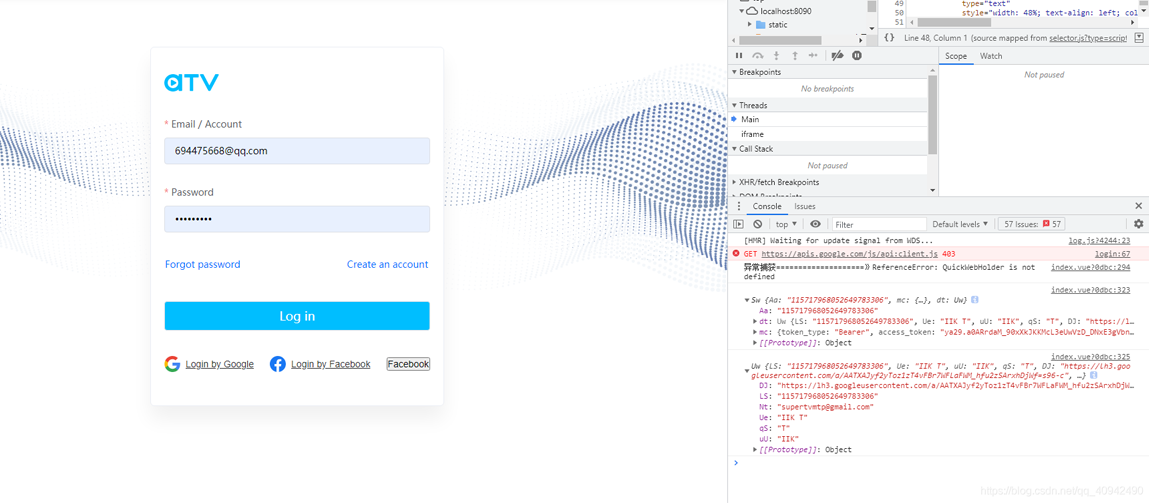
1、问题一:初始化没有引入js
你会发现在初始化的时候页面会出现一个报错。

出现这个问题的原因就是插件本身是没有引入Google.js文件。解决办法就是Vue的index.html中引入,详情看下图。
关于“Vue如何实现Google第三方登录”这篇文章的内容就介绍到这里,感谢各位的阅读!相信大家对“Vue如何实现Google第三方登录”知识都有一定的了解,大家如果还想学习更多知识,欢迎关注亿速云行业资讯频道。
免责声明:本站发布的内容(图片、视频和文字)以原创、转载和分享为主,文章观点不代表本网站立场,如果涉及侵权请联系站长邮箱:is@yisu.com进行举报,并提供相关证据,一经查实,将立刻删除涉嫌侵权内容。