这篇文章主要介绍了Vue如何实现通知或详情类弹窗,具有一定借鉴价值,感兴趣的朋友可以参考下,希望大家阅读完这篇文章之后大有收获,下面让小编带着大家一起了解一下。
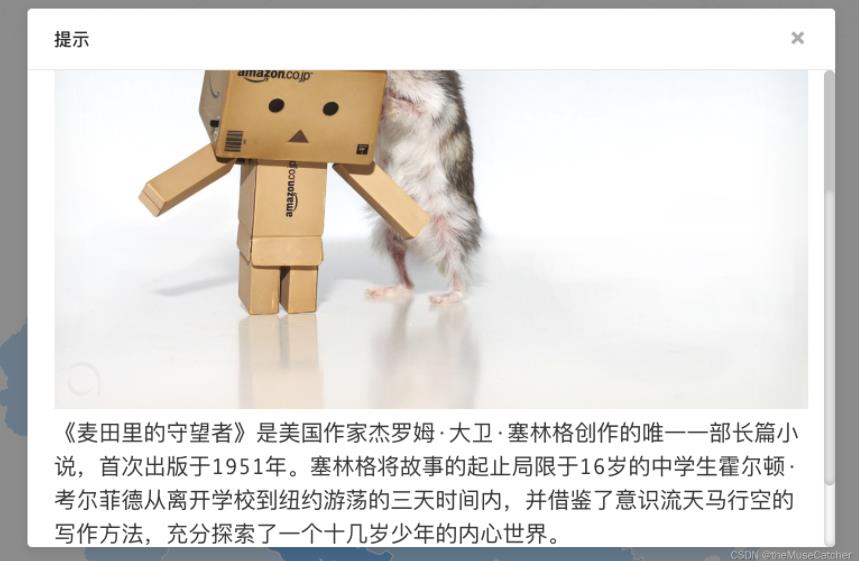
效果如图所示:(整体样式模仿ant-design-vue Modal样式,同时阴影覆盖浏览器窗口,并自定义滚动条样式)
①创建弹窗组件Dialog.vue:
<template>
<div class="m-dialog-mask">
<div class="m-modal">
<div class="m-modal-content">
<div @click="onClose" class="u-close">✖</div>
<div class="m-modal-header">
<div class="u-head">{{ title }}</div>
</div>
<div class="m-modal-body">
<p class="u-content" v-html="content"></p>
</div>
</div>
</div>
</div>
</template>
<script>
export default {
name: 'Dialog',
props: {
title: {
type: String,
default: '提示'
},
content: {
type: String,
default: ''
}
},
methods: {
onClose () {
this.$emit('close')
}
}
}
</script>
<style lang="less>
.m-dialog-mask {
position: fixed;
top: 0;
right: 0;
bottom: 0;
left: 0;
width: 100%;
height: 100%;
z-index: 1000000;
background: rgba(0,0,0,0.45);
.m-modal {
width: 720px;
position: relative;
top: calc(50% - 240px);
margin: 0 auto;
.m-modal-content {
position: relative;
background: #fff;
border-radius: 4px;
box-shadow: 0 4px 12px rgba(0,0,0,.1);
.u-close {
position: absolute;
top: 16px;
right: 24px;
color: rgba(0,0,0,.45);
font-size: 18px;
line-height: 22px;
cursor: pointer;
transition: color .3s;
&:hover {
color: rgba(0,0,0,.75);
}
}
.m-modal-header {
height: 22px;
padding: 16px 24px;
border-radius: 4px 4px 0 0;
border-bottom: 1px solid #e8e8e8;
.u-head {
margin: 0;
color: rgba(0,0,0,.85);
font-weight: 500;
font-size: 16px;
line-height: 22px;
word-wrap: break-word;
}
}
.m-modal-body {
height: 425px;
padding: 24px;
font-size: 16px;
line-height: 1.5;
word-wrap: break-word;
box-sizing: border-box;
overflow: auto;
.u-content {
width: 672px;
img { max-width: 100%; } // v-html中图片过大时,设置其样式最大宽度为100%
}
}
/* 自定义滚动条样式 */
.m-modal-body::-webkit-scrollbar {
width: 10px; /*对垂直流动条有效*/
height: 10px; /*对水平流动条有效*/
}
/*定义滚动条的圆角、内阴影及轨道样式*/
.m-modal-body::-webkit-scrollbar-track {
border-radius: 5px;
box-shadow: inset 0 0 6px rgba(0,0,0,.3);
background: #fff;
}
/* 滚动条上部轨道样式 */
.m-modal-body::-webkit-scrollbar-track-piece:vertical:start {
border-radius: 5px;
background: #c3c3c3;
}
/*定义圆角、内阴影及滑块样式*/
.m-modal-body::-webkit-scrollbar-thumb {
border-radius: 5px;
box-shadow: inset 0 0 6px rgba(0,0,0,.3);
background: #e8e8e8;
&:hover { // 悬浮或选中时滑块样式
background: #c9c9c9;
}
}
}
}
}
</style>②使用Dialog组件进行通知,详情类的展示:
<Dialog
      title="提示"
      :content="content"
      @close="onClose"
      v-show="showDialog"
      />

import Dialog from '@/components/Dialog'
components: {
    Dialog
}

data () {
    return {
      showDialog: false,
      content: '',
    }
}
methods: {
    onDialog (content) { // 调用Dialog弹窗展示
      this.content = content
      this.showDialog = true
    },
    onClose () { // 关闭dialog
      this.showDialog = false
    }
}感谢你能够认真阅读完这篇文章,希望小编分享的“Vue如何实现通知或详情类弹窗”这篇文章对大家有帮助,同时也希望大家多多支持亿速云,关注亿速云行业资讯频道,更多相关知识等着你来学习!
亿速云「云服务器」,即开即用、新一代英特尔至强铂金CPU、三副本存储NVMe SSD云盘,价格低至29元/月。点击查看>>
免责声明:本站发布的内容(图片、视频和文字)以原创、转载和分享为主,文章观点不代表本网站立场,如果涉及侵权请联系站长邮箱:is@yisu.com进行举报,并提供相关证据,一经查实,将立刻删除涉嫌侵权内容。


 计算
计算 安全
安全 数据库
数据库 网络和加速
网络和加速 企业服务
企业服务


