小编给大家分享一下freeswitch 1.6.17如何安装,希望大家阅读完这篇文章之后都有所收获,下面让我们一起去探讨吧!
先下载必要的依赖文件
wget http://downloads.xiph.org/releases/opus/opus-1.1.4.tar.gz
wget http://www.tortall.net/projects/yasm/releases/yasm-1.3.0.tar.gz
wget http://files.freeswitch.org/freeswitch-releases/freeswitch-1.6.17.tar.xz

mkdir cd_sounds
cd cd_sounds
wget http://files.freeswitch.org/releases/sounds/freeswitch-sounds-en-us-callie-8000-1.0.50.tar.gz
wget http://files.freeswitch.org/releases/sounds/freeswitch-sounds-en-us-callie-16000-1.0.50.tar.gz
wget http://files.freeswitch.org/releases/sounds/freeswitch-sounds-en-us-callie-32000-1.0.50.tar.gz
wget http://files.freeswitch.org/releases/sounds/freeswitch-sounds-en-us-callie-48000-1.0.50.tar.gz
wget http://files.freeswitch.org/releases/sounds/freeswitch-sounds-music-8000-1.0.50.tar.gz
wget http://files.freeswitch.org/releases/sounds/freeswitch-sounds-music-16000-1.0.50.tar.gz
wget http://files.freeswitch.org/releases/sounds/freeswitch-sounds-music-32000-1.0.50.tar.gz
wget http://files.freeswitch.org/releases/sounds/freeswitch-sounds-music-48000-1.0.50.tar.gz
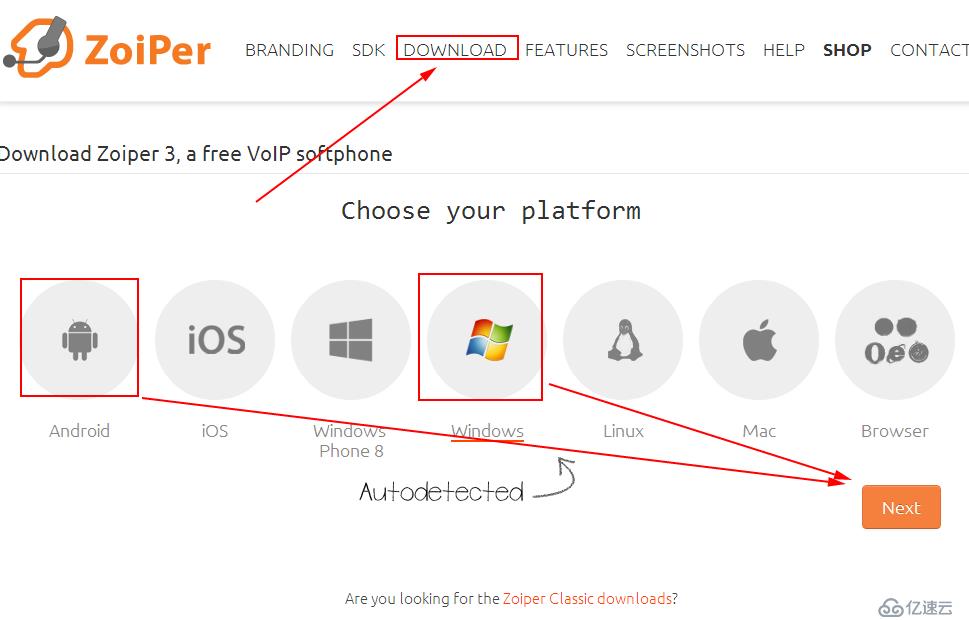
下载Zoiper,作为测试Freeswitch,好用且免费!
https://www.zoiper.com/en/voip-softphone/download/zoiper3?cid=home-dlb

下载的文件如何放置? --目录文件结构树,然后执行安装脚本
chunli@ubuntu:~$ tree install_freeswitch_2017.05.01-21-23/
install_freeswitch_2017.05.01-21-23/
├── cd_sounds
│   ├── freeswitch-sounds-en-us-callie-16000-1.0.50.tar.gz
│   ├── freeswitch-sounds-en-us-callie-32000-1.0.50.tar.gz
│   ├── freeswitch-sounds-en-us-callie-48000-1.0.50.tar.gz
│   ├── freeswitch-sounds-en-us-callie-8000-1.0.50.tar.gz
│   ├── freeswitch-sounds-music-16000-1.0.50.tar.gz
│   ├── freeswitch-sounds-music-32000-1.0.50.tar.gz
│   ├── freeswitch-sounds-music-48000-1.0.50.tar.gz
│   └── freeswitch-sounds-music-8000-1.0.50.tar.gz
├── freeswitch-1.6.17.tar.xz
├── install_on_CentOS_6.5.sh
├── install_on_ubuntu14.04.sh
├── opus-1.1.4.tar.gz
└── yasm-1.3.0.tar.gz

1 directory, 13 files
chunli@ubuntu:~$
CentOS 6.5 X86 基于Basic Server,root用户执行以下脚本:
chunli@CentOS->14_freeswitch_install$ cat install_on_CentOS_6.5.sh
#!/bin/bash
#CentOS 6.5 x86 Basic server

if [ 0 -ne `id -u` ]
then
    echo "You are not root user!"
    echo "Don't use sudo!"
    echo "should use 'su - '"
    exit
fi

WorkDir=`pwd`
yum install -y gcc
yum install -y gcc-c++
yum install -y zlib-devel
yum install -y libjpeg-turbo-devel
yum install -y sqlite-devel
yum install -y libcurl-devel
yum install -y pcre-devel
yum install -y speex-devel
yum install -y libedit-devel
yum install -y openssl-devel
yum install -y libsndfile-devel
yum install -y lua-devel


rm -rf ${WorkDir}/yasm-1.3.0
rm -rf ${WorkDir}/opus-1.1.4
rm -rf ${WorkDir}/freeswitch-1.6.17

cd ${WorkDir}
tar xf yasm-1.3.0.tar.gz
tar xf opus-1.1.4.tar.gz
tar xf freeswitch-1.6.17.tar.xz
cp ${WorkDir}/cd_sounds/*  ${WorkDir}/freeswitch-1.6.17/


yasm --version
if [ $? -ne 0 ]
then
    cd ${WorkDir}/yasm-1.3.0
    ./configure && make -j 4 && make install
fi


#这个可能会有点烦
cd ${WorkDir}/opus-1.1.4
./configure && make -j 4 && make install
cp /usr/local/lib/libopus.*         /usr/lib/
cp -r /root/opus/include/opus/opus* /usr/include/
mv /usr/local/lib/pkgconfig/opus.pc /usr/lib/pkgconfig/
ldconfig -v
export LD_LIBRARY_PATH=/lib:/usr/lib/:/usr/local/lib


cd ${WorkDir}/freeswitch-1.6.17
make distclean
sed -i 's@applications/mod_enum@#applications/mod_enum@g' modules.conf
./configure --prefix=${HOME}/freeswitch && make -j 4 && make install && make cd-sounds-install && make cd-moh-install

rm -rf ${WorkDir}/freeswitch-1.6.17
rm -rf ${WorkDir}/yasm-1.3.0
rm -rf ${WorkDir}/opus-1.1.4


#[1] start freeswitch
iptables -F
${HOME}/freeswitch/bin/freeswitch

#[2] shutdown freeswitch
#${HOME}/freeswitch/bin/freeswitch -stop
#${HOME}/freeswitch/bin/fs_cli -x "shutdown"

#[3] SIP设备连接freeswitch
#windows,android 可以安装X-Lite,Zoiper来连接freeswitch服务器


#测试拨打以下号码
#号码          说明
#------------- --------
#9664          保持音乐
#9196          echo,回音测试
#9195          echo,回音测试,延迟5秒
#9197          噪音生成
#9198          铃音生成示例
#9180          铃音测试,生成的回铃音
#9181          铃音测试,产生英式铃音
#9183          先应答,然后发送英式铃音
#9184          先应答,然后发送音乐铃音
#5000          示例IVR
#4000          听取语音信箱

#[4] 多个SIP设备互相语音测试
chunli@CentOS->14_freeswitch_install$
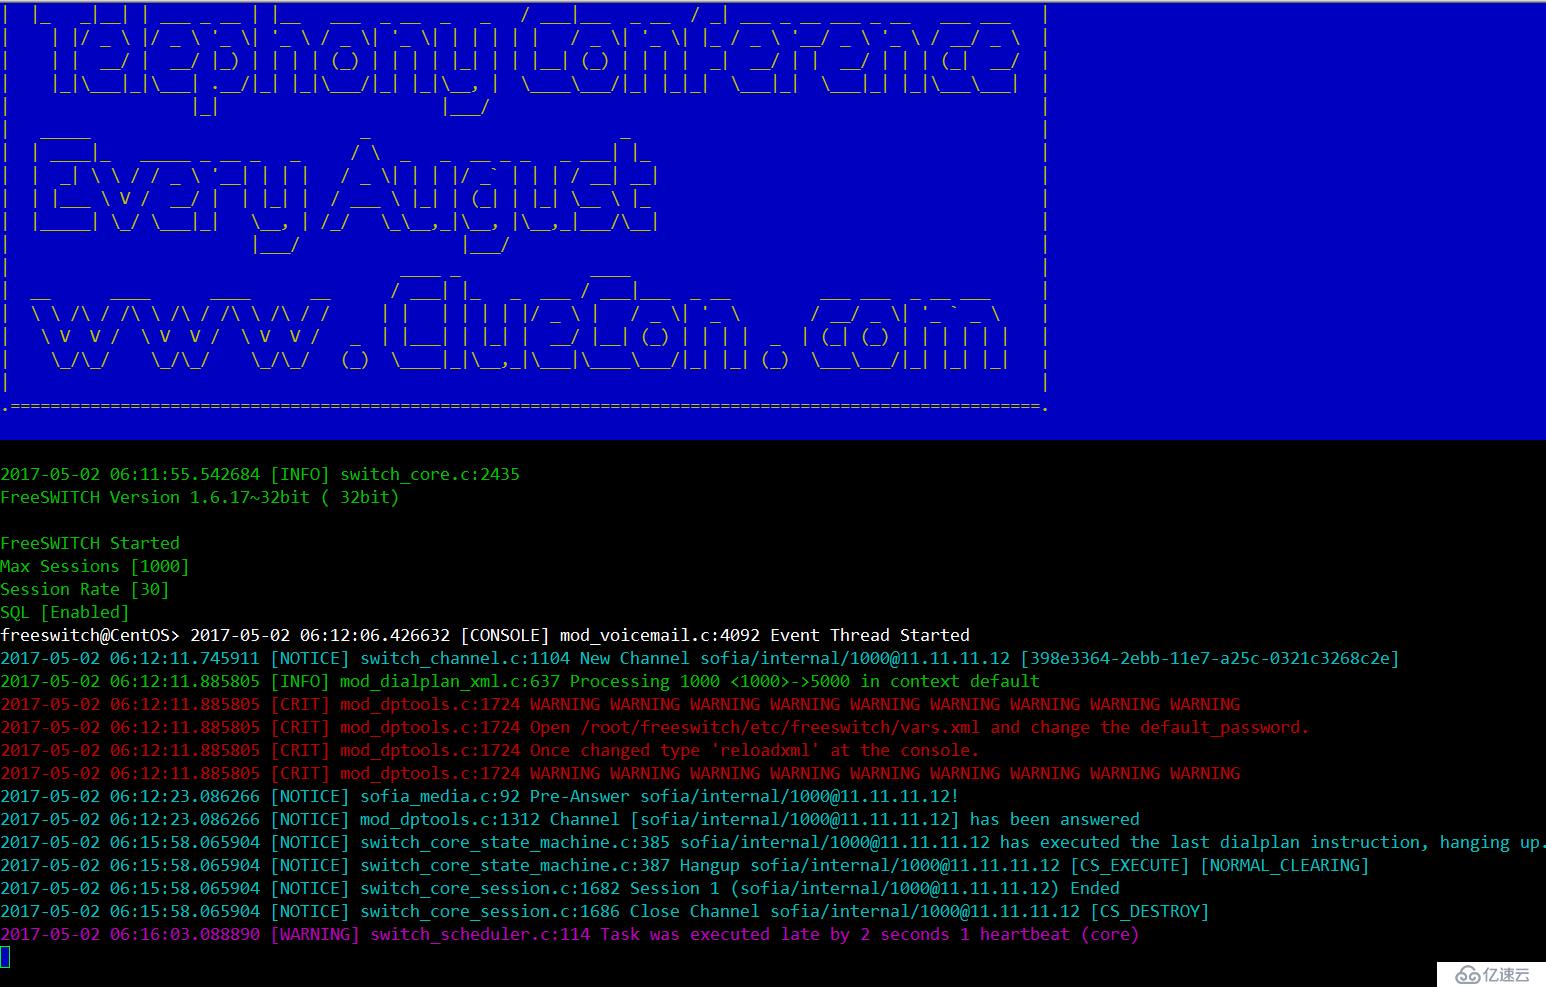
执行完毕,如下图,
这时可以拿起windows/Android的Zoiper软件,
添加SIP类型用户1000,密码1234,拨打5000听语音了.

Ubuntu14.04 x64, 带有root权限的普通用户执行以下脚本:
chunli@ubuntu:~/install_freeswitch_2017.05.01-21-23$ cat install_on_ubuntu14.04.sh
#install freeswitch for ubuntu 14.04
WorkDir=`pwd`
sudo apt-get update
sudo apt-get install -y vim
sudo apt-get install -y g++
sudo apt-get install -y zlib1g-dev
sudo apt-get install -y libjpeg-dev
sudo apt-get install -y libsqlite3-dev
sudo apt-get install -y libcurl4-gnutls-dev
sudo apt-get install -y libpcre3-dev
sudo apt-get install -y libspeexdsp-dev
sudo apt-get install -y libedit-dev
sudo apt-get install -y libssl-dev
sudo apt-get install -y libopus-dev
sudo apt-get install -y liblua5.2-dev
sudo apt-get install -y libldns-dev
sudo apt-get install -y libsndfile1-dev

sudo ln -s /usr/lib/x86_64-linux-gnu/liblua5.2.so.0.0.0 /usr/lib/x86_64-linux-gnu/liblua.so
sudo mv /usr/include/lua5.2/lua* /usr/include/
sudo mv /usr/include/opus/opus* /usr/include/
sudo mv /usr/lib/x86_64-linux-gnu/libsndfile* /usr/lib/
sudo ldconfig -v

cd ${WorkDir}
tar xf yasm-1.3.0.tar.gz
cd ${WorkDir}/yasm-1.3.0/
./configure && make && sudo make install

cd ${WorkDir}
tar xf freeswitch-1.6.17.tar.xz
cp cd_sounds/freeswitch-sounds-* freeswitch-1.6.17/
sudo rm -rf  ${HOME}/freeswitch
cd ${WorkDir}/freeswitch-1.6.17/
./configure --prefix=${HOME}/freeswitch && make -j 4 && make install && make cd-sounds-install && make cd-moh-install

rm -rf ${WorkDir}/freeswitch-1.6.17
rm -rf ${WorkDir}/yasm-1.3.0

#[1] start freeswitch
sudo iptables -F
${HOME}/freeswitch/bin/freeswitch
sleep 2

#[2] shutdown freeswitch
#${HOME}/freeswitch/bin/freeswitch -stop
#${HOME}/freeswitch/bin/fs_cli -x "shutdown"

#[3] SIP设备连接freeswitch
#windows,android 可以安装X-Lite,Zoiper来连接freeswitch服务器


#测试拨打以下号码
#号码          说明
#------------- --------
#9664          保持音乐
#9196          echo,回音测试
#9195          echo,回音测试,延迟5秒
#9197          噪音生成
#9198          铃音生成示例
#9180          铃音测试,生成的回铃音
#9181          铃音测试,产生英式铃音
#9183          先应答,然后发送英式铃音
#9184          先应答,然后发送音乐铃音
#5000          示例IVR
#4000          听取语音信箱

#[4] 多个SIP设备互相语音测试

chunli@ubuntu:~/install_freeswitch_2017.05.01-21-23$
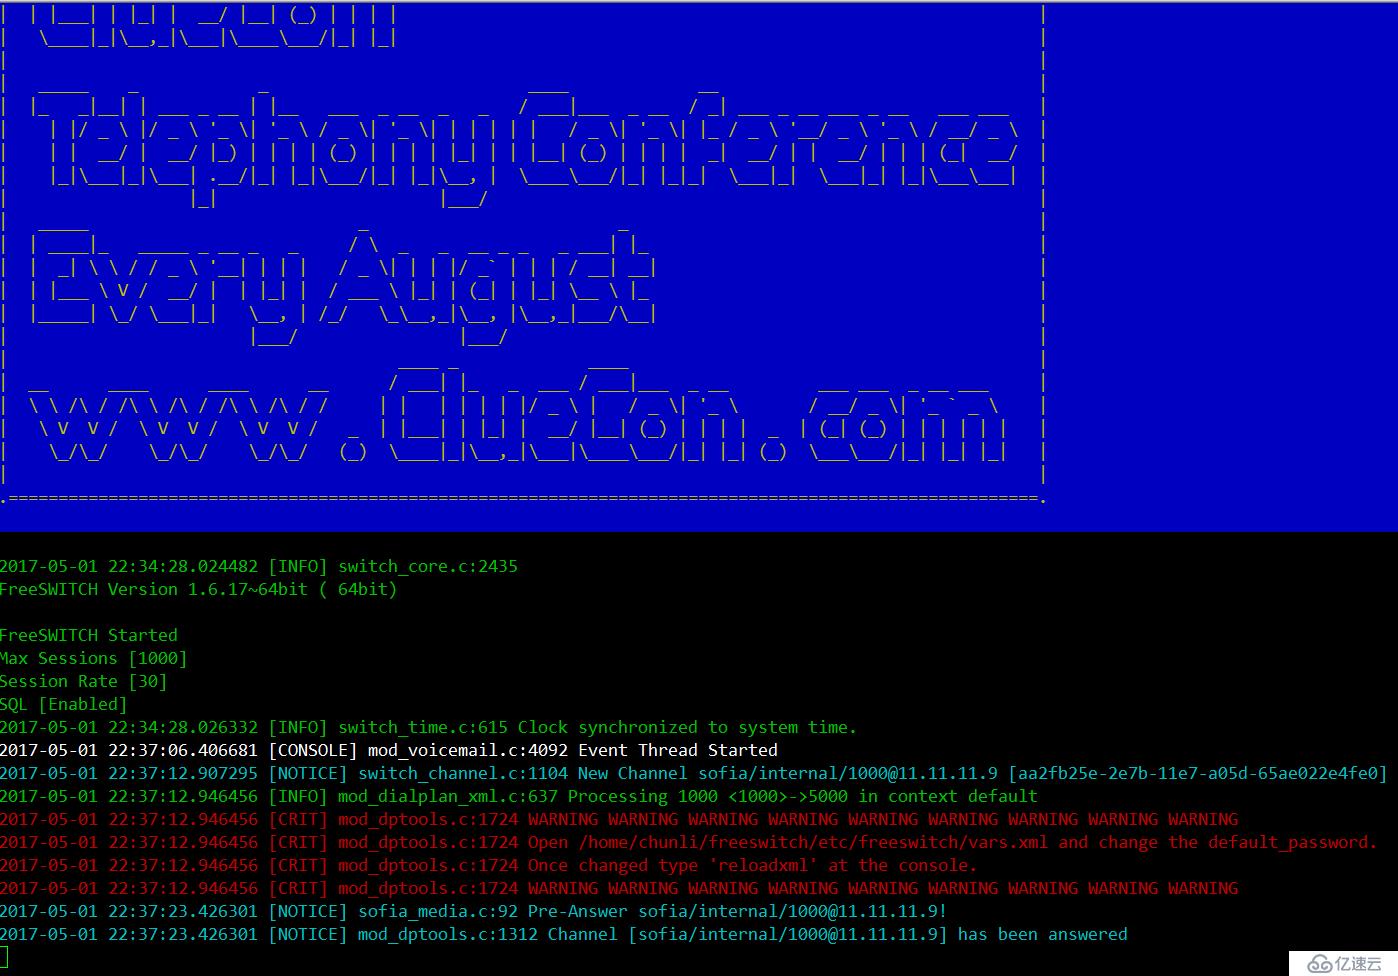
执行完毕,如下图,
这时可以拿起windows/Android的Zoiper软件,
添加SIP类型用户1000,密码1234,拨打5000听语音了.

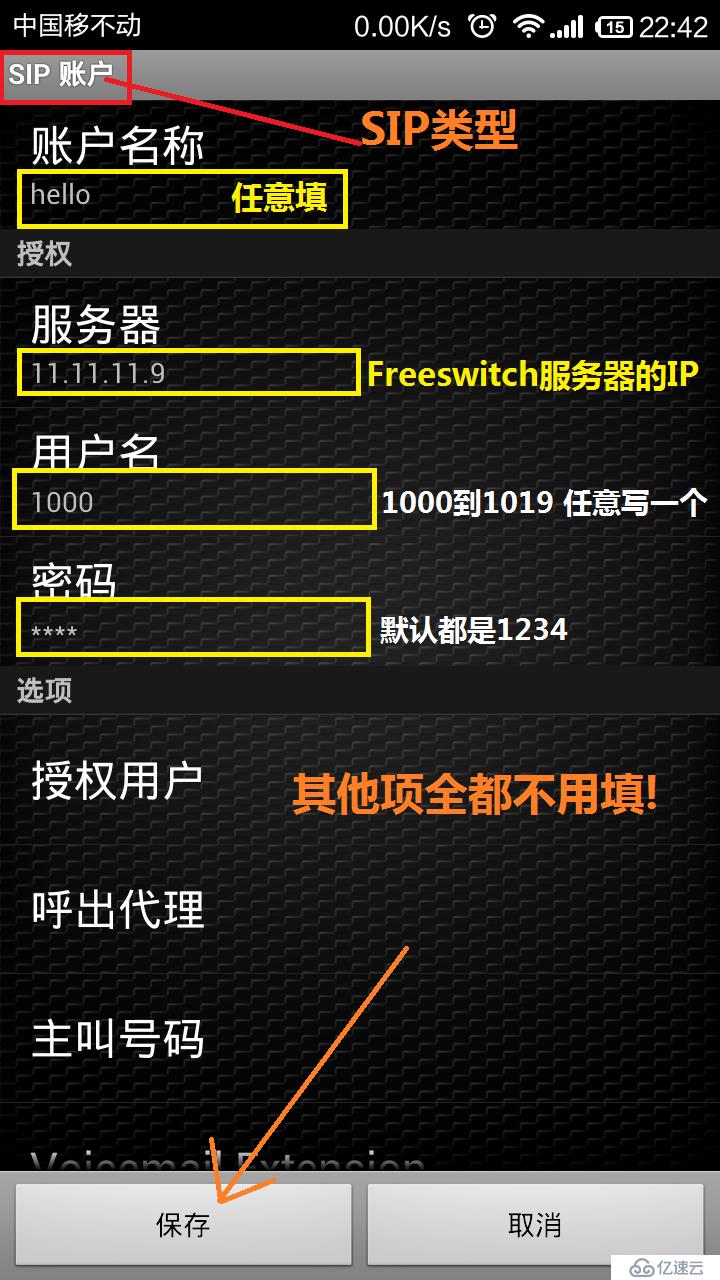
关于Zoiper最小可用的设置!

看完了这篇文章,相信你对“freeswitch 1.6.17如何安装”有了一定的了解,如果想了解更多相关知识,欢迎关注亿速云行业资讯频道,感谢各位的阅读!
免责声明:本站发布的内容(图片、视频和文字)以原创、转载和分享为主,文章观点不代表本网站立场,如果涉及侵权请联系站长邮箱:is@yisu.com进行举报,并提供相关证据,一经查实,将立刻删除涉嫌侵权内容。