这篇文章主要介绍了vue如何实现图片预览放大以及缩小效果的相关知识,内容详细易懂,操作简单快捷,具有一定借鉴价值,相信大家阅读完这篇vue如何实现图片预览放大以及缩小效果文章都会有所收获,下面我们一起来看看吧。
在vue的环境下实现图片放大缩小,可以使用viewerjs
1)首先安装依赖
npm i v-viewer --save2)全局注册(在main.js)以及引用css
//导入图片预览viewer组件以及css
import Viewer from 'v-viewer'
import 'viewerjs/dist/viewer.css'
Vue.use(Viewer);
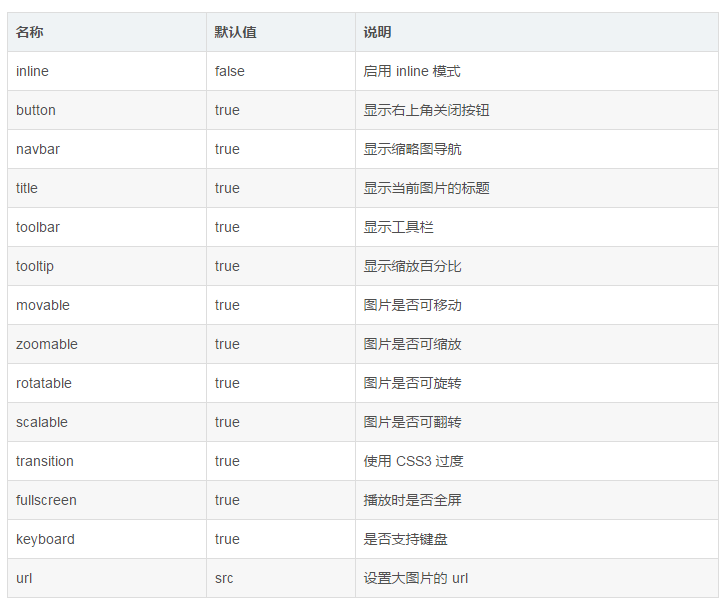
Viewer.setDefaults({
Options: { "inline": true, "button": true, "navbar": true, "title": true, "toolbar": true, "tooltip": true, "movable": true, "zoomable": true, "rotatable": true, "scalable": true, "transition": true, "fullscreen": true, "keyboard": true, "url": "data-source" }
});关于viewerjs中setDeafaults的配置下面有一张表,大家可以参考一下
这些工作都做完以后,然后可以在components(公共组件)文件下新建一个文件夹,命名看个人习惯,再新建一个以xxx.vue文件(同上,命名不做具体要求看个人习惯)。
在xxx.vue中写入
<template>
  <div class="content">
    <!-- <h2>Viewer图片预览插件</h2> -->
    <viewer :images="viewerList">
      <img
        v-for="src in viewerList"
        :src="src.icon"
        :key="src.id"

      />
    </viewer>
  </div>
</template>

<script>
export default {
  props: {
    viewerList: {
      type: Array,
      default: [],
    },
  },
  mounted() {},
  data() {
    return {};
  },
};
</script>

<style>
</style>因为已经全局注册过了,可以直接使用<viewer>标签 然后这个作为子组件。viewer绑定的一定要为数组,不然是会报错的(避坑)。
当这些都准备好的就可以在“父页面”使用了。
在父页面不要忘了引用以及注册
import viewer from "../../../components/viewer/viewer-preview.vue";
export default {
  name: "business",
  components: { viewer },
}仅展示了关键代码,其他的data(){ return{ } }等等按需写入。
注册完以后在需要用到的地方直接写入,数据的都是通过父传子props的方式
  <Table :columns="figurenHeader" :data="figurenData">
          <template slot-scope="{ row }" slot="img">
            <div >
              <viewer :viewerList="row.iconUrlList"></viewer>
            </div>
          </template>
</Table>因为使用的是table里面的插槽,所以传入的数据为row.iconUrlList. 这样整个工作就算是结束了。
这张图是显示的图片放大的一个预览情况,这里是参考预览操作实现的一个背景为黑色的部分,上层的图片可实现滚轮放大或者点击上部的放大镜图标进行放大,代码是基于Ant Design Vue框架的基础上
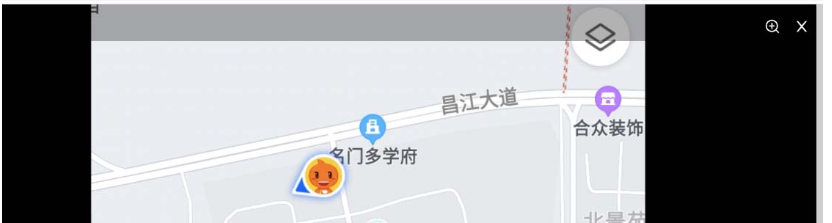
这里先分解部分,后面有全部代码
1.需要有黑色背景用于预览背景:
这里的背景要占满整个屏幕(这里的一般是参考其他插件预览的样式进行模拟设计的),样式在后方代码内
2.展示图片并且把图片展示到背景板最中间。
3.最重要的下方的两部分:
bbimg() {
      let e = e || window.event
      this.params.zoomVal += e.wheelDelta / 1200
      if (this.params.zoomVal >= 0.2) {
        this.test = `transform:scale(${this.params.zoomVal});`
      } else {
        this.params.zoomVal = 0.2
        this.test = `transform:scale(${this.params.zoomVal});`
        return false
      }
},imgMove(e) {
console.log('e', e)
let oImg = e.target
let disX = e.clientX - oImg.offsetLeft
let disY = e.clientY - oImg.offsetTop
console.log('disX', disX)
document.onmousemove = (e) => {
e.preventDefault()
let left = e.clientX - disX
let top = e.clientY - disY
this.test = this.test + `left: ${left}px;top: ${top}px;`
}
document.onmouseup = (e) => {
document.onmousemove = null
document.onmouseup = null
}
},这里的test和classStyle是作为图片的动态样式,虽然名字起得着急,但是不影响使用
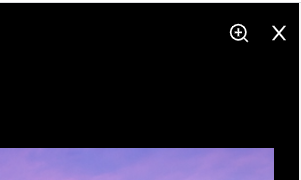
点击图片,可以进行滚轮放大及缩小,
点击后按压左键可进行拖拽查看图片
点击上方的放大及缩小图标也可以进行放大等操作,
点击 x 可关于预览
点击关闭后,恢复大小,避免点击其他照片影响大小
下面是全部实现代码:
<template>
<a-card >
<div>
<img
:src="file"
alt=""
@click="handlePhotoShow(file)"
/>
<!-- preview="0"
preview-text="图片" -->
</div>
<div class="showImg" v-if="pictShow" @mousewheel="bbimg(this)">
<div class="setting_box">
<a-icon
class="setting_zoom"
v-if="zoomInShow == false"
type="zoom-in"
@click="handleZoomIn"
/>
<a-icon
color="#fff"
class="setting_zoom"
v-if="zoomInShow == true"
type="zoom-out"
@click="handleZoomOut"
/>
<a-icon color="#fff" class="setting_close" type="close" @click="handleClose" />
</div>
<img :src="file" alt="" :class="classStyle" : @mousedown="imgMove" />
</div>
</a-card>
</template>
<script>
export default {
data() {
return {
test: '',
pictShow: false,
zoomInShow: false,
params: {
zoomVal: 1,
left: 0,
top: 0,
currentX: 0,
currentY: 0,
flag: false,
},
file: '',
}
},
computed: {
classStyle() {
return this.zoomInShow ? 'a1' : 'a2'
},
},
methods: {
// 实现图片放大缩小
bbimg() {
let e = e || window.event
this.params.zoomVal += e.wheelDelta / 1200
if (this.params.zoomVal >= 0.2) {
this.test = `transform:scale(${this.params.zoomVal});`
} else {
this.params.zoomVal = 0.2
this.test = `transform:scale(${this.params.zoomVal});`
return false
}
},
// 实现图片拖拽
imgMove(e) {
      console.log('e', e)
      let oImg = e.target
      let disX = e.clientX - oImg.offsetLeft
      let disY = e.clientY - oImg.offsetTop
      console.log('disX', disX)
      document.onmousemove = (e) => {
        e.preventDefault()
        let left = e.clientX - disX
        let top = e.clientY - disY
        this.test = this.test + `left: ${left}px;top: ${top}px;`
      }
      document.onmouseup = (e) => {
        document.onmousemove = null
        document.onmouseup = null
      }
    },
handleZoomIn() {
this.zoomInShow = true
},
handleZoomOut() {
this.zoomInShow = false
},
handlePhotoShow(file) {
console.log('file', file)
this.file = file
this.pictShow = true
},
handleClose() {
this.pictShow = false
this.test = `transform:scale(1)`
},
},
}
</script>
<style scoped lang="less">
.showImg {
width: 100%;
height: 100vh;
background-color: rgba(0, 0, 0, 1);
position: fixed;
*position: absolute;
z-index: 20;
margin: 0 auto;
top: 0;
left: 0;
display: flex;
justify-content: center;
align-items: center;
.setting_box {
width: 100%;
height: 50px;
line-height: 50px;
font-size: 20px;
background-color: rgba(0, 0, 0, 0.3);
position: absolute;
top: 0;
z-index: 999;
.setting_zoom,
.setting_close {
position: absolute;
z-index: 1000;
top: 20px;
color: #fff;
opacity: 1;
}
.setting_zoom {
right: 50px;
}
.setting_close {
right: 10px;
}
}
}
.a1 {
max-width: 200vw;
max-height: 180vh;
position: absolute;
z-index: 22;
margin-top: 40px;
cursor: move;
}
.a2 {
max-width: 95vw;
max-height: 90vh;
position: absolute;
z-index: 22;
margin-top: 40px;
cursor: move;
}
.zoom-box {
cursor: zoom-in;
}
.photo_box {
margin: 0 5px 5px 0;
}
</style>因为具体也是查看了很多博客等资源最后完成的。
其实在代码内有一部分代码:
<img
	:src="file"
	preview="0"
	preview-text="图片"
	alt=""
	@click="handlePhotoShow(file)"
/>其实有 preview="0" preview-text="图片" 这两行实现图片的预览,但是找了资料没找到具体实现的部分,但是这个属性确实实现了,这里手写预览的原因是这个插件在数量大的情况下是没有反应的。
关于“vue如何实现图片预览放大以及缩小效果”这篇文章的内容就介绍到这里,感谢各位的阅读!相信大家对“vue如何实现图片预览放大以及缩小效果”知识都有一定的了解,大家如果还想学习更多知识,欢迎关注亿速云行业资讯频道。
亿速云「云服务器」,即开即用、新一代英特尔至强铂金CPU、三副本存储NVMe SSD云盘,价格低至29元/月。点击查看>>
免责声明:本站发布的内容(图片、视频和文字)以原创、转载和分享为主,文章观点不代表本网站立场,如果涉及侵权请联系站长邮箱:is@yisu.com进行举报,并提供相关证据,一经查实,将立刻删除涉嫌侵权内容。


 计算
计算 安全
安全 数据库
数据库 网络和加速
网络和加速 企业服务
企业服务


