这篇文章主要介绍“markdown编辑器tui.editor如何使用”的相关知识,小编通过实际案例向大家展示操作过程,操作方法简单快捷,实用性强,希望这篇“markdown编辑器tui.editor如何使用”文章能帮助大家解决问题。
npm install @toast-ui/editor -S
import Editor from '@toast-ui/editor'
import '@toast-ui/editor/dist/toastui-editor.css'
import '@toast-ui/editor/dist/i18n/zh-cn';
export default {
    mounted () {
      const editor = new Editor({
        el: this.$refs.editor,
        language: 'zh-CN',
        initialEditType: 'markdown',
        previewStyle: 'vertical',
      });
    }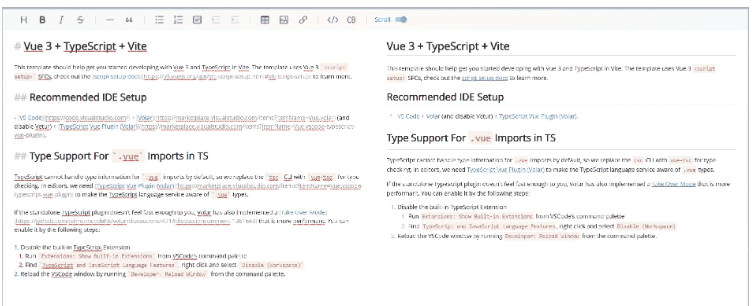
}通过以上两步,我们就能得到一个简易的编辑器了,如下图所示:
显然我们的目的不仅如此,markdown编辑器还缺少语法高亮、目录栏,接下来我们看下如何扩展tui
官方内置了以下插件:
| 插件名称 | 用途 |
|---|---|
@toast-ui/editor-plugin-chart | 图形渲染 |
@toast-ui/editor-plugin-code-syntax-highlight | 语法高亮 |
@toast-ui/editor-plugin-color-syntax | 文本添加颜色 |
@toast-ui/editor-plugin-table-merged-cell | 合并单元格 |
@toast-ui/editor-plugin-uml | 渲染UML |
接下来我们配置代码语法高亮。
安装插件
npm install @toast-ui/editor-plugin-code-syntax-highlight
使用
import 'prismjs/themes/prism.css';
import '@toast-ui/editor-plugin-code-syntax-highlight/dist/toastui-editor-plugin-code-syntax-highlight.css';
import Editor from '@toast-ui/editor';
// 支持所有语言语法高亮
import codeSyntaxHighlight from '@toast-ui/editor-plugin-code-syntax-highlight/dist/toastui-editor-plugin-code-syntax-highlight-all.js';
const editor = new Editor({
  // ...
  plugins: [codeSyntaxHighlight]
});目前编辑器包含了语法高亮,如果需要添加目录索引,可以监听文档编辑的change事件,获取markdown文档内容,通过正则表达式解析即可。具体实现如下:
const editor = new Editor({
  // ...
  events: {
    change: this.handleContentChange.bind(this)
  },
});
methods: {
  handleContentChange () {
    const mdText = this.editor.mdEditor.getMarkdown()
    this.parseMdTitle(mdText)
  },
  parseMdTitle (mdText) { // 解析markdown title
    const pattern = /^(#+)\s+(.+)/mg
    let result = mdText.match(pattern)
    if (!result) return
    const catalogList = result.map((vv, index) => {
      const levelText = vv.match(/^(#+)/)
      return {
        level: levelText[0].length, // 目录级别
        index,
        cls: `heading-${levelText[0].length}`,
        content: vv.slice(levelText[0].length).trim(), // 内容
      }
    })
    this.catalogList = catalogList
  }
}以上仅仅是一些基础的使用。markdown基础语法无法满足我们需要时、需要手动修改渲染样式等需求,tui.editor也提供相应的能力。如需要修改标题的默认渲染样式,我们可以使用customHTMLRenderer,这一块官方文档较少,可以从源码看出默认书写规则,内置schema位置详见源码libs\toastmark\src\html\baseConvertors.ts。
new Editor({
  // ...
  customHTMLRenderer: {
    heading (node, { entering }) {
      const spec = {
        type: entering ? 'openTag' : 'closeTag',
        tagName: `h${node.level}`,
        outerNewLine: true,
      };
      // 给每个header添加class
      if (entering) spec.attributes = {
        'class': `heading${node.level}`
      }
      return spec
    }
  }
})最新3.0版本的编辑器是基于Prosemirror,有兴趣的小伙伴可以去看下,功能十分强大,也是level1级富文本编辑器的典型代表。
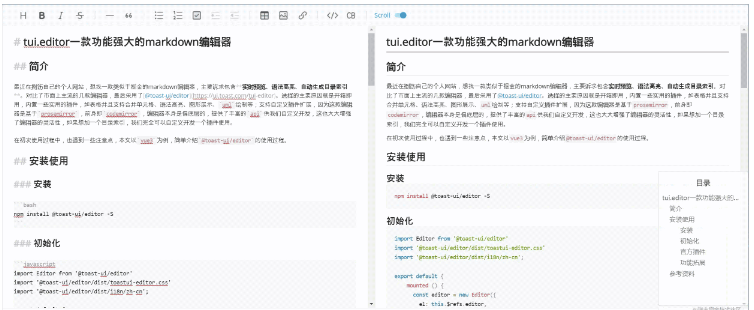
编辑器最终效果图如下:
<template>
  <div class="full">
    <div class="markdown-editor" ref="editor"></div>
    <div class="catalog-container" v-if="catalogList.length > 0">
      <div class="catalog-title">目录</div>
      <template v-for="(item, index) in catalogList" :key="index">
        <div class="catalog-item" :class="item.cls">
          <a :href="'#heading' + (index + 1)" rel="external nofollow" >{{item.content}}</a>
        </div>
      </template>
    </div>
  </div>
</template>
<script>
  import Editor from '@toast-ui/editor'
  import '@toast-ui/editor/dist/toastui-editor.css'
  import '@toast-ui/editor/dist/i18n/zh-cn';
  import 'prismjs/themes/prism.css';
  import '@toast-ui/editor-plugin-code-syntax-highlight/dist/toastui-editor-plugin-code-syntax-highlight.css';
  import codeSyntaxHighlight from '@toast-ui/editor-plugin-code-syntax-highlight/dist/toastui-editor-plugin-code-syntax-highlight-all.js';
  import '@toast-ui/editor-plugin-table-merged-cell/dist/toastui-editor-plugin-table-merged-cell.css';
  import tableMergedCell from '@toast-ui/editor-plugin-table-merged-cell';
  export default {
    data () {
      return {
        catalogList: []
      }
    },
    mounted () {
      this.editor = new Editor({
        el: this.$refs.editor,
        language: 'zh-CN',
        initialEditType: 'markdown',
        previewStyle: 'vertical',
        placeholder: '请输入内容',
        plugins: [codeSyntaxHighlight, tableMergedCell],
        events: {
          change: this.handleContentChange.bind(this)
        },
        customHTMLRenderer: {
          heading (node, { entering }) {
            const spec = {
              type: entering ? 'openTag' : 'closeTag',
              tagName: `h${node.level}`,
              outerNewLine: true,
            };
            // 添加自定义属性
            if (entering) spec.attributes = {
              'class': `heading${node.level}`
            }
            return spec
          }
        }
      })
    },
    methods: {
      handleContentChange () {
        const mdText = this.editor.mdEditor.getMarkdown()
        this.parseMdTitle(mdText)
      },
      parseMdTitle (mdText) { // 解析markdown title
        const pattern = /^(#+)\s+(.+)/mg
        let result = mdText.match(pattern)
        if (!result) return
        const catalogList = result.map((vv, index) => {
          const levelText = vv.match(/^(#+)/)
          return {
            level: levelText[0].length, // 目录级别
            index,
            cls: `heading-${levelText[0].length}`,
            content: vv.slice(levelText[0].length).trim(), // 内容
          }
        })
        this.catalogList = catalogList
      }
    }
  }
</script>
<style scoped>
  .full {
    position: relative
  }
  .catalog-container {
    box-sizing: border-box;
    position: absolute;
    right: 0;
    bottom: 32px;
    width: 200px;
    height: 300px;
    padding: 16px 0;
    background-color: rgba(255, 255, 255, .65);
    border: 1px solid #ccc;
    border-radius: 4px;
  }
  .catalog-title {
    text-align: center;
    padding-bottom: 12px;
  }
  .catalog-item {
    overflow: hidden;
    text-overflow: ellipsis;
    white-space: nowrap;
    padding: 4px 8px;
    font-size: 14px;
    user-select: none;
  }
  .catalog-item a {
    color: rgba(0, 0, 0, .65);
    text-decoration: none;
  }
  .heading-2 {
    padding-left: 24px;
  }
  .heading-3 {
    padding-left: 48px;
  }
  .catalog-item a:hover {
    color: cadetblue;
  }
  .markdown-editor {
    height: 100% !important;
    background: #fff;
    border-radius: 4px;
  }
</style>关于“markdown编辑器tui.editor如何使用”的内容就介绍到这里了,感谢大家的阅读。如果想了解更多行业相关的知识,可以关注亿速云行业资讯频道,小编每天都会为大家更新不同的知识点。
亿速云「云服务器」,即开即用、新一代英特尔至强铂金CPU、三副本存储NVMe SSD云盘,价格低至29元/月。点击查看>>
免责声明:本站发布的内容(图片、视频和文字)以原创、转载和分享为主,文章观点不代表本网站立场,如果涉及侵权请联系站长邮箱:is@yisu.com进行举报,并提供相关证据,一经查实,将立刻删除涉嫌侵权内容。


 计算
计算 安全
安全 数据库
数据库 网络和加速
网络和加速 企业服务
企业服务


