ASIHTTPRequest是一个对CFNetwork API进行了封装,并且使用起来非常简单的一套API,用Objective-C编写,可以很好的应用在Mac OS X系统和iOS平台的应用程序中。ASIHTTPRequest适用于基本的HTTP请求,和基于REST的服务之间的交互。如果想要在项目中使用asihttprequest,需要进行如下的配置:
1:首先需要有ASIHTTPRequest 的资源包。下载地址:http://down.51cto.com/data/1984747
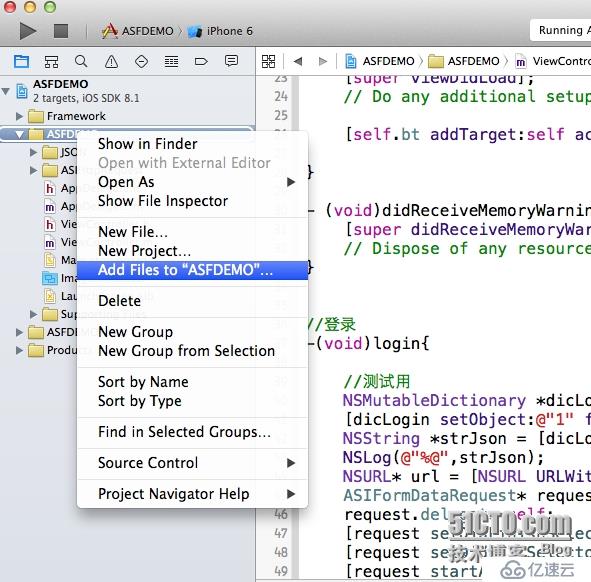
2:在xcode 中右键项目选择“Add Files to ”选项:如下图

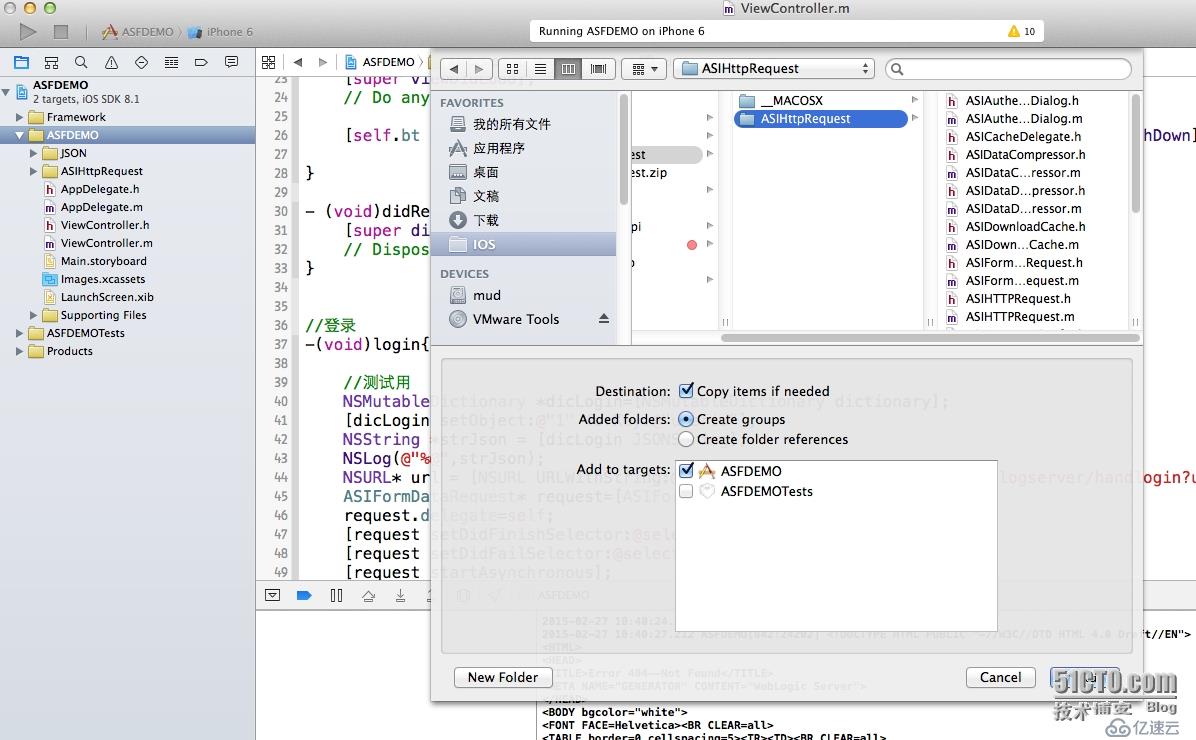
3:选择第1步准备好的asi的类库源文件,如下图:

选择Copy items if needed .
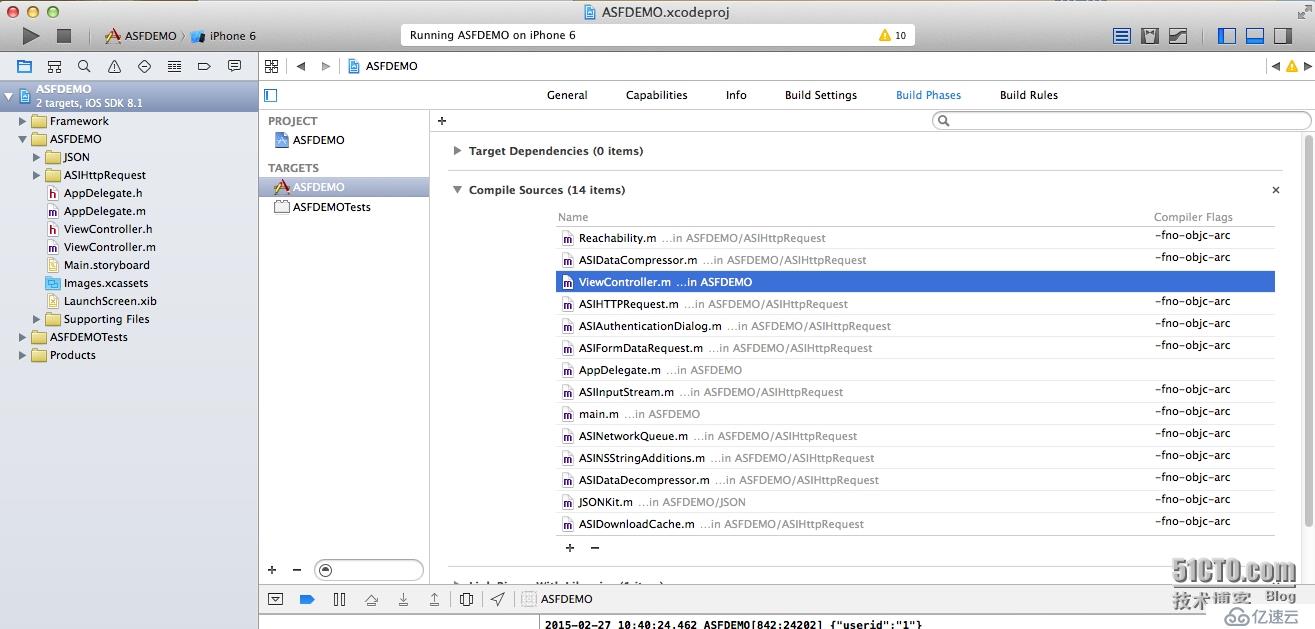
这样ASI的类库源文件就已经添加完毕了。接下来,我们要设置ASI的源文件不使用ARC机制,具体做法就是在项目中的ASI源文件中的Complier Flags 中设置为 -fno-objc-arc 。首先选中项目的targets 的Build Phases ,如下图:

就是双击每个ASI源文件的Complier Flags 然后填上 -fno-objc-arc 。
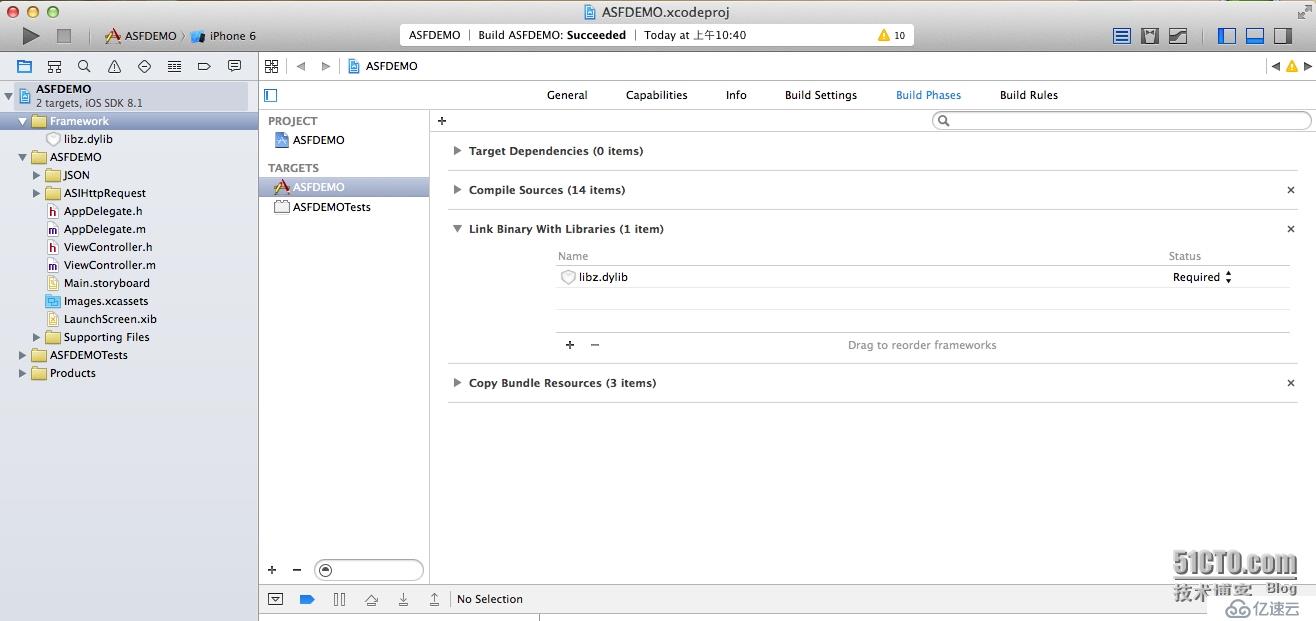
接下来需要在frameworks 中添加libz.dylib ,在项目的targets 选择 link Binary With libraried ,点击+号进行添加,如下图:

用ASI框架进行通信的简单DEMO如下:
#import "ViewController.h"
#import "ASIFormDataRequest.h"
#import "JSONKit.h"
@interface ViewController ()<ASIHTTPRequestDelegate>
{
}
@end
@implementation ViewController
- (void)viewDidLoad {
[super viewDidLoad];
// Do any additional setup after loading the view, typically from a nib.
[self.bt addTarget:self action:@selector(login) forControlEvents:UIControlEventTouchDown];
}
- (void)didReceiveMemoryWarning {
[super didReceiveMemoryWarning];
// Dispose of any resources that can be recreated.
}
//登录
-(void)login{
//测试用
NSMutableDictionary *dicLogin=[NSMutableDictionary dictionary];
[dicLogin setObject:@"1" forKey:@"userid"];
NSString *strJson = [dicLogin JSONString];
NSLog(@"%@",strJson);
NSURL* url = [NSURL URLWithString:@"http://10.129.240.243:7001/initblogserver/handlogin?userid=1"];
ASIFormDataRequest* request=[ASIFormDataRequest requestWithURL:url];
request.delegate=self;
[request setDidFinishSelector:@selector(loginRequestDone:)];
[request setDidFailSelector:@selector(loginRequestFail:)];
[request startAsynchronous];
//生产的用
// NSMutableDictionary *dicLogin=[NSMutableDictionary dictionary];
// NSString* smsCode=self.cTxt.text;
// [dicLogin setObject:smsCode forKey:@"smsCode"];
// NSString *strJson = [dicLogin JSONString];
// ASIFormDataRequest* request=[ASIFormDataRequest requestWithURL:LOGIN_SERV];
// [request setPostValue:strJson forKey:@"logjson"];
// request.delegate=self;
// [request setDidFinishSelector:@selector(loginRequestDone:)];
// [request setDidFailSelector:@selector(loginRequestFail:)];
// [request startAsynchronous];
}
//登录验证请求正常
-(void)loginRequestDone:(ASIHTTPRequest*)request{
NSData* responseData=[request responseData];
NSString* responseStr=[request responseString];
// 返回的数据
NSLog(@"%@",request.responseString);
}
//登录验证请求失败
-(void)loginRequestFail:(ASIHTTPRequest*)request{
//取消等待框
UIAlertView *alertView = [[UIAlertView alloc]initWithTitle:@"服务器错误" message:nil delegate:self cancelButtonTitle:nil otherButtonTitles:@"Ok", nil,nil];
[alertView show];
NSLog(@"服务器错误%@",request.error);
}
@end
亿速云「云服务器」,即开即用、新一代英特尔至强铂金CPU、三副本存储NVMe SSD云盘,价格低至29元/月。点击查看>>
免责声明:本站发布的内容(图片、视频和文字)以原创、转载和分享为主,文章观点不代表本网站立场,如果涉及侵权请联系站长邮箱:is@yisu.com进行举报,并提供相关证据,一经查实,将立刻删除涉嫌侵权内容。