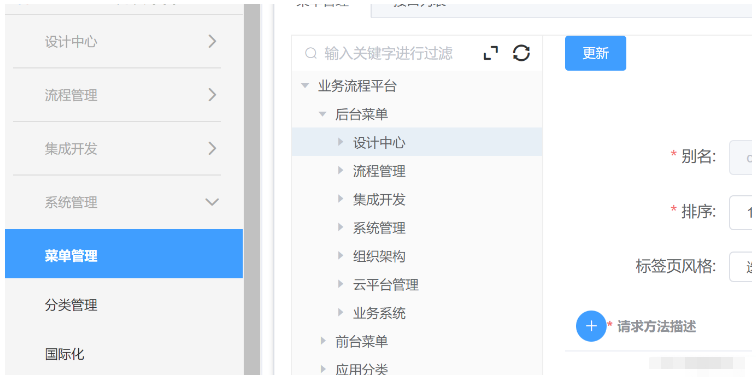
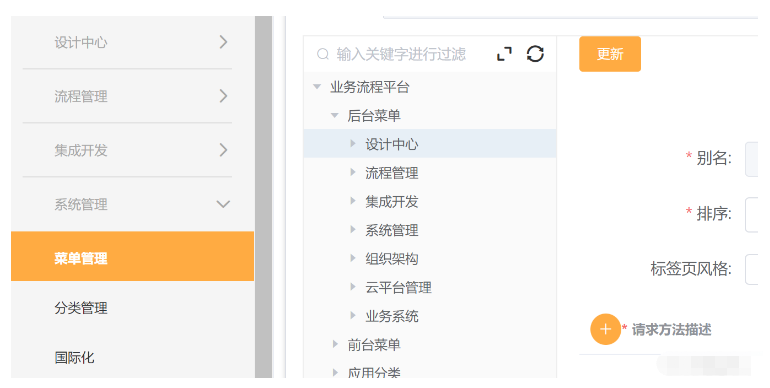
这篇文章主要介绍“vue-element怎么实现动态换肤存储”,在日常操作中,相信很多人在vue-element怎么实现动态换肤存储问题上存在疑惑,小编查阅了各式资料,整理出简单好用的操作方法,希望对大家解答”vue-element怎么实现动态换肤存储”的疑惑有所帮助!接下来,请跟着小编一起来学习吧!
选择颜色块或者颜色选择器切换网站主题色,选择主题后保存到本地,下次打开页面是缓存的主题色


根据ElementUI官网的自定义主题,新建一个样式文件:element-variables(或者参考官网生成),在文件中写入:
/* 改变主题色变量 */
$--color-primary: #409eff;
$--color-success: #67c23a;
/*....还可以定义更多变量*/

/* 改变 icon 字体路径变量,必需 */
$--font-path: '~element-ui/lib/theme-chalk/fonts';

@import "~element-ui/packages/theme-chalk/src/index";

//主要的一步:
:export {
  theme: $--color-primary;
}在项目store文件夹中新建theme.js文件,用于存储主题色变化状态,代码如下
//引入element-variables文件,文件路径根据自己项目存放位置来
import variables from '@/assets/css/element-variables.scss'
const state = {
  theme: variables.theme
}

const getters = {
	theme: function (state) {
		return state.theme;
	}
};

const mutations = {
  CHANGE_SETTING: (state, { key, value }) => {
    // eslint-disable-next-line no-prototype-builtins
    if (state.hasOwnProperty(key)) {
      state[key] = value
    }
  }
}

const actions = {
  changeSetting({ commit }, data) {
    commit('CHANGE_SETTING', data)
  }
}

export default {
  namespaced: true,
  state,
  mutations,
  actions,
  getters
}然后在store.js中引入theme.js
import Vue from 'vue';
import Vuex from 'vuex';
import theme from '@/store/theme.js';
Vue.use(Vuex);
export default new Vuex.Store({
	modules: {
		theme
	}
});切换主图部分template代码如下:
<el-form-item label="可选主题" label-width="140px">
	<div class="color-box">
		<div
			v-for="(item,i) in themeArr"
			:key="i"
			:class="['color-item',theme===item?'active':'']"
			:
			@click="changeTheme(item)">
			<span v-if="theme===item" class="iconfont icon-f-right"></span>
		</div>
	</div>
</el-form-item>
<el-form-item label="自定义主题" label-width="140px">
	<el-color-picker
		v-model="theme"
		:predefine="['#409EFF', '#1890ff', '#304156','#212121','#11a983', '#13c2c2', '#6959CD', '#f5222d', ]"
		class="theme-picker"
		popper-class="theme-picker-dropdown"
	/>
</el-form-item>script代码
const version = require('element-ui/package.json').version // element-ui version from node_modules
const ORIGINAL_THEME = '#409EFF' // default color

export default {
	data() {
		return {
			themeArr: ['#409EFF','#202225','#F56C6C','#FFAB42','#17a969','#888C8F'],
			chalk: '',
			theme: ORIGINAL_THEME,
		}
	},
	watch: {
		//异步监听theme的变化
		async theme(val,oldVal) {
	      if (typeof val !== 'string') return
	      const themeCluster = this.getThemeCluster(val.replace('#', ''))
	      const originalCluster = this.getThemeCluster(oldVal.replace('#', ''))
	      // console.log(themeCluster, originalCluster)

	      const $message = this.$message({
	        message: '  Compiling the theme',
	        customClass: 'theme-message',
	        type: 'success',
	        duration: 0,
	        iconClass: 'el-icon-loading'
	      })

	      const getHandler = (variable, id) => {
	        return () => {
	          const originalCluster = this.getThemeCluster(ORIGINAL_THEME.replace('#', ''))
	          const newStyle = this.updateStyle(this[variable], originalCluster, themeCluster)

	          let styleTag = document.getElementById(id)
	          if (!styleTag) {
	            styleTag = document.createElement('style')
	            styleTag.setAttribute('id', id)
	            document.head.appendChild(styleTag)
	          }
	          styleTag.innerText = newStyle
	        }
	      }

		  //  初次进入或刷新时动态加载CSS文件
	      if (!this.chalk) {
	        const url = `https://unpkg.com/element-ui@${version}/lib/theme-chalk/index.css`
	        await this.getCSSString(url, 'chalk')
	      }

	      const chalkHandler = getHandler('chalk', 'chalk-style')

	      chalkHandler()

	      const styles = [].slice.call(document.querySelectorAll('style'))
	        .filter(style => {
	          const text = style.innerText
	          return new RegExp(oldVal, 'i').test(text) && !/Chalk Variables/.test(text)
	        })
	      styles.forEach(style => {
	        const { innerText } = style
	        if (typeof innerText !== 'string') return
	        style.innerText = this.updateStyle(innerText, originalCluster, themeCluster)
	      })

	       // 将修改的主题保存到本地,下次打开页面是保存的主题色
	    	localStorage.setItem('theme',val)
	    	//调用vuex中改变主题色方法
			this.$store.dispatch('theme/changeSetting', {
		        key: 'theme',
		        value: val
		    })

	      $message.close()

	    },
	},
	methods: {
		updateStyle(style, oldCluster, newCluster) {
	      let newStyle = style
	      oldCluster.forEach((color, index) => {
	        newStyle = newStyle.replace(new RegExp(color, 'ig'), newCluster[index])
	      })
	      return newStyle
	    },
	    getCSSString(url, variable) {
	      return new Promise(resolve => {
	        const xhr = new XMLHttpRequest()
	        xhr.onreadystatechange = () => {
	          if (xhr.readyState === 4 && xhr.status === 200) {
	            this[variable] = xhr.responseText.replace(/@font-face{[^}]+}/, '')
	            resolve()
	          }
	        }
	        xhr.open('GET', url)
	        xhr.send()
	      })
	    },
	    getThemeCluster(theme) {
	      const tintColor = (color, tint) => {
	        let red = parseInt(color.slice(0, 2), 16)
	        let green = parseInt(color.slice(2, 4), 16)
	        let blue = parseInt(color.slice(4, 6), 16)

	        if (tint === 0) { // when primary color is in its rgb space
	          return [red, green, blue].join(',')
	        } else {
	          red += Math.round(tint * (255 - red))
	          green += Math.round(tint * (255 - green))
	          blue += Math.round(tint * (255 - blue))

	          red = red.toString(16)
	          green = green.toString(16)
	          blue = blue.toString(16)

	          return `#${red}${green}${blue}`
	        }
	      }

	      const shadeColor = (color, shade) => {
	        let red = parseInt(color.slice(0, 2), 16)
	        let green = parseInt(color.slice(2, 4), 16)
	        let blue = parseInt(color.slice(4, 6), 16)

	        red = Math.round((1 - shade) * red)
	        green = Math.round((1 - shade) * green)
	        blue = Math.round((1 - shade) * blue)

	        red = red.toString(16)
	        green = green.toString(16)
	        blue = blue.toString(16)

	        return `#${red}${green}${blue}`
	      }

	      const clusters = [theme]
	      for (let i = 0; i <= 9; i++) {
	        clusters.push(tintColor(theme, Number((i / 10).toFixed(2))))
	      }
	      clusters.push(shadeColor(theme, 0.1))
	      return clusters
	    },
		// 颜色块点击切换主题事件
		changeTheme(item) {
		  this.theme = item
	      this.$store.dispatch('theme/changeSetting', {
	        key: 'theme',
	        value: item
	      })
		},
	},
	mounted() {
		//从本地存储获取保存的主题
		if(localStorage.getItem("theme")) {
			this.theme = localStorage.getItem("theme")
			this.$store.dispatch('theme/changeSetting', {
		        key: 'theme',
		        value: this.theme
		    })
		}
	}
}颜色块选择样式style:
.color-box {
	display: flex;
	flex-wrap: wrap;
	.color-item {
		position: relative;
		margin: 2px;
		width: 34px;
		height: 34px;
		border-radius: 3px;
		border: 2px solid transparent;
		cursor: pointer;
		span {
			position: absolute;
			right: 0;
			top: 0;
			width: 15px;
			height: 15px;
			background-color: #000;
			color: #fff;
			font-size: 10px;
    	text-align: center;
		}
		&.active {
			border-color: #000;
		}
	}
}到此,关于“vue-element怎么实现动态换肤存储”的学习就结束了,希望能够解决大家的疑惑。理论与实践的搭配能更好的帮助大家学习,快去试试吧!若想继续学习更多相关知识,请继续关注亿速云网站,小编会继续努力为大家带来更多实用的文章!
亿速云「云服务器」,即开即用、新一代英特尔至强铂金CPU、三副本存储NVMe SSD云盘,价格低至29元/月。点击查看>>
免责声明:本站发布的内容(图片、视频和文字)以原创、转载和分享为主,文章观点不代表本网站立场,如果涉及侵权请联系站长邮箱:is@yisu.com进行举报,并提供相关证据,一经查实,将立刻删除涉嫌侵权内容。
原文链接:https://blog.csdn.net/qq_30907845/article/details/123377082