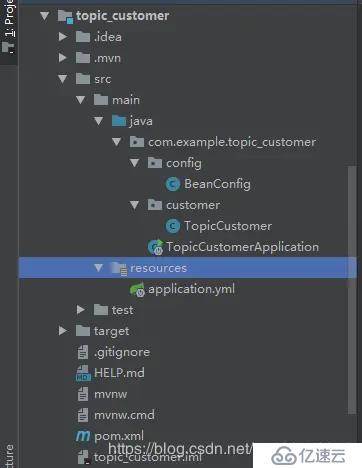
今天和大家分享springboot整合activeMq之topic(主题) - - 发布/订阅模式,类似微信公众号,我们关注公共就可以收到消息,topic需要消费者先订阅才能收到消息,如果没有消费者订阅,生产者产生的消息就是废消息(发布/订阅模式,生产者生产了一个消息,可以由多个消费者进行消费)。本次实例支持websocket、消息重发、持久化…
版本信息:SpringBoot2.1.5 ActiveMQ 5.15.10

pom文件
<dependency>
            <groupId>org.springframework.boot</groupId>
            <artifactId>spring-boot-starter</artifactId>
        </dependency>

        <dependency>
            <groupId>org.springframework.boot</groupId>
            <artifactId>spring-boot-starter-test</artifactId>
            <scope>test</scope>
        </dependency>

        <dependency>
            <groupId>org.springframework.boot</groupId>
            <artifactId>spring-boot-starter-activemq</artifactId>
        </dependency>

        <dependency>
            <groupId>org.springframework.boot</groupId>
            <artifactId>spring-boot-starter-websocket</artifactId>
        </dependency>
yml文件配置
server
port: 8085
spring:
activemq:
broker-url: tcp://localhost:61616
user: admin
password: admin
jms:
pub-sub-domain: true
#自己的主题名字
myTopic: boot_actviemq_topic
配置类
package com.example.topic_customer.config;

import org.apache.activemq.ActiveMQConnectionFactory;
import org.apache.activemq.RedeliveryPolicy;
import org.apache.activemq.command.ActiveMQTopic;
import org.springframework.beans.factory.annotation.Value;
import org.springframework.context.annotation.Bean;
import org.springframework.context.annotation.Configuration;
import org.springframework.jms.config.DefaultJmsListenerContainerFactory;
import org.springframework.stereotype.Component;
import org.springframework.web.socket.server.standard.ServerEndpointExporter;

import javax.jms.ConnectionFactory;
import javax.jms.Topic;

/**
 * @Date 2019/11/13  10:22
 * @Desc 消费者配置类
 */
@Configuration
public class BeanConfig {
    @Value("${myTopic}")
    private String myTopic;

    /**
     * websocket配置
     *
     * @return
     */
    @Bean
    public ServerEndpointExporter serverEndpointExporter() {
        return new ServerEndpointExporter();
    }

    @Bean
    public Topic topic() {
        return new ActiveMQTopic(myTopic);
    }

    public RedeliveryPolicy redeliveryPolicy() {
        RedeliveryPolicy redeliveryPolicy = new RedeliveryPolicy();
        //是否在每次尝试重新发送失败后,增长这个等待时间
        redeliveryPolicy.setUseExponentialBackOff(true);
        //重发次数,默认为6次,这里设置为10次,-1表示不限次数
        redeliveryPolicy.setMaximumRedeliveries(-1);
        //重发时间间隔,默认为1毫秒,设置为10000毫秒
        redeliveryPolicy.setInitialRedeliveryDelay(10000);
        //表示没有拖延只有UseExponentialBackOff(true)为true时生效
        //第一次失败后重新发送之前等待10000毫秒,第二次失败再等待10000 * 2毫秒
        //第三次翻倍10000 * 2 * 2,以此类推
        redeliveryPolicy.setBackOffMultiplier(2);
        //是否避免消息碰撞
        redeliveryPolicy.setUseCollisionAvoidance(true);
        //设置重发最大拖延时间360000毫秒 表示没有拖延只有UseExponentialBackOff(true)为true时生效
        redeliveryPolicy.setMaximumRedeliveryDelay(360000);
        return redeliveryPolicy;
    }

    public ConnectionFactory connectionFactory() {
        ActiveMQConnectionFactory connectionFactory = new ActiveMQConnectionFactory();
        //设置重发属性
        connectionFactory.setRedeliveryPolicy(redeliveryPolicy());
        return connectionFactory;
    }

    /**
     * JMS 队列的监听容器工厂
     */
    @Bean(name = "jmsTopicListener")
    public DefaultJmsListenerContainerFactory jmsTopicListenerContainerFactory() {
        DefaultJmsListenerContainerFactory factory =
                new DefaultJmsListenerContainerFactory();
        factory.setConnectionFactory(connectionFactory());
        factory.setPubSubDomain(true);
        factory.setSessionTransacted(true);
        factory.setAutoStartup(true);
        //开启持久化订阅
        factory.setSubscriptionDurable(true);
        //重连间隔时间
        factory.setRecoveryInterval(1000L);
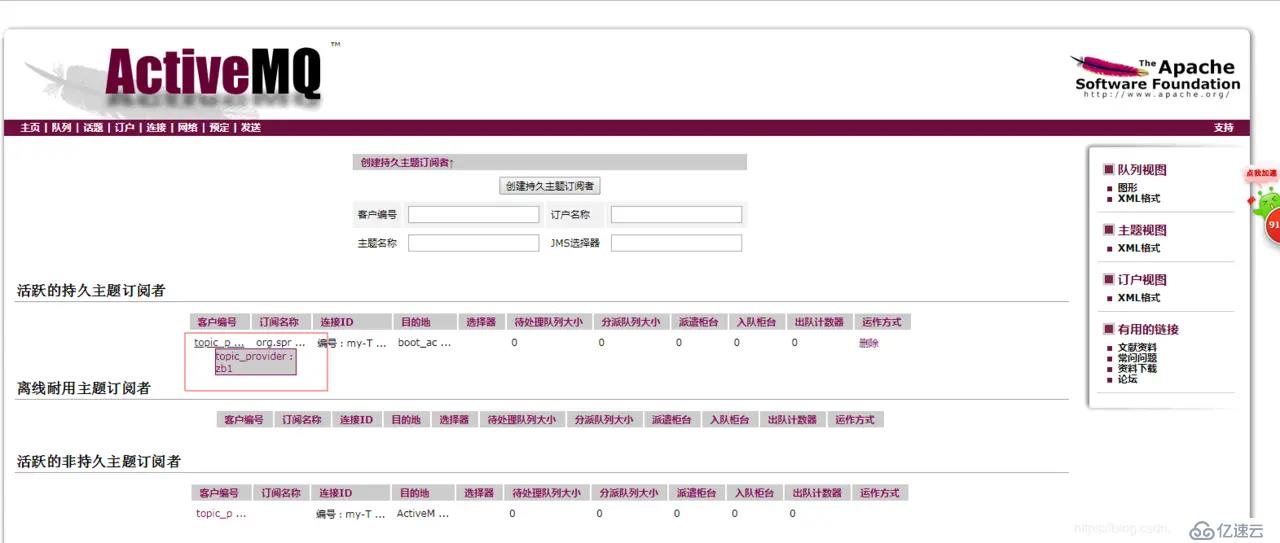
        factory.setClientId("topic_provider:zb1");
        return factory;
    }
}
设置消费者持久化主要有两点:
.TopicCustomer类
package com.example.topic_customer.customer;

import lombok.Data;
import org.springframework.jms.annotation.JmsListener;
import org.springframework.stereotype.Component;

import javax.jms.JMSException;
import javax.jms.TextMessage;
import javax.websocket.OnClose;
import javax.websocket.OnError;
import javax.websocket.OnMessage;
import javax.websocket.OnOpen;
import javax.websocket.server.ServerEndpoint;
import java.util.concurrent.CopyOnWriteArraySet;

/**
 * @Date 2019/11/13  13:31
 * @Desc
 */
@Component
@ServerEndpoint("/websocket")
@Data
public class TopicCustomer {
    /**
     * 每个客户端都会有相应的session,服务端可以发送相关消息
     */
    private javax.websocket.Session session;

    /**
     * J.U.C包下线程安全的类,主要用来存放每个客户端对应的webSocket连接
     */
    private static CopyOnWriteArraySet<TopicCustomer> copyOnWriteArraySet = new CopyOnWriteArraySet<>();

    @OnOpen
    public void onOpen(javax.websocket.Session session) {
        this.session = session;
        copyOnWriteArraySet.add(this);
    }

    @OnClose
    public void onClose() {
        copyOnWriteArraySet.remove(this);
    }

    @OnMessage
    public void onMessage(String message) {
    }

    @OnError
    public void onError(javax.websocket.Session session, Throwable error) {
        error.printStackTrace();
    }

    @JmsListener(destination = "${myTopic}", containerFactory = "jmsTopicListener")
    public void receive(TextMessage textMessage, javax.jms.Session session) throws JMSException {
        //遍历客户端
        for (TopicCustomer webSocket : copyOnWriteArraySet) {
            try {
                //服务器主动推送
                webSocket.session.getBasicRemote().sendText(textMessage.getText());
                System.out.println("-- 接收到topic持久化消息 -- " + textMessage.getText());
            } catch (Exception e) {
                System.out.println("-----测试重发-----");
                session.rollback();// 此不可省略 重发信息使用
            }
        }
    }
}
启动类
package com.example.topic_customer;

import org.springframework.boot.SpringApplication;
import org.springframework.boot.autoconfigure.SpringBootApplication;

@SpringBootApplication
public class TopicCustomerApplication {

    public static void main(String[] args) {
        SpringApplication.run(TopicCustomerApplication.class, args);
    }
}
消费者启动成功后mq的截图: 

yml配置文件
server:
  port: 8084
spring:
  activemq:
    broker-url: tcp://localhost:61616
    user: admin
    password: admin
  jms:
    pub-sub-domain: true

myTopic: boot_actviemq_topic
配置类
package com.example.topicprovider.config;

import org.apache.activemq.ActiveMQConnectionFactory;
import org.apache.activemq.RedeliveryPolicy;
import org.apache.activemq.command.ActiveMQTopic;
import org.springframework.beans.factory.annotation.Value;
import org.springframework.context.annotation.Bean;
import org.springframework.jms.config.DefaultJmsListenerContainerFactory;
import org.springframework.stereotype.Component;

import javax.jms.ConnectionFactory;
import javax.jms.Topic;

/**
 * @Date 2019/11/13  10:22
 * @Desc 生产者配置文件
 */
@Component
public class BeanConfig {
    @Value("${myTopic}")
    private String myTopic;

    public RedeliveryPolicy redeliveryPolicy(){
        RedeliveryPolicy redeliveryPolicy=   new RedeliveryPolicy();
        //是否在每次尝试重新发送失败后,增长这个等待时间
        redeliveryPolicy.setUseExponentialBackOff(true);
        //重发次数,默认为6次,这里设置为10次,-1表示不限次数
        redeliveryPolicy.setMaximumRedeliveries(-1);
        //重发时间间隔,默认为1毫秒,设置为10000毫秒
        redeliveryPolicy.setInitialRedeliveryDelay(10000);
        //表示没有拖延只有UseExponentialBackOff(true)为true时生效
        //第一次失败后重新发送之前等待10000毫秒,第二次失败再等待10000 * 2毫秒
        //第三次翻倍10000 * 2 * 2,以此类推
        redeliveryPolicy.setBackOffMultiplier(2);
        //是否避免消息碰撞
        redeliveryPolicy.setUseCollisionAvoidance(true);
        //设置重发最大拖延时间360000毫秒 表示没有拖延只有UseExponentialBackOff(true)为true时生效
        redeliveryPolicy.setMaximumRedeliveryDelay(360000);
        return redeliveryPolicy;
    }

    @Bean
    public Topic topic() {
        return new ActiveMQTopic(myTopic);
    }

    public ConnectionFactory connectionFactory(){
        ActiveMQConnectionFactory connectionFactory = new ActiveMQConnectionFactory();
        //设置重发属性
        connectionFactory.setRedeliveryPolicy(redeliveryPolicy());
        return connectionFactory;
    }

    /**
     * JMS 队列的监听容器工厂
     */
    @Bean(name = "jmsTopicListener")
    public DefaultJmsListenerContainerFactory jmsTopicListenerContainerFactory() {
        DefaultJmsListenerContainerFactory factory =
                new DefaultJmsListenerContainerFactory();
        factory.setConnectionFactory(connectionFactory());
        factory.setPubSubDomain(true);
        factory.setSessionTransacted(true);
        factory.setAutoStartup(true);
        //开启持久化订阅
        factory.setSubscriptionDurable(true);
        //重连间隔时间
        factory.setRecoveryInterval(1000L);
        return factory;
    }
}
TopicProvider类
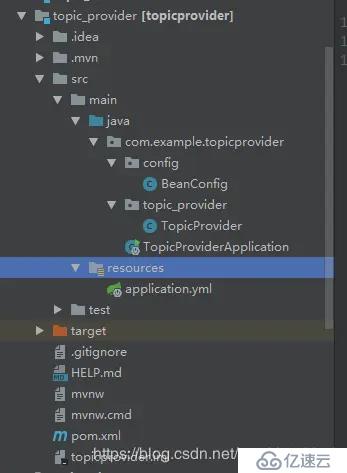
package com.example.topicprovider.topic_provider;

import org.springframework.beans.factory.annotation.Autowired;
import org.springframework.jms.core.JmsMessagingTemplate;
import org.springframework.jms.core.JmsTemplate;
import org.springframework.scheduling.annotation.Scheduled;
import org.springframework.stereotype.Component;

import javax.jms.Topic;
import java.util.UUID;

/**
 * @Date 2019/11/13  10:25
 * @Desc
 */
@Component
public class TopicProvider {
    @Autowired
    private Topic topic;
    @Autowired
    private JmsTemplate jmsTemplate;

    @Scheduled(fixedDelay = 10000)
    private void produceMsg() {
        jmsTemplate.convertAndSend(topic, "主题生产者" + UUID.randomUUID().toString().substring(1, 7));
        System.out.println( jmsTemplate.getDeliveryMode());
        System.out.println("主题生产者1");
    }
}
启动类
package com.example.topicprovider;

import org.springframework.boot.SpringApplication;
import org.springframework.boot.autoconfigure.SpringBootApplication;
import org.springframework.scheduling.annotation.EnableScheduling;

@SpringBootApplication
@EnableScheduling
public class TopicProviderApplication {

    public static void main(String[] args) {
        SpringApplication.run(TopicProviderApplication.class, args);
    }
}
启动成功后结果图:
最后
喜欢的可以关注我的公众号:java小瓜哥的分享平台。谢谢支持!
免责声明:本站发布的内容(图片、视频和文字)以原创、转载和分享为主,文章观点不代表本网站立场,如果涉及侵权请联系站长邮箱:is@yisu.com进行举报,并提供相关证据,一经查实,将立刻删除涉嫌侵权内容。