жӮЁеҘҪпјҢзҷ»еҪ•еҗҺжүҚиғҪдёӢи®ўеҚ•е“ҰпјҒ
жӮЁеҘҪпјҢзҷ»еҪ•еҗҺжүҚиғҪдёӢи®ўеҚ•е“ҰпјҒ


иҫ“е…Ҙyum -y install lrzszиҫ“е…Ҙyum -y install gcc-c++е®үиЈ…gccзҺҜеўғ
иҫ“е…Ҙyum -y install libevent е®үиЈ…FastDFSдҫқиө–libeventеә“
иҫ“е…Ҙпјҡyum -y install zlib zlib-devel pcre pcre-devel gcc gcc-c++ openssl openssl-devel libevent libevent-devel perl unzip net-tools wget
дёӢиҪҪзјәе°‘зҡ„дёңиҘҝ

жіЁж„ҸпјҡеҰӮжһңtracker е’ҢstorageжңҚеҠЎеңЁдёҖеҸ°жңәеҷЁдёҠпјҢдёҖдёӢжӯҘйӘӨеҸҜд»ҘдёҚйңҖиҰҒпјҢеҰӮжһңtrackerе’ҢstorageеңЁдёҚеҗҢзҡ„жңәеҷЁдёҠ,д»ҘдёӢзҡ„жӯҘйӘӨдёҖе®ҡиҰҒжү§иЎҢгҖӮ
пҒ¬ е®үиЈ…centos7 еҗҢдёҠпјӣ
пҒ¬ е®үиЈ…libfastcommon еҗҢдёҠ
пҒ¬ иҝӣе…Ҙ/usr/localзӣ®еҪ•дёӢпјҡcd /usr/local
пҒ¬ дј е…ҘFastDFSеҺӢзј©еҢ…пјҡ rz
пҒ¬ и§ЈеҺӢпјҡtar -zxvf FastDFS_v5.05.tar.gz
пҒ¬ иҝӣе…ҘFastDFSзӣ®еҪ•пјҡ cd FastDFS
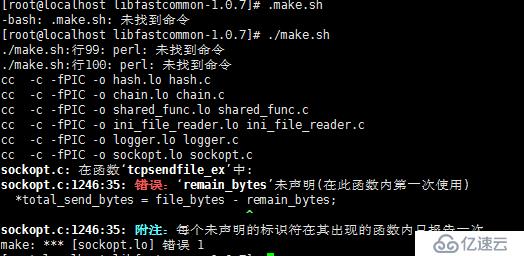
пҒ¬ зј–иҜ‘ . ./make.sh
пҒ¬ е®үиЈ… ./make.sh install
пҒ¬ е®үиЈ…жҲҗеҠҹе°Ҷе®үиЈ…зӣ®еҪ•дёӢзҡ„confдёӢзҡ„ж–Ү件жӢ·иҙқеҲ°/etc/fdfs/дёӢгҖӮ
пҒ¬ иҝӣе…Ҙ/etc/fdfsзӣ®еҪ•пјҡ cd /etc/fdfs/
пҒ¬ еӨҚеҲ¶Storageй…ҚзҪ®ж–Ү件 пјҡcp storage.conf.sample storage.conf
пҒ¬ еҲӣе»әж–Ү件еӨ№з”ЁжҲ·еӯҳеӮЁж•°жҚ®: mkdir -p /home/FastDFS/fafs_storage
пҒ¬ дҝ®ж”№storage.confж–Ү件пјҡ vi storage.conf
пҒ® Base_path =/home/FastDFS
пҒ® Store_path0=/home/FastDFS/fdfs_storage
пҒ® tracker_server=ip(trackerжңҚеҠЎеҷЁзҡ„ip):221
пҒ¬ еҗҜеҠЁstorageжңҚеҠЎ пјҡ/usr/bin/fdfs_storaged /etc/fdfs/storage.conf
пҒ¬ жҹҘзңӢжҳҜеҗҰеҗҜеҠЁпјҡ netstat -unltp | grep fdfs
пҒ¬ иҝӣе…Ҙ/usr/local/зӣ®еҪ• cd /usr/local
пҒ¬ дёҠдј nginxеҺӢзј©еҢ… rz
пҒ¬ и§ЈеҺӢnginxеҺӢзј©еҢ… tar -zxvf nginx-1.8.0.tar.gz
пҒ¬ дёҠдј fastdfs-nginx-module_v1.16.tar.gz ж•ҙеҗҲеҢ… rz
пҒ¬ и§ЈеҺӢж•ҙеҗҲеҢ… tar -zxvf fastdfs-nginx-module_v1.16.tar.gz
пҒ¬ иҝӣе…Ҙfastdfs-nginx-module/srcзӣ®еҪ•пјҡcd /usr/local/fastdfs-nginx-module/src
пҒ¬ дҝ®ж”№й…ҚзҪ®ж–Ү件пјҡvi config
пҒ® #е°ҶCORE_INCS,CORE_LIBS,дёӯзҡ„/usr/local/и·Ҝеҫ„ж”№дёә/usr/
пҒ® CORE_INCS="$CORE_INCS /usr/include/fastdfs /usr/include/fastcommon/"
пҒ® CORE_LIBS="$CORE_LIBS -L/usr/lib -lfastcommon -lfdfsclient"
пҒ¬ иҪ¬з§»mod_fastdfs.confй…ҚзҪ®ж–Ү件пјҡcp mod_fastdfs.conf /etc/fdfs
пҒ¬ дҝ®ж”№/etc/fdfs/mod_fastdfs.confй…ҚзҪ®ж–Ү件 пјҡcd /etc/fdfs/
пҒ¬ дҝ®ж”№ пјҡvi mod_fastdfs.conf
пҒ® base_path=/home/FastDFS
пҒ® tracker_server=yourid:22122
пҒ® url_have_group_name = true
пҒ® store_path0=/home/FastDFS/fdfs_storage
пҒ¬ е°Ҷlibfdfsclient.so жӢ·иҙқиҮі/usr/libдёӢпјҡcp /usr/lib64/libfdfsclient.so /usr/lib/
пҒ¬ еҲӣе»әnginx/clientзӣ®еҪ•пјҡmkdir -p /var/temp/nginx/client
пҒ¬ иҝӣе…ҘNginxзӣ®еҪ•пјҡcd /usr/local/nginx-1.8.3
пҒ¬ е®үиЈ…Nginxпјҡ
[root@localhost nginx-1.10.3]# ./configure \
--prefix=/usr/local/nginx \
--pid-path=/var/run/nginx/nginx.pid \
--lock-path=/var/lock/nginx.lock \
--error-log-path=/var/log/nginx/error.log \
--http-log-path=/var/log/nginx/access.log \
--with-http_gzip_static_module \
--http-client-body-temp-path=/var/temp/nginx/client \
--http-proxy-temp-path=/var/temp/nginx/proxy \
--http-fastcgi-temp-path=/var/temp/nginx/fastcgi \
--http-uwsgi-temp-path=/var/temp/nginx/uwsgi \
--http-scgi-temp-path=/var/temp/nginx/scgi \
--add-module=/usr/local/fastdfs-nginx-module/src
пјҲжіЁж„ҸиҰҒзҙ§и·ҹзқҖеҶҷпјү
пҒ¬ #зј–иҜ‘пјҡ make
пҒ¬ е®үиЈ…пјҡ make install
пҒ¬ дҝ®ж”№Nginxй…ҚзҪ®ж–Ү件
пҒ® еҲӣе»әж•°жҚ®зӣ®еҪ• mkdir /home/FastDFS/fdfs_storage/data
пҒ® иҝӣе…Ҙnginxзӣ®еҪ•пјҡcd /usr/local/nginx
пҒ® [root@localhost nginx]# cd conf/
пҒ® [root@localhost conf]# vim nginx.conf
server {
listen 80;
server_name 192.168.134.133;
location /group1/M00/{
root /home/FastDFS/fdfs_storage/data;
ngx_fastdfs_module;
}
}
пҒ¬ еҗҜеҠЁпјҡ
[root@localhost nginx]# cd sbin
[root@localhost sbin]# ./nginx
ngx_http_fastdfs_set pid=6203
иҰҒејҖеҗҜcentosзҡ„йҳІзҒ«еўҷпјҡ
firewall-cmd --zone=public --add-port=80/tcp --permanent пјҲ--permanentж°ёд№…з”ҹж•ҲпјҢжІЎжңүжӯӨеҸӮж•°йҮҚеҗҜеҗҺеӨұж•Ҳпјү
и®©з«ҜеҸЈз”ҹж•Ҳ
firewall-cmd --reload
е…ҚиҙЈеЈ°жҳҺпјҡжң¬з«ҷеҸ‘еёғзҡ„еҶ…е®№пјҲеӣҫзүҮгҖҒи§Ҷйў‘е’Ңж–Үеӯ—пјүд»ҘеҺҹеҲӣгҖҒиҪ¬иҪҪе’ҢеҲҶдә«дёәдё»пјҢж–Үз« и§ӮзӮ№дёҚд»ЈиЎЁжң¬зҪ‘з«ҷз«ӢеңәпјҢеҰӮжһңж¶үеҸҠдҫөжқғиҜ·иҒ”зі»з«ҷй•ҝйӮ®з®ұпјҡis@yisu.comиҝӣиЎҢдёҫжҠҘпјҢ并жҸҗдҫӣзӣёе…іиҜҒжҚ®пјҢдёҖз»ҸжҹҘе®һпјҢе°Ҷз«ӢеҲ»еҲ йҷӨж¶үе«ҢдҫөжқғеҶ…е®№гҖӮ