Neo4j是现今最火爆的图数据。在2010年发布,产品的发展势头还算不错。
作为图数据库,Neo4j最大的特点是关系数据的存储。
图数据库除了能够像普通的数据库一样存储一行一行的数据之外,还可以很方便的看出存储数据之间的关系信息。
适合存储”修改较少,查询较多,没有超大节点“的图数据。
根据用户与其他用户的关系为用户推荐新的朋友。例如,在QQ中给你推荐朋友的朋友 。
通过分析用户有哪些朋友、用户朋友喜好的产品、用户的浏览记录等关系信息推测用户的喜好进而为用户推荐商品。
根据知识点间的关系建立图谱,帮助用户搜索到关联的知识。例如在百度上搜索Neo4j,会同时出现MySQL等类似的内容。
通过记录软件行为的各种关系数据,例如其访问了哪些IP、访问了哪些系统资源,进而分析软件行为是否具有恶意。
网络、数据中心这些基础设施自身就是一个包含复杂关系的网络,利用Neo4j可以方便的建立设备之间的关系,以便于对整个系统的管理。
下载Neo4j
下载地址:https://neo4j.com/download-center/#community
包地址:https://neo4j.com/artifact.php?name=neo4j-community-3.5.6-unix.tar.gz
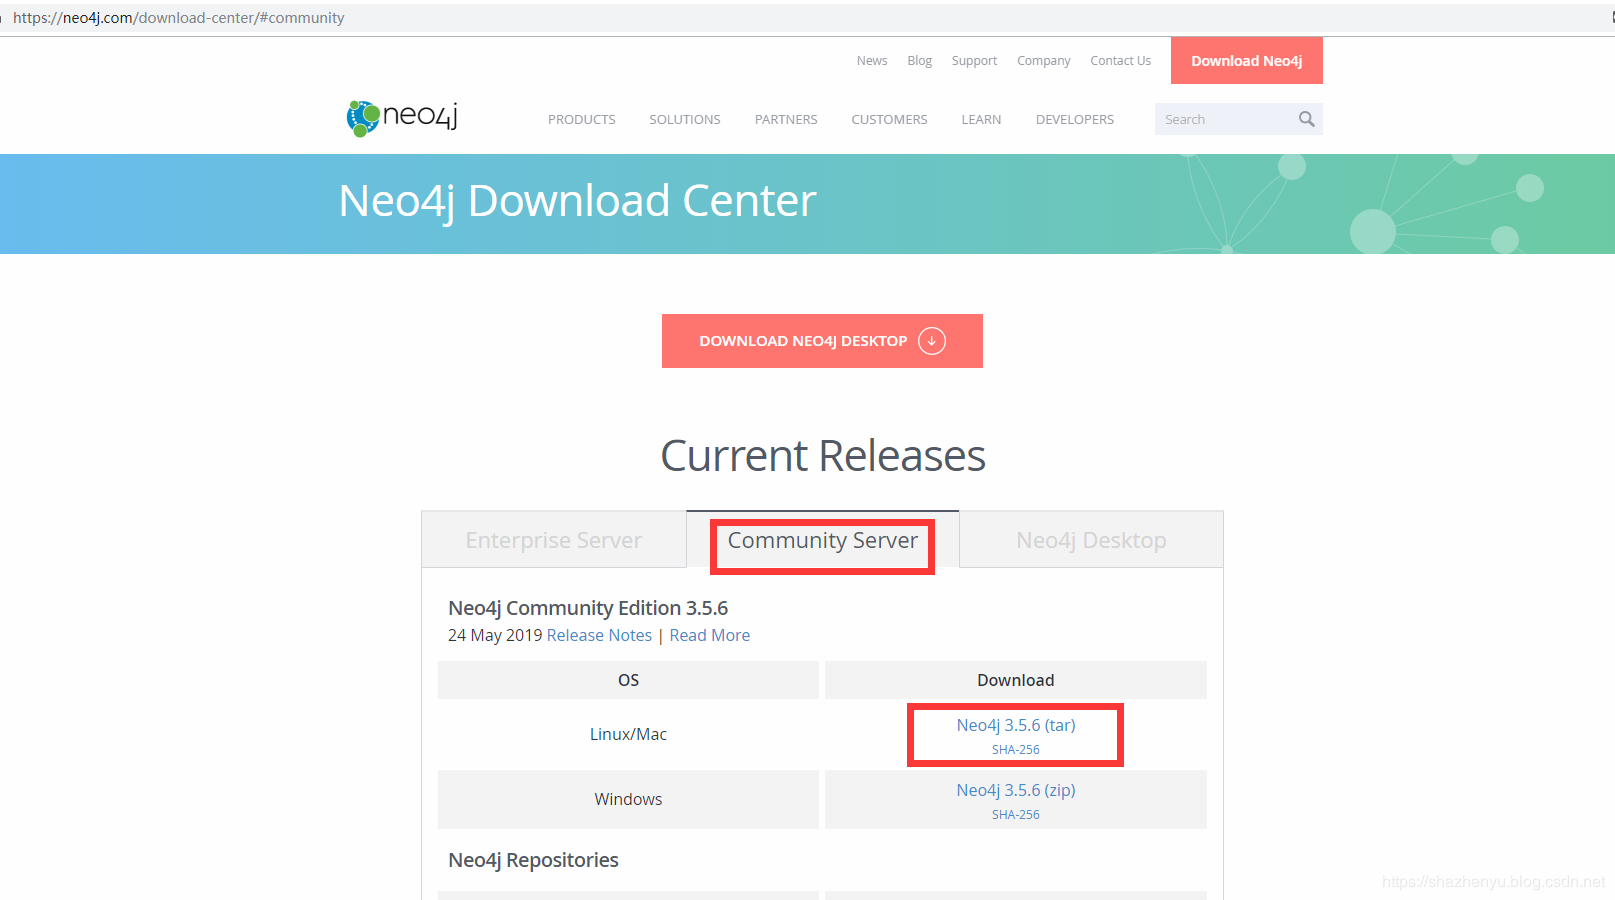
下载 3.5.6 版本
curl -O https://neo4j.com/artifact.php?name=neo4j-community-3.5.6-unix.tar.gz
tar -zxvf neo4j-community-3.5.6-unix.tar.gz
移动文件夹
mv neo4j-community-3.5.6/ /usr/local/neo4j
效果

配置文件路径

1、修改第22行load csv时路径,在前面加个#注释掉,可从任意路径读取文件
#dbms.directories.import=import

2、修改35行和36行,去除注释,设置JVM初始堆内存和JVM最大堆内存
(理论上JVM最大 堆内存越大越好,但是要小于机器的物理内存)
dbms.memory.heap.initial_size=512m
dbms.memory.heap.max_size=1g

如果不知道还剩多少,可以用linux命令free -m

3、修改46行,可以认为这个是缓存,如果机器配置高,这个越大越好
dbms.memory.pagecache.size=5g

4、修改54行,去掉改行的#,可以远程通过ip访问neo4j数据库
dbms.connectors.default_listen_address=0.0.0.

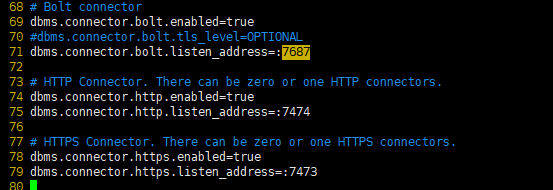
5、默认 bolt端口是7687,http端口是7474,https关口是7473,不修改下面3项也可以

dbms.connector.bolt.listen_address=:
dbms.connector.http.listen_address=:
dbms.connector.https.listen_address=:
去掉注释
6、修改245行,去掉#,允许从远程url来load csv
dbms.security.allow_csv_import_from_file_urls=true

7、修改265行,去除注释设置neo4j可读可写
dbms.read_only=false

8、3.5.6 版本配置文件(注:各个版本中配置文件是不同的)
#*****************************************************************
# Neo4j configuration
#
# For more details and a complete list of settings, please see
# https://neo4j.com/docs/operations-manual/current/reference/configuration-settings/
#*****************************************************************

# The name of the database to mount
#dbms.active_database=graph.db

# Paths of directories in the installation.
#dbms.directories.data=data
#dbms.directories.plugins=plugins
#dbms.directories.certificates=certificates
#dbms.directories.logs=logs
#dbms.directories.lib=lib
#dbms.directories.run=run

# This setting constrains all `LOAD CSV` import files to be under the `import` directory. Remove or comment it out to
# allow files to be loaded from anywhere in the filesystem; this introduces possible security problems. See the
# `LOAD CSV` section of the manual for details.
# dbms.directories.import=import

# Whether requests to Neo4j are authenticated.
# To disable authentication, uncomment this line
#dbms.security.auth_enabled=false

# Enable this to be able to upgrade a store from an older version.
#dbms.allow_upgrade=true

# Java Heap Size: by default the Java heap size is dynamically
# calculated based on available system resources.
# Uncomment these lines to set specific initial and maximum
# heap size.
dbms.memory.heap.initial_size=512m
dbms.memory.heap.max_size=1g

# The amount of memory to use for mapping the store files, in bytes (or
# kilobytes with the 'k' suffix, megabytes with 'm' and gigabytes with 'g').
# If Neo4j is running on a dedicated server, then it is generally recommended
# to leave about 2-4 gigabytes for the operating system, give the JVM enough
# heap to hold all your transaction state and query context, and then leave the
# rest for the page cache.
# The default page cache memory assumes the machine is dedicated to running
# Neo4j, and is heuristically set to 50% of RAM minus the max Java heap size.
dbms.memory.pagecache.size=5g

#*****************************************************************
# Network connector configuration
#*****************************************************************

# With default configuration Neo4j only accepts local connections.
# To accept non-local connections, uncomment this line:
dbms.connectors.default_listen_address=0.0.0.0

# You can also choose a specific network interface, and configure a non-default
# port for each connector, by setting their individual listen_address.

# The address at which this server can be reached by its clients. This may be the server's IP address or DNS name, or
# it may be the address of a reverse proxy which sits in front of the server. This setting may be overridden for
# individual connectors below.
#dbms.connectors.default_advertised_address=localhost

# You can also choose a specific advertised hostname or IP address, and
# configure an advertised port for each connector, by setting their
# individual advertised_address.

# Bolt connector
dbms.connector.bolt.enabled=true
#dbms.connector.bolt.tls_level=OPTIONAL
dbms.connector.bolt.listen_address=:7687

# HTTP Connector. There can be zero or one HTTP connectors.
dbms.connector.http.enabled=true
dbms.connector.http.listen_address=:7474

# HTTPS Connector. There can be zero or one HTTPS connectors.
dbms.connector.https.enabled=true
dbms.connector.https.listen_address=:7473

# Number of Neo4j worker threads.
#dbms.threads.worker_count=

#*****************************************************************
# SSL system configuration
#*****************************************************************

# Names of the SSL policies to be used for the respective components.

# The legacy policy is a special policy which is not defined in
# the policy configuration section, but rather derives from
# dbms.directories.certificates and associated files
# (by default: neo4j.key and neo4j.cert). Its use will be deprecated.

# The policies to be used for connectors.
#
# N.B: Note that a connector must be configured to support/require
#   SSL/TLS for the policy to actually be utilized.
#
# see: dbms.connector.*.tls_level

#bolt.ssl_policy=legacy
#https.ssl_policy=legacy

#*****************************************************************
# SSL policy configuration
#*****************************************************************

# Each policy is configured under a separate namespace, e.g.
#  dbms.ssl.policy.<policyname>.*
#
# The example settings below are for a new policy named 'default'.

# The base directory for cryptographic objects. Each policy will by
# default look for its associated objects (keys, certificates, ...)
# under the base directory.
#
# Every such setting can be overridden using a full path to
# the respective object, but every policy will by default look
# for cryptographic objects in its base location.
#
# Mandatory setting

#dbms.ssl.policy.default.base_directory=certificates/default

# Allows the generation of a fresh private key and a self-signed
# certificate if none are found in the expected locations. It is
# recommended to turn this off again after keys have been generated.
#
# Keys should in general be generated and distributed offline
# by a trusted certificate authority (CA) and not by utilizing
# this mode.

#dbms.ssl.policy.default.allow_key_generation=false

# Enabling this makes it so that this policy ignores the contents
# of the trusted_dir and simply resorts to trusting everything.
#
# Use of this mode is discouraged. It would offer encryption but no security.

#dbms.ssl.policy.default.trust_all=false

# The private key for the default SSL policy. By default a file
# named private.key is expected under the base directory of the policy.
# It is mandatory that a key can be found or generated.

#dbms.ssl.policy.default.private_key=

# The private key for the default SSL policy. By default a file
# named public.crt is expected under the base directory of the policy.
# It is mandatory that a certificate can be found or generated.

#dbms.ssl.policy.default.public_certificate=

# The certificates of trusted parties. By default a directory named
# 'trusted' is expected under the base directory of the policy. It is
# mandatory to create the directory so that it exists, because it cannot
# be auto-created (for security purposes).
#
# To enforce client authentication client_auth must be set to 'require'!

#dbms.ssl.policy.default.trusted_dir=

# Client authentication setting. Values: none, optional, require
# The default is to require client authentication.
#
# Servers are always authenticated unless explicitly overridden
# using the trust_all setting. In a mutual authentication setup this
# should be kept at the default of require and trusted certificates
# must be installed in the trusted_dir.

#dbms.ssl.policy.default.client_auth=require

# It is possible to verify the hostname that the client uses
# to connect to the remote server. In order for this to work, the server public
# certificate must have a valid CN and/or matching Subject Alternative Names.

# Note that this is irrelevant on host side connections (sockets receiving
# connections).

# To enable hostname verification client side on nodes, set this to true.

#dbms.ssl.policy.default.verify_hostname=false

# A comma-separated list of allowed TLS versions.
# By default only TLSv1.2 is allowed.

#dbms.ssl.policy.default.tls_versions=

# A comma-separated list of allowed ciphers.
# The default ciphers are the defaults of the JVM platform.

#dbms.ssl.policy.default.ciphers=

#*****************************************************************
# Logging configuration
#*****************************************************************

# To enable HTTP logging, uncomment this line
#dbms.logs.http.enabled=true

# Number of HTTP logs to keep.
#dbms.logs.http.rotation.keep_number=5

# Size of each HTTP log that is kept.
#dbms.logs.http.rotation.size=20m

# To enable GC Logging, uncomment this line
#dbms.logs.gc.enabled=true

# GC Logging Options
# see http://docs.oracle.com/cd/E19957-01/819-0084-10/pt_tuningjava.html#wp57013 for more information.
#dbms.logs.gc.options=-XX:+PrintGCDetails -XX:+PrintGCDateStamps -XX:+PrintGCApplicationStoppedTime -XX:+PrintPromotionFailure -XX:+PrintTenuringDistribution

# For Java 9 and newer GC Logging Options
# see https://docs.oracle.com/javase/10/tools/java.htm#JSWOR-GUID-BE93ABDC-999C-4CB5-A88B-1994AAAC74D5
#dbms.logs.gc.options=-Xlog:gc*,safepoint,age*=trace

# Number of GC logs to keep.
#dbms.logs.gc.rotation.keep_number=5

# Size of each GC log that is kept.
#dbms.logs.gc.rotation.size=20m

# Log level for the debug log. One of DEBUG, INFO, WARN and ERROR. Be aware that logging at DEBUG level can be very verbose.
#dbms.logs.debug.level=INFO

# Size threshold for rotation of the debug log. If set to zero then no rotation will occur. Accepts a binary suffix "k",
# "m" or "g".
#dbms.logs.debug.rotation.size=20m

# Maximum number of history files for the internal log.
#dbms.logs.debug.rotation.keep_number=7

#*****************************************************************
# Miscellaneous configuration
#*****************************************************************

# Enable this to specify a parser other than the default one.
#cypher.default_language_version=3.0

# Determines if Cypher will allow using file URLs when loading data using
# `LOAD CSV`. Setting this value to `false` will cause Neo4j to fail `LOAD CSV`
# clauses that load data from the file system.
dbms.security.allow_csv_import_from_file_urls=true


# Value of the Access-Control-Allow-Origin header sent over any HTTP or HTTPS
# connector. This defaults to '*', which allows broadest compatibility. Note
# that any URI provided here limits HTTP/HTTPS access to that URI only.
#dbms.security.http_access_control_allow_origin=*

# Value of the HTTP Strict-Transport-Security (HSTS) response header. This header
# tells browsers that a webpage should only be accessed using HTTPS instead of HTTP.
# It is attached to every HTTPS response. Setting is not set by default so
# 'Strict-Transport-Security' header is not sent. Value is expected to contain
# directives like 'max-age', 'includeSubDomains' and 'preload'.
#dbms.security.http_strict_transport_security=

# Retention policy for transaction logs needed to perform recovery and backups.
dbms.tx_log.rotation.retention_policy=1 days

# Only allow read operations from this Neo4j instance. This mode still requires
# write access to the directory for lock purposes.
dbms.read_only=false

# Comma separated list of JAX-RS packages containing JAX-RS resources, one
# package name for each mountpoint. The listed package names will be loaded
# under the mountpoints specified. Uncomment this line to mount the
# org.neo4j.examples.server.unmanaged.HelloWorldResource.java from
# neo4j-server-examples under /examples/unmanaged, resulting in a final URL of
# http://localhost:7474/examples/unmanaged/helloworld/{nodeId}
#dbms.unmanaged_extension_classes=org.neo4j.examples.server.unmanaged=/examples/unmanaged

# A comma separated list of procedures and user defined functions that are allowed
# full access to the database through unsupported/insecure internal APIs.
#dbms.security.procedures.unrestricted=my.extensions.example,my.procedures.*

# A comma separated list of procedures to be loaded by default.
# Leaving this unconfigured will load all procedures found.
#dbms.security.procedures.whitelist=apoc.coll.*,apoc.load.*

#********************************************************************
# JVM Parameters
#********************************************************************

# G1GC generally strikes a good balance between throughput and tail
# latency, without too much tuning.
dbms.jvm.additional=-XX:+UseG1GC

# Have common exceptions keep producing stack traces, so they can be
# debugged regardless of how often logs are rotated.
dbms.jvm.additional=-XX:-OmitStackTraceInFastThrow

# Make sure that `initmemory` is not only allocated, but committed to
# the process, before starting the database. This reduces memory
# fragmentation, increasing the effectiveness of transparent huge
# pages. It also reduces the possibility of seeing performance drop
# due to heap-growing GC events, where a decrease in available page
# cache leads to an increase in mean IO response time.
# Try reducing the heap memory, if this flag degrades performance.
dbms.jvm.additional=-XX:+AlwaysPreTouch

# Trust that non-static final fields are really final.
# This allows more optimizations and improves overall performance.
# NOTE: Disable this if you use embedded mode, or have extensions or dependencies that may use reflection or
# serialization to change the value of final fields!
dbms.jvm.additional=-XX:+UnlockExperimentalVMOptions
dbms.jvm.additional=-XX:+TrustFinalNonStaticFields

# Disable explicit garbage collection, which is occasionally invoked by the JDK itself.
dbms.jvm.additional=-XX:+DisableExplicitGC

# Remote JMX monitoring, uncomment and adjust the following lines as needed. Absolute paths to jmx.access and
# jmx.password files are required.
# Also make sure to update the jmx.access and jmx.password files with appropriate permission roles and passwords,
# the shipped configuration contains only a read only role called 'monitor' with password 'Neo4j'.
# For more details, see: http://download.oracle.com/javase/8/docs/technotes/guides/management/agent.html
# On Unix based systems the jmx.password file needs to be owned by the user that will run the server,
# and have permissions set to 0600.
# For details on setting these file permissions on Windows see:
#   http://docs.oracle.com/javase/8/docs/technotes/guides/management/security-windows.html
#dbms.jvm.additional=-Dcom.sun.management.jmxremote.port=3637
#dbms.jvm.additional=-Dcom.sun.management.jmxremote.authenticate=true
#dbms.jvm.additional=-Dcom.sun.management.jmxremote.ssl=false
#dbms.jvm.additional=-Dcom.sun.management.jmxremote.password.file=/absolute/path/to/conf/jmx.password
#dbms.jvm.additional=-Dcom.sun.management.jmxremote.access.file=/absolute/path/to/conf/jmx.access

# Some systems cannot discover host name automatically, and need this line configured:
#dbms.jvm.additional=-Djava.rmi.server.hostname=$THE_NEO4J_SERVER_HOSTNAME

# Expand Diffie Hellman (DH) key size from default 1024 to 2048 for DH-RSA cipher suites used in server TLS handshakes.
# This is to protect the server from any potential passive eavesdropping.
dbms.jvm.additional=-Djdk.tls.ephemeralDHKeySize=2048

# This mitigates a DDoS vector.
dbms.jvm.additional=-Djdk.tls.rejectClientInitiatedRenegotiation=true

#********************************************************************
# Wrapper Windows NT/2000/XP Service Properties
#********************************************************************
# WARNING - Do not modify any of these properties when an application
# using this configuration file has been installed as a service.
# Please uninstall the service before modifying this section. The
# service can then be reinstalled.

# Name of the service
dbms.windows_service_name=neo4j

#********************************************************************
# Other Neo4j system properties
#********************************************************************
dbms.jvm.additional=-Dunsupported.dbms.udc.source=tarball
启动:进入bin目录执行./neo4j start
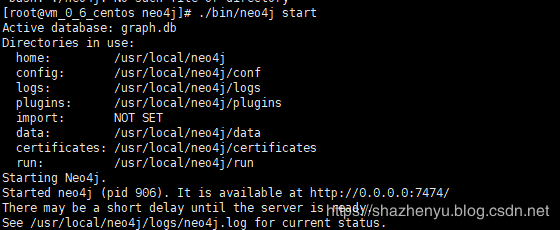
停止:进入bin目录执行./neo4j stop

查看状态:进入bin目录执行./neo4j status

http://服务器ip:7474/browser/
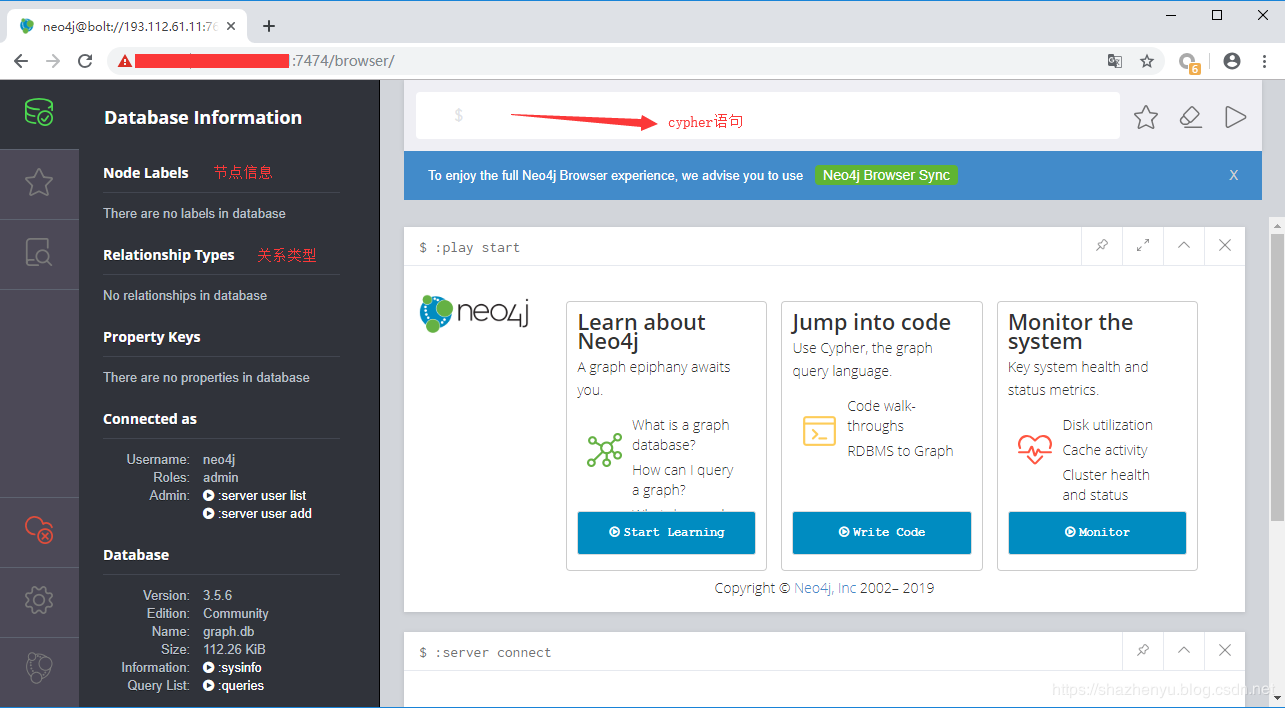
在浏览器访问图数据库所在的机器上的7474端口(第一次访问账号neo4j,密码neo4j,会提示修改初始密码)
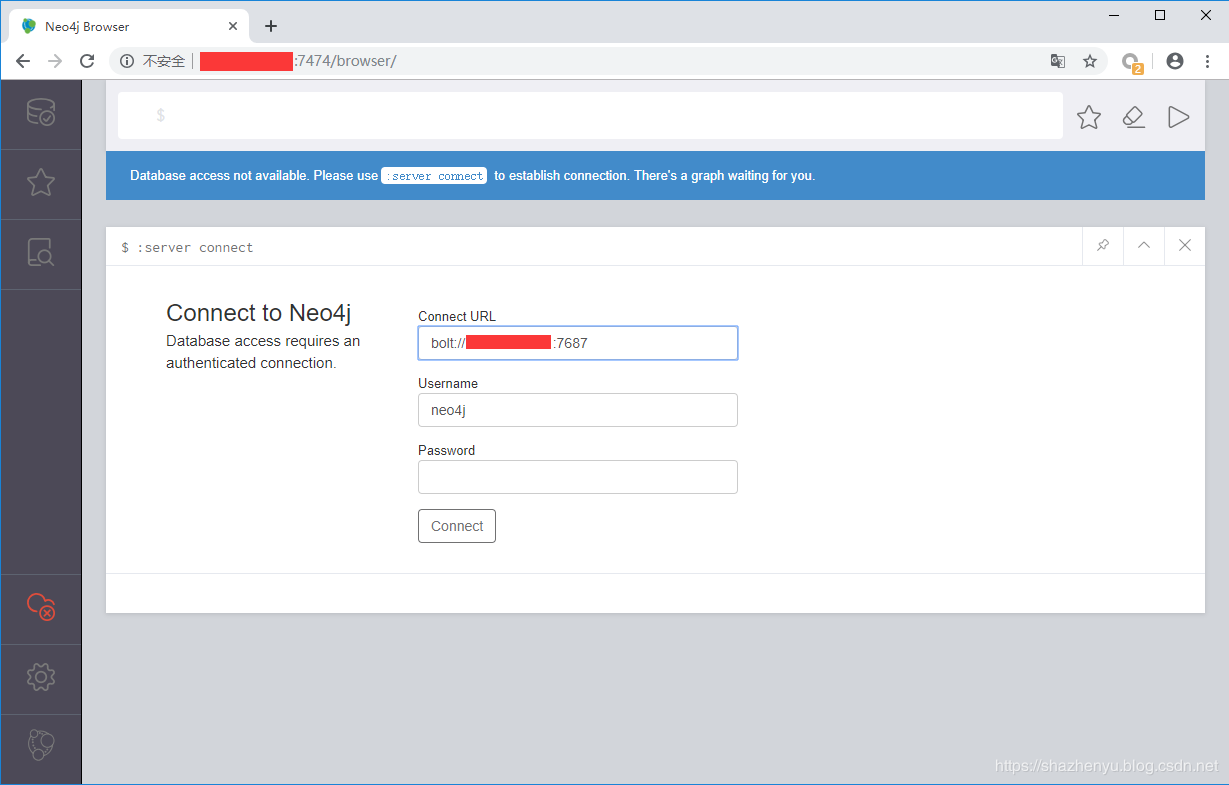
设置完密码后,点击左上角数据库,就能看到图数据库里面的信息了
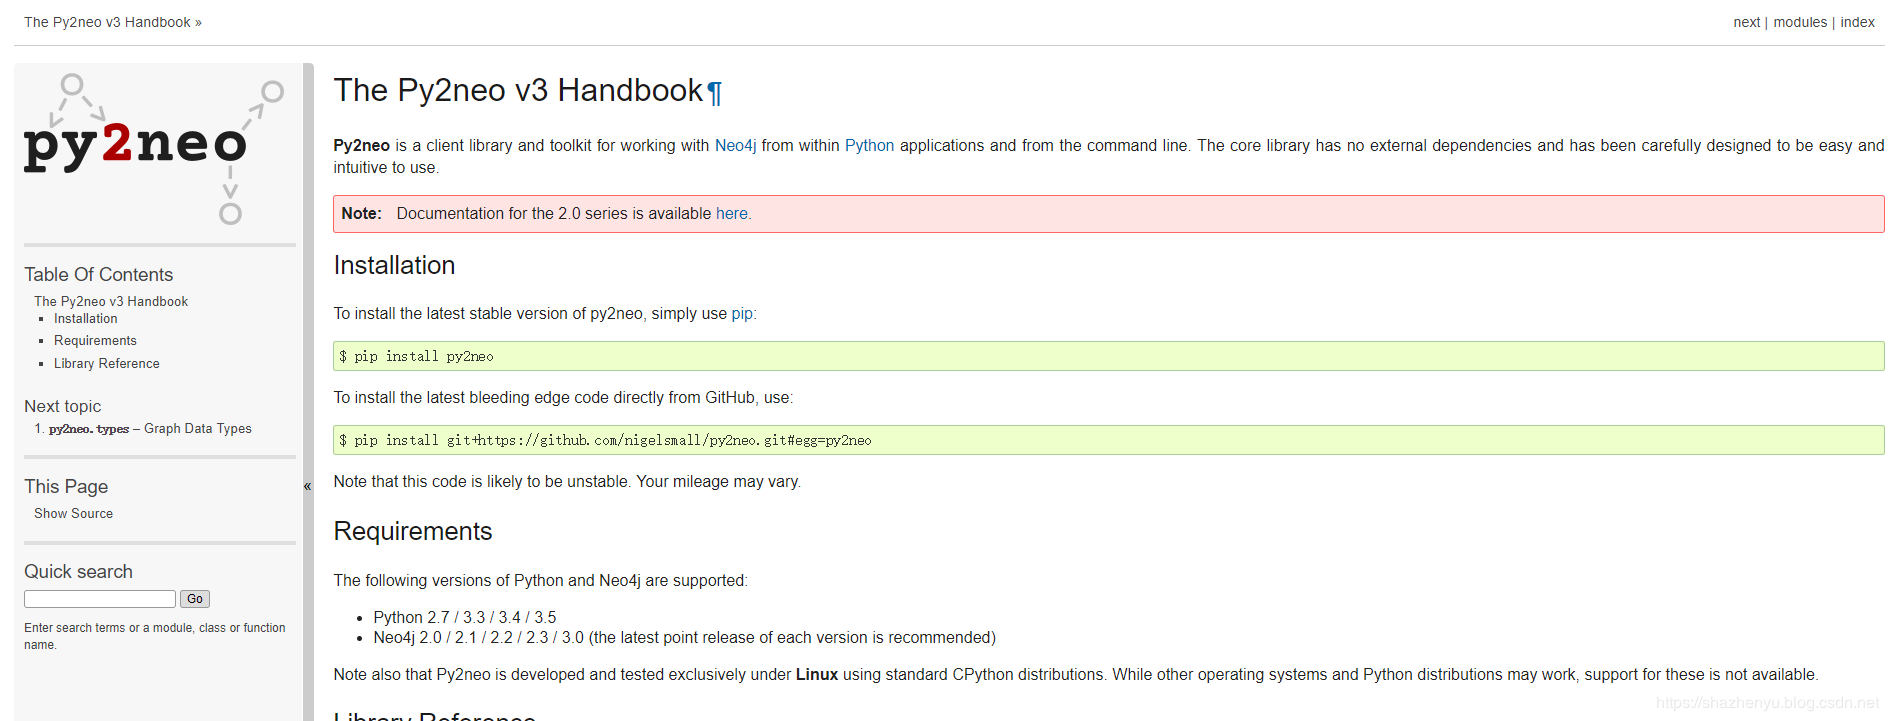
pip install py2neo
如果安不上,请用:
pip install git+https://github.com/nigelsmall/py2neo.git

官网地址:https://py2neo.org/v3/index.html
更多内容请参考官网给的命令:
效果图
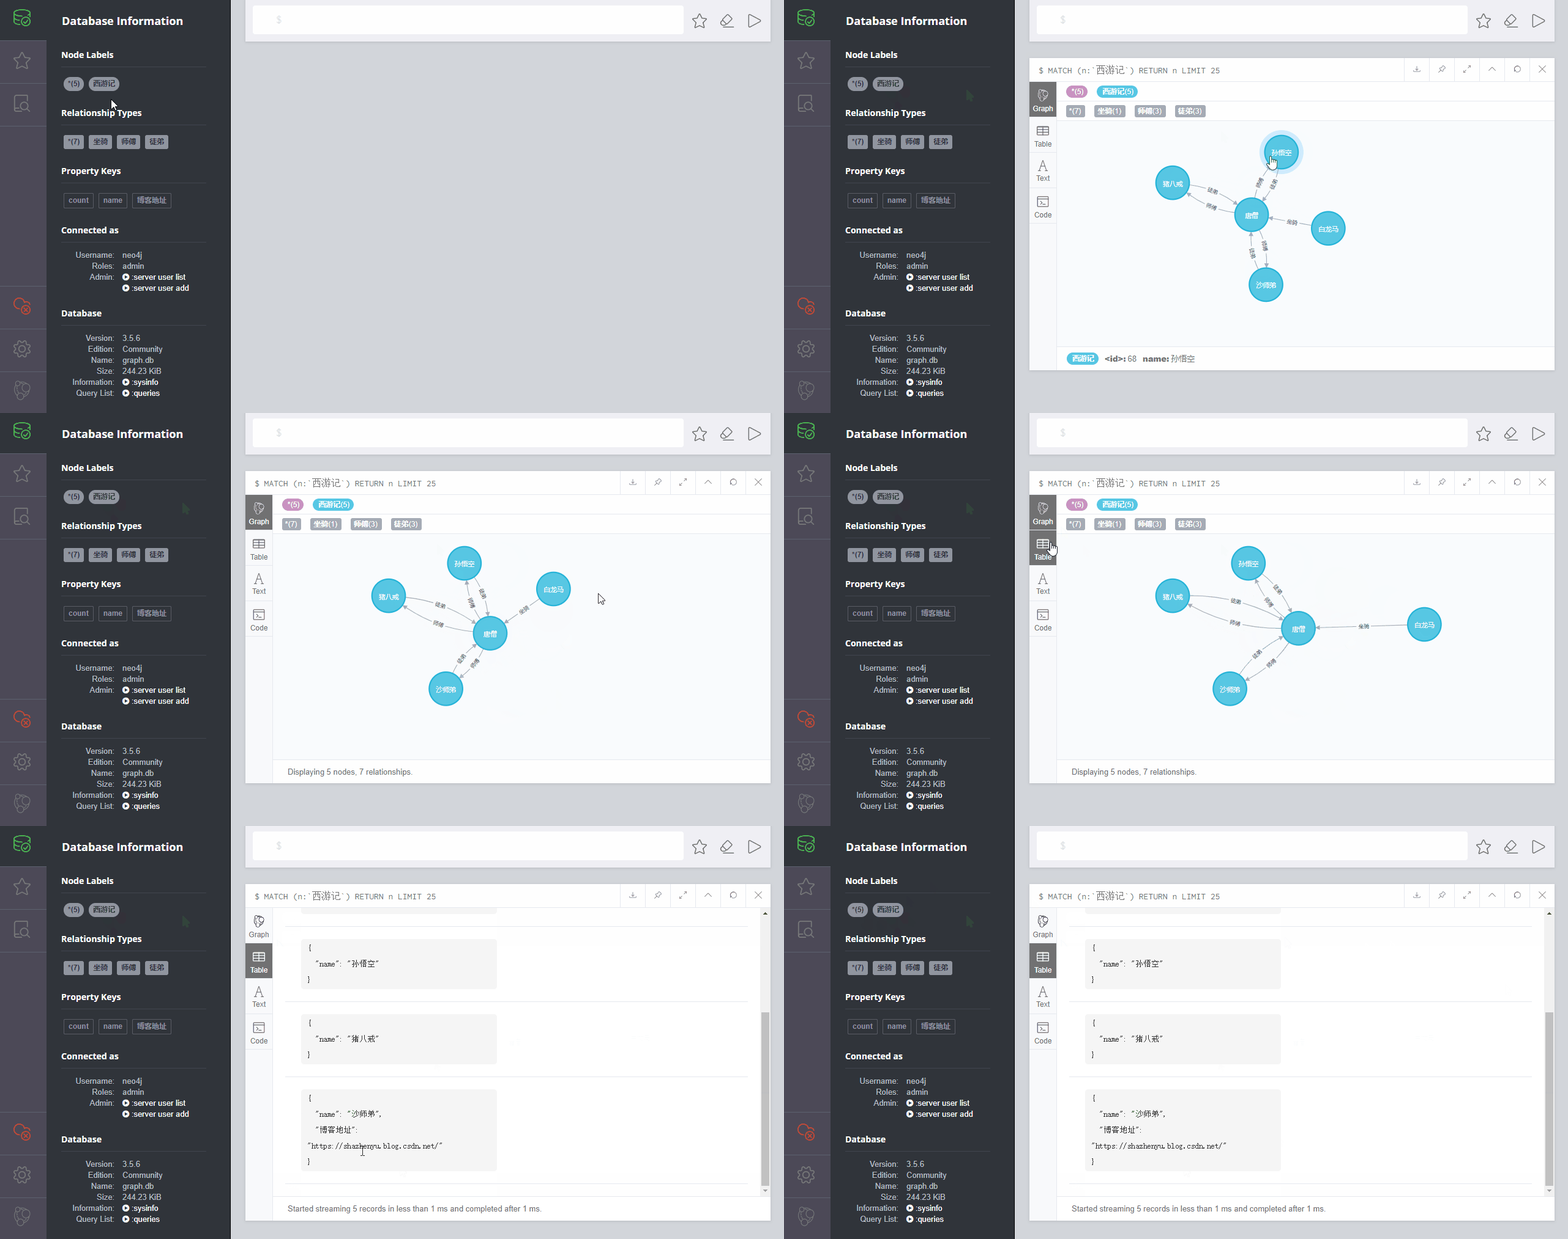
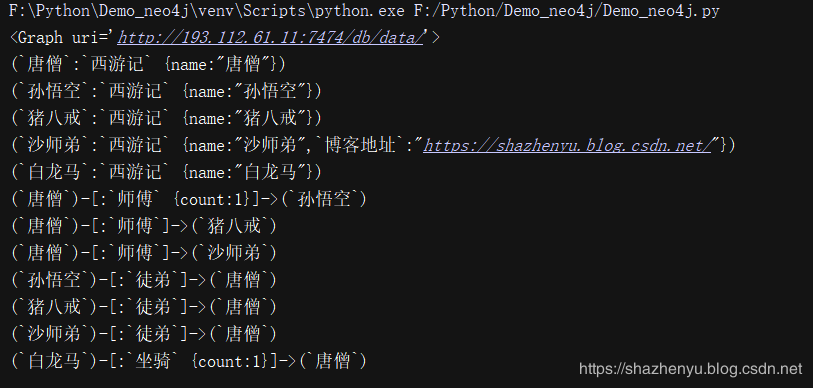
简单讲解
如上图,是本示例的效果。
其中,我加了5个节点信息,3种关系(7个分支的关系),还有3种属性。
这里是给了节点加了属性,例如我给自己加了“博客地址”的属性,属性值为“https://www.jb51.net/”。
还可以给关系加属性,这里没做展示,方法是类似的。
完整源码
from py2neo import Graph, Node, Relationship

graph = Graph(host='IP地址', http_port=7474, user='neo4j', password='123456')

# 清空库
graph.delete_all()

# 创建结点
test_node_0 = Node('西游记', name='唐僧') # 修改的部分
test_node_1 = Node('西游记', name='孙悟空') # 修改的部分
test_node_2 = Node('西游记', name='猪八戒') # 修改的部分
test_node_3 = Node('西游记', name='沙师弟') # 修改的部分
test_node_4 = Node('西游记', name='白龙马') # 修改的部分

test_node_3.setdefault("博客地址",'https://shazhenyu.blog.csdn.net/')

graph.create(test_node_0)
graph.create(test_node_1)
graph.create(test_node_2)
graph.create(test_node_3)
graph.create(test_node_4)

# 创建关系
# 分别建立了test_node_1指向test_node_2和test_node_2指向test_node_1两条关系,关系的类型为"丈夫、妻子",两条关系都有属性count,且值为1。
node_0_node_1 = Relationship(test_node_0, '师傅', test_node_1)
node_0_node_2 = Relationship(test_node_0, '师傅', test_node_2)
node_0_node_3 = Relationship(test_node_0, '师傅', test_node_3)
node_1_node_0 = Relationship(test_node_1, '徒弟', test_node_0)
node_2_node_0 = Relationship(test_node_2, '徒弟', test_node_0)
node_3_node_0 = Relationship(test_node_3, '徒弟', test_node_0)
node_4_node_0 = Relationship(test_node_4, '坐骑', test_node_0)
node_0_node_1['count'] = 1
node_4_node_0['count'] = 1

graph.create(node_0_node_1)
graph.create(node_0_node_2)
graph.create(node_0_node_3)
graph.create(node_1_node_0)
graph.create(node_2_node_0)
graph.create(node_3_node_0)
graph.create(node_4_node_0)

print(graph)
print(test_node_0)
print(test_node_1)
print(test_node_2)
print(test_node_3)
print(test_node_4)
print(node_0_node_1)
print(node_0_node_2)
print(node_0_node_3)
print(node_1_node_0)
print(node_2_node_0)
print(node_3_node_0)
print(node_4_node_0)
本文详细讲解了非关系型图数据库Neo4j安装方法及Python3连接操作Neo4j方法实例,更多关于Python3操作Neo4j的知识请查看下面的相关链接
免责声明:本站发布的内容(图片、视频和文字)以原创、转载和分享为主,文章观点不代表本网站立场,如果涉及侵权请联系站长邮箱:is@yisu.com进行举报,并提供相关证据,一经查实,将立刻删除涉嫌侵权内容。