这篇文章给大家分享的是有关怎样给element添加一个抽屉组件的内容。小编觉得挺实用的,因此分享给大家做个参考,一起跟随小编过来看看吧。
一、实践
1.分析
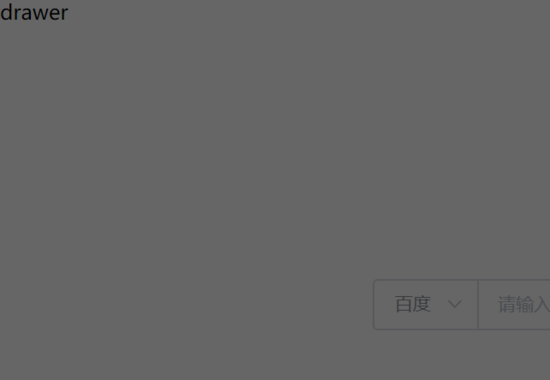
一个抽屉组件的z-index必定是在当前页面之上的,在抽屉主体之外的区域还会有一层半透明的遮罩层,知道这些就很容易了
// drawer.vue
<template>
 <div class="mask"></div>
 <div class="drawer">
  <div class="drawer_body"></div>
 </div>
</template>

<style scoped>
.drawer {
 position: absolute;
 height: 100vh;
 top: 0;
 bottom: 0;
 right: 0;
 left: 0;
 z-index: 1000000 !important;
}
.drawer .drawer_body {
 height: 100%;
 position: absolute;
 z-index: 1000001;
 background-color: #fff;
}
.mask {
 height: 100vh;
 width: 100vw;
 position: absolute;
 z-index: 1000000;
 top: 0;
 left: 0;
 background-color: #000;
 opacity: 0.5;
}
</style>
现在已经是我们想要的样子了,接下来是给drawer_body添加样式

作为一个灵活的组件库,我们希望样式是可以随时定制的,所以,接下要添加的样式都 使用props
动态绑定的
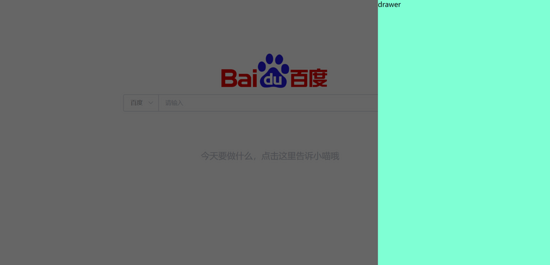
参考iview的样式,除了抽屉的宽度,还需要设置抽屉的方向,当我们需要抽屉时让它显示出来,不需要时隐藏它,或者为了更加显眼,甚至给抽屉更换背景色......,这些都是可以实现的,看下面的代码
<script>
export default {
 props: {
 // 是否显示drawer
 drawerVisible: Boolean,
 // drawer方向
 direction: {
  type: String,
  validator(val) {
  return ["right", "left"].indexOf(val) !== -1;
  }
 },
 // drawer宽度
 width: {
  type: Number,
  default: 400
 },
 // drawer背景色
 background: {
  type: String,
  default: "#ffffff"
 },
 // 是否显示遮罩层
 mask: {
  type: Boolean,
  default: true
 }
 }
};
</script>
对于宽度和背景色,你还需要额外的处理下
<div
 class="drawer_body"
 :style="{'right':direction=='right'?'0':'auto',
 'left':direction=='left'?'0':'auto',
 'width':width+'px','background':background}"
>drawer</div>
你只需在使用的地方引入组件,然后提供你想修改的props值
//index.vue
<template>
 <div>
 ...
 <el-button size="mini" @click="visible">显示抽屉</el-button>
 <Drawer
  :drawerVisible="drawerVisible"
  direction="right"
  :mask="true"
  background="aquamarine"
 ></Drawer>
 </div>
</template>
<script>
export default {
 data() {
 return {
  drawerVisible: false
 };
 },
 methods:{
  // 打开抽屉
 visible() {
  this.drawerVisible = true;
 }
 }
}
</script>
2.关闭抽屉
在点击遮罩层的时候,我们希望可以关闭已经打开的抽屉组件,这里如果你直接修改父组件传过来的drawerVisible值,会报错如下
vue.esm.js:629 [Vue warn]: Avoid mutating a prop directly since the value will be overwritten
whenever the parent component re-renders. Instead, use a data or computed property based on the
prop's value. Prop being mutated: "drawerVisible"
这是因为vue是单向数据流的,如果想改变父元素的值,必须使用监听事件的方式,但是2.3.0之后添加了.sync修饰符,所以,正确的做法是使用.sync修饰符
...
<div v-if="drawerVisible" class="mask"></div>
<transition :name="this.direction=='left'?'slide-right':'slide-left'">
  <div v-if="drawerVisible" @click.stop="closeBtn?'':close" class="drawer">
  <div
   class="drawer_body"
   :style="{
   'right':direction=='right'?'0':'auto',
   'left':direction=='left'?'0':'auto',
   'width':width+'px',
   'background': background}"
  >
  </div>
  </div>
</transition>
...

methods: {
 close() {
  this.$emit("update:drawerVisible", false);
 }
}
另外,我们还希望在关闭抽屉组件时,我们可以监听到这个事件然后做出反应
methods: {
 close() {
  this.$emit("update:drawerVisible", false);
  this.$emit("close");
 }
}
此时需要在抽屉组件上添加
<Drawer
  :drawerVisible.sync="drawerVisible"
  @close="close"
 >
 </Drawer>

methods:{
 close(){
  // 关闭抽屉组件时你要做的事
 }
}
2.动画
动画是UI的灵魂,所以接下来给抽屉组件的显示和隐藏添加动画,我们使用transition的css动画做动画过度效果
//drawer.vue
 <div class="drawer">
 <div class="mask"></div>
 <!-- 不同方向使用不用的动画名称,如果抽屉在左边,则进入方向是朝 → -->
 <transition :name="this.direction=='left'?'slide-right':'slide-left'">
  <div
  class="drawer_body"
  v-if="drawerVisible"
  :style="{'right':direction=='right'?'0':'auto',
  'left':direction=='left'?'0':'auto',
  'width':width+'px',
  'background':background}"
  >drawer</div>
 </transition>
 </div>
</template>
<style scoped>
/*
* ...
*这里省略了写过的样式
*/
.slide-right-enter-active,
.slide-right-leave-active,
.slide-left-enter-active,
.slide-left-leave-active {
 will-change: transform;
 transition: transform 300ms;
 position: absolute;
 width: 100vw;
 height: 100vh;
 overflow: hidden;
}
.slide-right-enter,
.slide-right-leave-active {
 transform: translate(-100%, 0);
}
.slide-left-leave-active,
.slide-left-enter {
 transform: translate(100%, 0);
}
</style>
虽然现在已经完全实现了抽屉的功能,但是本着更加精美的原则,我还打算使用slot给它添加辩题和页脚
3.添加标题
标题solt的name值是header
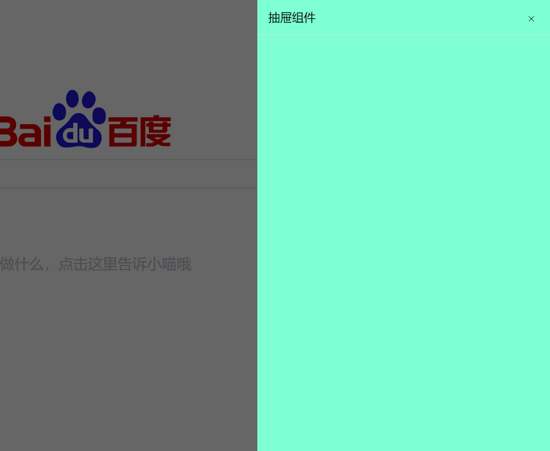
添加标题的目的是为了让抽屉组件看起来更加清楚,此外,除了添加标题,我还想添加个关闭按钮
// 需要添加几个props属性
<script>
export default {
 props: {
 // drawer标题
 title: String,
 // 是否显示关闭按钮
 closeBtn: {
  type: Boolean,
  default: false
 },
 }
};
</script>
你可以选择是否添加标题,是否添加关闭按钮,值的注意的是如果添加了关闭按钮,点击遮罩层就不会自动关闭抽屉组件了

<!--这里要啰嗦下布局,如果你只选择开启关闭按钮,那justify-content布局是flex-end
如果两者都开启,那justify-content布局是space-between-->
<slot name="header">
 <div
  v-if="title||closeBtn"
  :
  class="title"
 >
  <div v-if="title">{{title}}</div>
  <el-button
  v-if="closeBtn"
  circle
  size="mini"
  icon="el-icon-close"
  @click="close"
  ></el-button>
 </div>
 </slot>
我是这么做到禁用遮罩层点击事件的
<div v-if="drawerVisible" @click.stop="closeBtn?'':close" class="mask"></div>
当然这些你可以使用具名插槽自定义的
<Drawer
 :width="400"
 direction="right"
 :mask="true"
 title="抽屉组件"
 >
 <div v-slot:header>这里是自定义标题</div>
 <div ></div>
</Drawer>
4.添加页脚
页脚solt的name值是footer
为了使得页脚和标题有一定的距离,我给主体内容添加了最小高度
<div >
<slot></slot>
</div>
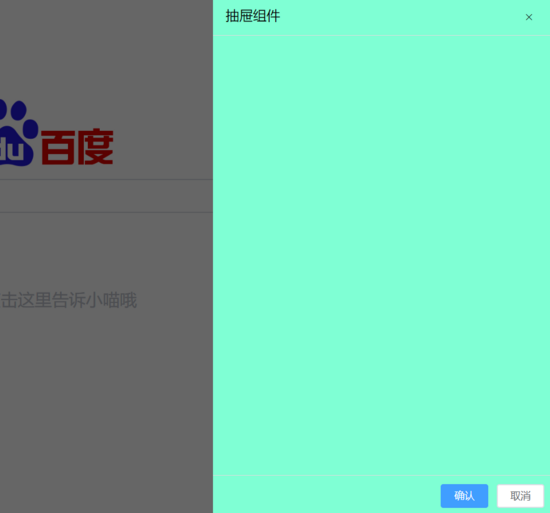
方法是很类似的,只是我多添加了两个监听事件,确定和取消
//drawer.vue
<slot name="footer">
 <div class="footer">
  <el-button size="mini" type="primary" @click="footerOk">确认</el-button>
  <el-button size="mini" @click="footerCal">取消</el-button>
 </div>
</slot>
//引入的页面
<Drawer
 :width="400"
 direction="right"
 :mask="true"
 title="抽屉组件"
 :footer-ok="footerOk"
 :footer-cal="footerCal"
 >
</Drawer>
还需要在props中添加对应的值
props: {
 footerOk: Function,
 footerCal: Function
 },
关于页脚的布局是这样的

.footer {
 border-top: 0.1px solid #ddd;
 display: flex;
 justify-content: flex-end;
 padding-top: 10px;
}
当然这些你也是可以使用具名插槽自定义的
<Drawer
 :width="400"
 direction="right"
 :mask="true"
 title="抽屉组件"
 >
 <div v-slot:header>这里是自定义标题</div>
 <div ></div>
 <div v-slot:footer>这里是自定义页脚</div>
</Drawer>
5.主体是否可以滚动
前面说过给主体添加了最小高度,但是超过最小高度,可能会被撑开布局,所以我给它添加了滚动功能
// props添加
 // 是否开启滚动
 scroll: {
  type: Boolean,
  default: false
 }
在drawer_body的样式末尾追加overflow-y样式
<div
 class="drawer_body"
 :style="{
  'right':direction=='right'?'0':'auto',
  'left':direction=='left'?'0':'auto',
  'width':width+'px',
  'background': background,
  'overflow-y':scroll?'scroll':'hidden'}"
>
</div>
scroll默认是不开启的,如果你的抽屉要放的内容少,就不用理这个属性,但是当内容撑开抽屉时记得手动开启这个功能复制代码
6.细节的优化
这里说下自己的不足之处,并且如何改进它
a.滚动条bug
当选择抽屉在右边时,动画过程中会出现滚动条,看起来让我的UI组件大打折扣,针对这个问题我打算在组件中监听drawerVisible,当它需要被展示时禁用body的滚动效果,当它不需要被展示时,还原body的展示效果
watch: {
 drawerVisible(n, o) {
  if (n == true) {
  document.documentElement.style.overflowY = "hidden";
  document.documentElement.style.overflowX = "hidden";
  }
 }
 },
b.向下冒泡bug
在点击抽屉以外的区域可以正常关闭抽屉,但是我发现当我点击抽屉非按钮区域时,也会关闭抽屉,这是向下冒泡的bug,这个bug我的解决方案是在drawer_body上添加个无意义的事件,并阻止向上冒泡
<div
 @click.stop="clickBg_" // 注意这里
 class="drawer_body"
 :style="{
  'right':direction=='right'?'0':'auto',
  'left':direction=='left'?'0':'auto',
  'width':width+'px',
  'background': background,
  'overflow-y':scroll?'scroll':'hidden'}"
>
</div>
二、API文档
1.属性
| 属性 | 描述 | 类型 | 默认 |
|---|---|---|---|
| drawerVisible | 是否显示drawer | Boolean | false |
| direction | drawer方向 | String | left |
| width | drawer宽度 | Number | 400 |
| background | drawer背景色 | String | #ffffff |
| mask | 是否显示遮罩层 | Boolean | true |
| title | drawer标题 | Boolean | true |
| closeBtn | 是否显示关闭按钮 | String | --- |
| scroll | 是否开启滚动 | Boolean | false |
2.事件
| 事件 | 描述 | 返回值 |
|---|---|---|
| close | 监听关闭事件 | 无 |
| footerOk | 页脚确认绑定事件,使用默认页脚时有效 | 无 |
| footerCal | 页脚取消绑定事件,使用默认页脚时有效 | 无 |
3.slot
| name | 描述 |
|---|---|
| header | 页头插槽名称 |
| default | 抽屉主体部分,可省略 |
| footer | 页脚插槽名称 |
注意:插槽里的按钮都是使用element内置的组件,如果你的项目里没有引入element库
那最好请使用具名插槽重写页头和页脚部分
感谢各位的阅读!关于“怎样给element添加一个抽屉组件”这篇文章就分享到这里了,希望以上内容可以对大家有一定的帮助,让大家可以学到更多知识,如果觉得文章不错,可以把它分享出去让更多的人看到吧!
免责声明:本站发布的内容(图片、视频和文字)以原创、转载和分享为主,文章观点不代表本网站立场,如果涉及侵权请联系站长邮箱:is@yisu.com进行举报,并提供相关证据,一经查实,将立刻删除涉嫌侵权内容。