小编给大家分享一下如何实现iOS中Cell的Section展开和收起,希望大家阅读完这篇文章之后都有所收获,下面让我们一起去探讨吧!
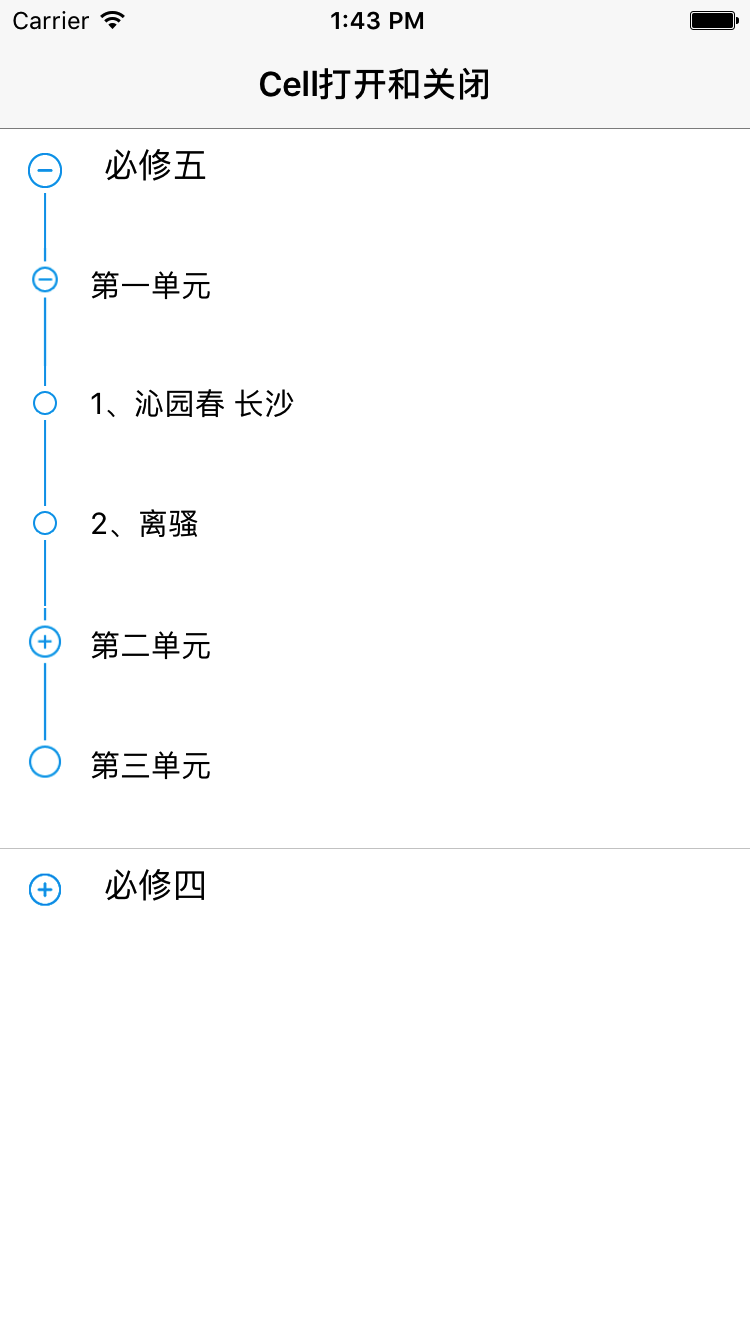
首先,先上图,让大家看看效果
相信大家对于TableViewd数据的设置都熟悉,这方面就不多说的,重点的还是来看:
1.如何实现cell的Section的展开和收起的效果
- (void)tableView:(UITableView *)tableView didSelectRowAtIndexPath:(NSIndexPath *)indexPath {
  [self.tableView deselectRowAtIndexPath:indexPath animated:NO];


  currentRow = indexPath.row;

  NSDictionary *sectionDic = self.dataSource[indexPath.section];
  NSArray *cellArray = sectionDic[@"sub"];

  //cell当前的数据
  NSDictionary *cellData = cellArray[indexPath.row];

  NSString *key = [NSString stringWithFormat:@"%@", cellData[@"chapterID"]];
  CellModel *chapterModel = [self.cellOpen valueForKey:key];

  chapterModel.isShow = !chapterModel.isShow;

  [self.tableView reloadRowsAtIndexPaths:@[indexPath] withRowAnimation:UITableViewRowAnimationAutomatic];
}
当用户点击到某一个cell时候,需要判断cell是否是展开状态,如果张开或者收起就调用
复制代码 代码如下:
[self.tableView reloadRowsAtIndexPaths:@[indexPath] withRowAnimation:UITableViewRowAnimationAutomatic];
让cell的section能够重新加载刷新;
2.如何添加cell的Section
2.1设置section的高度
- (CGFloat)tableView:(UITableView *)tableView heightForRowAtIndexPath:(NSIndexPath *)indexPath {
  NSDictionary *sectionDic = self.dataSource[indexPath.section];
  NSArray *cellArray = sectionDic[@"sub"];
  //cell当前的数据
  NSDictionary *cellData = cellArray[indexPath.row];

  NSString *key = [NSString stringWithFormat:@"%@", cellData[@"chapterID"]];
  CellModel *model = [self.cellOpen valueForKey:key];
  if (model.isShow) {
    return (model.pois.count+1)*60;
  } else {
    return 60;
  }

}
上面的代码是设置section的高度,主要是以cell的isshow作为标记,让section的能够随数据的改变而变动
3.如果要在一个cell上再加一个cell,实现cell内嵌cell,需要在哪里加?
答案:当然是在cell的HeaderSection或者FooterSection上加上cell,这样就能实现cell内嵌cell。
看完了这篇文章,相信你对“如何实现iOS中Cell的Section展开和收起”有了一定的了解,如果想了解更多相关知识,欢迎关注亿速云行业资讯频道,感谢各位的阅读!
免责声明:本站发布的内容(图片、视频和文字)以原创、转载和分享为主,文章观点不代表本网站立场,如果涉及侵权请联系站长邮箱:is@yisu.com进行举报,并提供相关证据,一经查实,将立刻删除涉嫌侵权内容。


