这篇文章主要讲解了Android自定义view实现标签栏功能的实例解析,内容清晰明了,对此有兴趣的小伙伴可以学习一下,相信大家阅读完之后会有帮助。
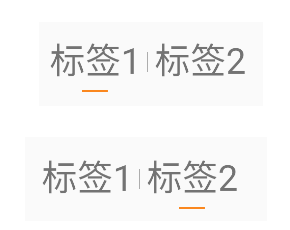
实现效果图
主要代码
完整源代码
class TabView(context: Context, attributeSet: AttributeSet?) : LinearLayout(context, attributeSet) {
 private lateinit var firstTab: View
 private lateinit var secondTab: View
 private val firstTabIndex = 0
 private val secondTabIndex = 1
 private var selectedTab = firstTabIndex
 private val textSize = 20f
 private val bottomSplitColor = "#FA871E"
 private val centerSplitColor = "#666666"
 private val bottomSplitWidth = 50
 private val bottomSplitHeight = 4
 private val centerSplitWidth = 1
 private val centerSplitHeight = 40
 private lateinit var mOnSwitchListener: OnSwitchListener
 fun initTabs(
  firstTabText: String,
  secondTabText: String,
  selectedIndex: Int,
  onSwitchListener: OnSwitchListener
 ) {
  mOnSwitchListener = onSwitchListener
  setOrientation()
  firstTab = addTab(firstTabText)
  addCenterSplit()
  secondTab = addTab(secondTabText)
  selectTab(selectedIndex)
  setOnClickListener { switchTab() }
 }
 interface OnSwitchListener {
  fun onSwitched(selectedIndex: Int)
 }
 private fun selectTab(tabIndex: Int) {
  if (tabIndex == firstTabIndex) {
   firstTab.visibility = View.VISIBLE
   secondTab.visibility = View.INVISIBLE
  } else {
   firstTab.visibility = View.INVISIBLE
   secondTab.visibility = View.VISIBLE
  }
  selectedTab = tabIndex
 }
 private fun switchTab() {
  if (selectedTab == firstTabIndex) {
   selectTab(secondTabIndex)
  } else {
   selectTab(firstTabIndex)
  }
  mOnSwitchListener.onSwitched(selectedTab)
 }
 private fun setOrientation() {
  orientation = HORIZONTAL
 }
 private fun getBottomSplitView(): View {
  val view = View(context)
  view.setBackgroundColor(Color.parseColor(bottomSplitColor))
  return view
 }
 private fun getBottomSplitLayoutParams(): LayoutParams {
  val layoutParams = LayoutParams(bottomSplitWidth, bottomSplitHeight)
  layoutParams.setMargins(3, 3, 3, 3)
  layoutParams.gravity = Gravity.CENTER_HORIZONTAL
  return layoutParams
 }
 private fun addCenterSplit() {
  val view = View(context)
  view.setBackgroundColor(Color.parseColor(centerSplitColor))
  addView(view, getCenterSplitLayoutParams())
 }
 private fun getCenterSplitLayoutParams(): LayoutParams {
  val layoutParams = LayoutParams(centerSplitWidth, centerSplitHeight)
  layoutParams.setMargins(3, 0, 3, 0)
  layoutParams.gravity = Gravity.CENTER_VERTICAL
  return layoutParams
 }
 private fun addTab(text: String): View {
  var linearLayout = LinearLayout(context)
  linearLayout.orientation = VERTICAL
  val textView = getTextView(text)
  linearLayout.addView(
   textView,
   LayoutParams(LayoutParams.WRAP_CONTENT, LayoutParams.WRAP_CONTENT)
  )
  val splitView = getBottomSplitView()
  linearLayout.addView(splitView, getBottomSplitLayoutParams())
  addView(linearLayout, LayoutParams(LayoutParams.WRAP_CONTENT, LayoutParams.WRAP_CONTENT))
  return splitView
 }
 private fun getTextView(text: String): TextView {
  val textView = TextView(context)
  textView.text = text
  textView.setPadding(10, 10, 10, 10)
  textView.textSize = textSize
  return textView
 }
}看完上述内容,是不是对Android自定义view实现标签栏功能的实例解析有进一步的了解,如果还想学习更多内容,欢迎关注亿速云行业资讯频道。
亿速云「云服务器」,即开即用、新一代英特尔至强铂金CPU、三副本存储NVMe SSD云盘,价格低至29元/月。点击查看>>
免责声明:本站发布的内容(图片、视频和文字)以原创、转载和分享为主,文章观点不代表本网站立场,如果涉及侵权请联系站长邮箱:is@yisu.com进行举报,并提供相关证据,一经查实,将立刻删除涉嫌侵权内容。


 计算
计算 安全
安全 数据库
数据库 网络和加速
网络和加速 企业服务
企业服务


