使用springboot整合kaptcha实现生成验证码功能?针对这个问题,这篇文章详细介绍了相对应的分析和解答,希望可以帮助更多想解决这个问题的小伙伴找到更简单易行的方法。
一、导入jar包
<!-- kaptcha验证码 -->
<dependency>
	<groupId>com.github.penggle</groupId>
	<artifactId>kaptcha</artifactId>
	<version>2.3.2</version>
</dependency>
二、编写kaptcha配置类
package com.zym.config;

import com.google.code.kaptcha.impl.DefaultKaptcha;
import com.google.code.kaptcha.util.Config;
import org.springframework.context.annotation.Bean;
import org.springframework.context.annotation.Configuration;

import java.util.Properties;

@Configuration
public class KaptchaConfig {

  @Bean
  public DefaultKaptcha defaultKaptcha(){
    DefaultKaptcha kaptcha = new DefaultKaptcha();

    Properties properties = new Properties();
    //边框
    properties.setProperty("kaptcha.border", "no");
    //字体颜色
    properties.setProperty("kaptcha.textproducer.font.color", "green");
    //图片宽度
    properties.setProperty("kaptcha.image.width", "120");
    //图片高度
    properties.setProperty("kaptcha.image.height", "30");
    //字体大小
    properties.setProperty("kaptcha.textproducer.font.size", "20");
    //session key
    properties.setProperty("kaptcha.session.key", "kaptcha");
    //验证码长度
    properties.setProperty("kaptcha.textproducer.char.length", "4");
    //字体
    properties.setProperty("kaptcha.textproducer.font.names", "宋体");
    //文字间隔
    properties.setProperty("kaptcha.textproducer.char.space", "10");
    //噪点实现类
    properties.setProperty("kaptcha.noise.impl", "com.google.code.kaptcha.impl.NoNoise");
    //图片样式-阴影
    properties.setProperty("kaptcha.obscurificator.impl", "com.google.code.kaptcha.impl.ShadowGimpy");

    Config config = new Config(properties);
    kaptcha.setConfig(config);
    return kaptcha;
  }
}
三、编写接口
package com.zym.controller;
import com.google.code.kaptcha.impl.DefaultKaptcha;
import org.apache.tomcat.util.http.fileupload.IOUtils;
import org.springframework.beans.factory.annotation.Autowired;
import org.springframework.web.bind.annotation.GetMapping;
import org.springframework.web.bind.annotation.RestController;
import javax.imageio.ImageIO;
import javax.servlet.ServletOutputStream;
import javax.servlet.http.HttpServletRequest;
import javax.servlet.http.HttpServletResponse;
import javax.servlet.http.HttpSession;
import java.awt.image.BufferedImage;
import java.io.IOException;
@RestController
public class KaptchaController {
@Autowired
private DefaultKaptcha defaultKaptcha;
@GetMapping("/kaptcha")
public void getKaptcha(HttpServletRequest request, HttpServletResponse response) throws IOException {
//设置响应头
response.setHeader("Cache-Control", "no-cache");
response.setHeader("Pragma", "no-cache");
response.setContentType("image/jpeg");
String text = defaultKaptcha.createText();
HttpSession session = request.getSession();
//将验证码存入session
session.setAttribute("code", text);
//创建验证码图片
BufferedImage image = defaultKaptcha.createImage(text);
ServletOutputStream os = response.getOutputStream();
ImageIO.write(image, "jpg", os);
IOUtils.closeQuietly(os);
}
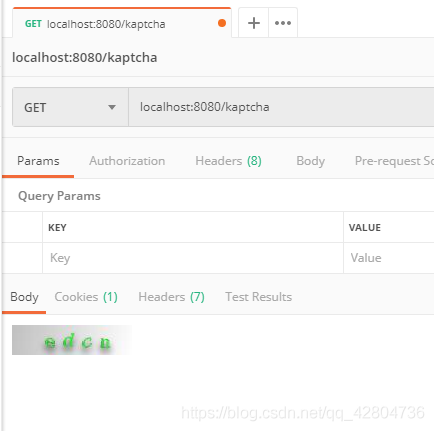
}四、测试接口
使用PostMan:
输入url:localhost:8080/kaptcha
成功得到验证码图片,大功告成!
关于使用springboot整合kaptcha实现生成验证码功能问题的解答就分享到这里了,希望以上内容可以对大家有一定的帮助,如果你还有很多疑惑没有解开,可以关注亿速云行业资讯频道了解更多相关知识。
免责声明:本站发布的内容(图片、视频和文字)以原创、转载和分享为主,文章观点不代表本网站立场,如果涉及侵权请联系站长邮箱:is@yisu.com进行举报,并提供相关证据,一经查实,将立刻删除涉嫌侵权内容。


