这篇文章主要介绍“Android中如何使用ViewGroup自定义布局”,在日常操作中,相信很多人在Android中如何使用ViewGroup自定义布局问题上存在疑惑,小编查阅了各式资料,整理出简单好用的操作方法,希望对大家解答”Android中如何使用ViewGroup自定义布局”的疑惑有所帮助!接下来,请跟着小编一起来学习吧!
步骤
这里 我为大家设计一个 类似 LinearLayout 线性布局的 ViewGroup 作为范例。
首先,如果是一个 LinearLayout 那么当设置 wrap_content 时,他就会以子空间中最宽的那个为它的宽度。同时在高度方面会是所有子控件高度的总和。所以我们先写两个方法,分别用于测量 ViewGroup 的宽度和高度。
 private int getMaxWidth(){
  int count = getChildCount();
  int maxWidth = 0;
  for (int i = 0 ; i < count ; i ++){
   int currentWidth = getChildAt(i).getMeasuredWidth();
   if (maxWidth < currentWidth){
    maxWidth = currentWidth;
   }
  }
  return maxWidth;
 }

 private int getTotalHeight(){
  int count = getChildCount();
  int totalHeight = 0;
  for (int i = 0 ; i < count ; i++){
   totalHeight += getChildAt(i).getMeasuredHeight();
  }
  return totalHeight;
}对于 ViewGroup 而言我们可以粗略的分为两种模式:固定长宽模式(match_parent),自适应模式(wrap_content),根据这两种模式,就可以对 ViewGroup 的绘制进行划分。这里关于 measureChildren 这个方法,他是用于将所有的子 View 进行测量,这会触发每个子 View 的 onMeasure 函数,但是大家要注意要与 measureChild 区分,measureChild 是对单个 view 进行测量
 @Override
 protected void onMeasure(int widthMeasureSpec, int heightMeasureSpec) {
  super.onMeasure(widthMeasureSpec, heightMeasureSpec);

  measureChildren(widthMeasureSpec, heightMeasureSpec);

  int widthMode = MeasureSpec.getMode(widthMeasureSpec);
  int width  = MeasureSpec.getSize(widthMeasureSpec);
  int heightMode= MeasureSpec.getMode(heightMeasureSpec);
  int height = MeasureSpec.getSize(heightMeasureSpec);

  if (widthMode == MeasureSpec.AT_MOST && heightMode == MeasureSpec.AT_MOST){
   int groupWidth = getMaxWidth();
   int groupHeight= getTotalHeight();

   setMeasuredDimension(groupWidth, groupHeight);
  }else if (widthMode == MeasureSpec.AT_MOST){
   setMeasuredDimension(getMaxWidth(), height);
  }else if (heightMode == MeasureSpec.AT_MOST){
   setMeasuredDimension(width, getTotalHeight());
  }
}重写 onLayout
整完上面这些东西,我们的布局大小七十九已经出来了,然我们在活动的布局文件里面加上它,并添加上几个子 View 然后运行一下,先看看效果:
 <com.entry.android_view_user_defined_first.views.MyLinearLayout
  android:layout_width="wrap_content"
  android:layout_height="wrap_content"
  android:background="@color/colorAccent">

  <Button
   android:layout_width="100dp"
   android:layout_height="50dp"
   android:text="qwe"/>

  <Button
   android:layout_width="250dp"
   android:layout_height="150dp"
   android:text="qwe"/>

  <Button
   android:layout_width="200dp"
   android:layout_height="75dp"
   android:text="qwe"/>

</com.entry.android_view_user_defined_first.views.MyLinearLayout>运行效果如下:
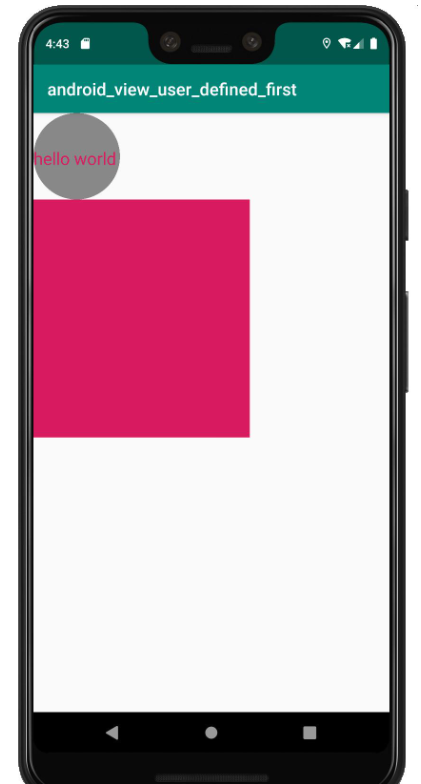
我们看见布局出来了,大小好像也没啥问题,但是子 View 呢??! 这么没看见子 View 在看看代码,系统之前然我们重写的 onLayout() 还是空着的呀!!也就是说,子 View 的大小和位置根本就还没有进行过设定!让我们来重写下 onLayout() 方法。
 @Override
 protected void onLayout(boolean changed, int l, int t, int r, int b) {
  int count = getChildCount();
  int currentHeight = 0;
  for (int i = 0 ; i < count ; i++){
   View view = getChildAt(i);
   int height = view.getMeasuredHeight();
   int width = view.getMeasuredWidth();
   view.layout(l, currentHeight, l + width, currentHeight + height);
   currentHeight += height;
  }
}到此,关于“Android中如何使用ViewGroup自定义布局”的学习就结束了,希望能够解决大家的疑惑。理论与实践的搭配能更好的帮助大家学习,快去试试吧!若想继续学习更多相关知识,请继续关注亿速云网站,小编会继续努力为大家带来更多实用的文章!
亿速云「云服务器」,即开即用、新一代英特尔至强铂金CPU、三副本存储NVMe SSD云盘,价格低至29元/月。点击查看>>
免责声明:本站发布的内容(图片、视频和文字)以原创、转载和分享为主,文章观点不代表本网站立场,如果涉及侵权请联系站长邮箱:is@yisu.com进行举报,并提供相关证据,一经查实,将立刻删除涉嫌侵权内容。
原文链接:https://www.xuebuyuan.com/3270029.html


 计算
计算 安全
安全 数据库
数据库 网络和加速
网络和加速 企业服务
企业服务


