本篇内容主要讲解“RESTful API怎么进行版本控制”,感兴趣的朋友不妨来看看。本文介绍的方法操作简单快捷,实用性强。下面就让小编来带大家学习“RESTful API怎么进行版本控制”吧!
您将学到
最好的版本控制方法是不进行版本控制。只要不需要版本控制,就不要版本控制。
构建向后兼容的服务,以便尽可能避免版本控制!
然而,在许多情况下我们都需要进行版本控制,然我们看看下面具体的例子:
最初,你有个这个版本的Student服务,返回数据如下:
{ "name": "Bob Charlie"} 后来,您希望将学生的名字拆分,因此创建了这个版本的服务。
{ "name": { "firstName": "Bob", "lastName": "Charlie" }}您可以从同一个服务支持这两个请求,但是随着每个版本的需求多样化,它会变得越来越复杂。
在这种情况下,版本控制就成必不可少,强制性的了。
接下来让我们创建一个简单的SpringBoot的maven项目,并理解对 RESTful 服务进行版本控制的4种不同方法。
<dependencies> <dependency> <groupId>org.springframework.boot</groupId> <artifactId>spring-boot-starter</artifactId> </dependency> <dependency> <groupId>org.springframework.boot</groupId> <artifactId>spring-boot-starter-web</artifactId> </dependency> <dependency> <groupId>org.projectlombok</groupId> <artifactId>lombok</artifactId> </dependency> <dependency> <groupId>org.springframework.boot</groupId> <artifactId>spring-boot-starter-test</artifactId> <scope>test</scope> </dependency></dependencies>
第一个版本的 Bean
@Data@AllArgsConstructorpublic class StudentV1 { private String name;} 第二个版本的 Bean
@Datapublic class StudentV2 { private Name name;} StudentV2使用的Name实体
@Data@AllArgsConstructorpublic class Name { private String firstName; private String lastName;}
我们希望创建两个版本的服务,一个返回 StudentV1,另一个返回 StudentV2。
让我们来看看创建相同服务版本的4种不同方法。
@RestControllerpublic class StudentUriController { @GetMapping("v1/student") public StudentV1 studentV1() { return new StudentV1("javadaily"); } @GetMapping("v2/student") public StudentV2 studentV2() { return new StudentV2(new Name("javadaily", "JAVA日知录")); }}请求:http://localhost:8080/v1/student
响应:{"name":"javadaily"}
请求:http://localhost:8080/v2/student
响应:{"name":{"firstName":"javadaily","lastName":"JAVA日知录"}}
版本控制的第二种方法是使用请求参数来区分版本。请求示例如下所示:
http://localhost:8080/student/param?version=1http://localhost:8080/student/param?version=2实现方式如下:
@RestControllerpublic class StudentParmController { @GetMapping(value="/student/param",params = "version=1") public StudentV1 studentV1() { return new StudentV1("javadaily"); } @GetMapping(value="/student/param",params = "version=2") public StudentV2 studentV2() { return new StudentV2(new Name("javadaily", "JAVA日知录")); }} 请求:http://localhost:8080/student/param?version=1
响应:{"name":"javadaily"}
请求:http://localhost:8080/student/param?version=2
响应:{"name":{"firstName":"javadaily","lastName":"JAVA日知录"}}
版本控制的第三种方法是使用请求头来区分版本,请求示例如下:
http://localhost:8080/student/header
http://localhost:8080/student/header
实现方式如下所示:
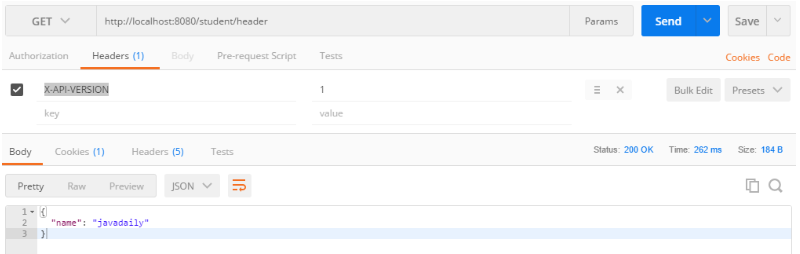
@RestControllerpublic class StudentHeaderController { @GetMapping(value="/student/header",headers = "X-API-VERSION=1") public StudentV1 studentV1() { return new StudentV1("javadaily"); } @GetMapping(value="/student/header",headers = "X-API-VERSION=2") public StudentV2 studentV2() { return new StudentV2(new Name("javadaily", "JAVA日知录")); }} 下图展示了我们如何使用Postman执行带有请求头的Get请求方法。
请求:http://localhost:8080/student/header
header:X-API-VERSION = 1
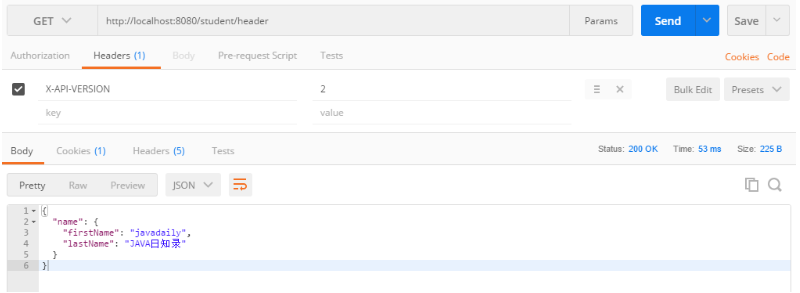
请求:http://localhost:8080/student/header
header:X-API-VERSION = 2
最后一种版本控制方法是在请求中使用Accept Header,请求示例如下:
http://localhost:8080/student/produce
headers=[Accept=application/api-v1+json]http://localhost:8080/student/produce
headers=[Accept=application/api-v2+json]实现方式如下:
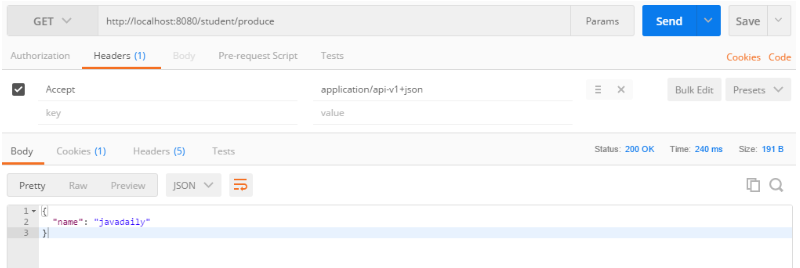
@RestControllerpublic class StudentProduceController { @GetMapping(value="/student/produce",produces = "application/api-v1+json") public StudentV1 studentV1() { return new StudentV1("javadaily"); } @GetMapping(value="/student/produce",produces = "application/api-v2+json") public StudentV2 studentV2() { return new StudentV2(new Name("javadaily", "JAVA日知录")); }}下图展示了我们如何使用Postman执行带有请求Accept的Get方法。
请求:http://localhost:8080/student/produce
header:Accept = application/api-v1+json
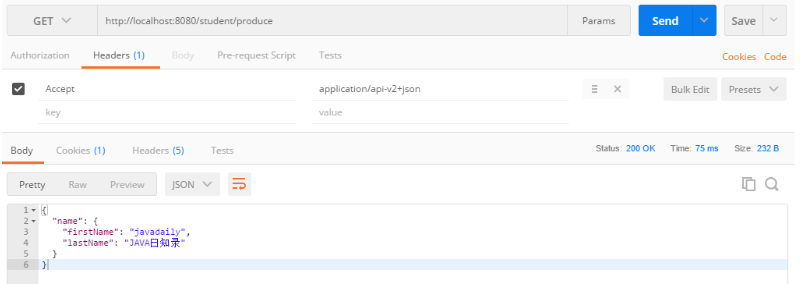
请求:http://localhost:8080/student/produce
header:Accept = application/api-v2+json
以下因素影响版本控制的选择
事实上,并没有完美的版本控制解决方案,你需要根据项目实际情况进行选择。
到此,相信大家对“RESTful API怎么进行版本控制”有了更深的了解,不妨来实际操作一番吧!这里是亿速云网站,更多相关内容可以进入相关频道进行查询,关注我们,继续学习!
亿速云「云服务器」,即开即用、新一代英特尔至强铂金CPU、三副本存储NVMe SSD云盘,价格低至29元/月。点击查看>>
免责声明:本站发布的内容(图片、视频和文字)以原创、转载和分享为主,文章观点不代表本网站立场,如果涉及侵权请联系站长邮箱:is@yisu.com进行举报,并提供相关证据,一经查实,将立刻删除涉嫌侵权内容。
原文链接:https://my.oschina.net/u/1388595/blog/4923598


 计算
计算 安全
安全 数据库
数据库 网络和加速
网络和加速 企业服务
企业服务


