这篇文章主要介绍“Flutter怎么使用AnimatedBuilder实现动效复用”的相关知识,小编通过实际案例向大家展示操作过程,操作方法简单快捷,实用性强,希望这篇“Flutter怎么使用AnimatedBuilder实现动效复用”文章能帮助大家解决问题。
我们之前讲述了动画构建的两种方式,Animation 和 AnimationWidget,这两种构建动画都是将组件和动画一起完成的。有些时候,我们只是想动效复用,而不关心组件构建,这个时候就可以使用 AnimatedBuilder 了。
根据官方文档说明,AnimatedBuilder 的使用要点如下:
An AnimatedBuilder understands how to render the transition. —— AnimatedBuilder 知道如何渲染转场动效。
An AnimatedBuilder doesn’t know how to render the widget, nor does it manage the Animation object. —— AnimatedBuilder 不知道(或者准确说不应)如何渲染组件,也不管理组件对象。
Use AnimatedBuilder to describe an animation as part of a build method for another widget. If you simply want to define a widget with a reusable animation, use an AnimatedWidget. —— 使用 AnimatedBuilder 作为其他组件的动效描述。如果只是想复用一个带有动效的组件,那么应该使用 AnimatedWidget。这个可以看我们之前关于 AnimatedWidget 的介绍:Flutter 入门与实战(九十四):让你的组件拥有三维动效
Examples of AnimatedBuilders in the Flutter API: BottomSheet, ExpansionTile, PopupMenu, ProgressIndicator, RefreshIndicator, Scaffold, SnackBar, TabBar, TextField. —— 在 Flutter 中,有很多组件使用 AnimatedBuilder 构建动效。
这段话的核心要点就是 AnimatedBuilder 应该只负责动画效果的管理,而不应该管理组件构建。如果混在一起使用,就失去设计者的初衷了。这就好比我们的状态管理和界面一样,一个负责业务逻辑,一个负责界面渲染,从而实现解耦和复用。这个AnimatedBuilder就是专门复制动效管理的,并且应当努力实现复用。AnimatedBuilder的定义如下:
const AnimatedBuilder({
    Key? key,
    required Listenable animation,
    required this.builder,
    this.child,
  }) : assert(animation != null),
       assert(builder != null),
super(key: key, listenable: animation);其中关键的参数是builder,builder 用于构建组件的转变动作,在 builder 里可以对要渲染的子组件进行转变操作,然后返回变换后的组件。builder 的定义如下,其中 child 实际就是 AnimatedBuilder 的 child 参数,可以根据需要是否使用。
Widget Function(BuildContext context, Widget? child)
在 Flutter 中,提供了一个专门用于对子组件进行转换操作的,定义如下:
const Transform({
    Key? key,
    required this.transform,
    this.origin,
    this.alignment,
    this.transformHitTests = true,
    Widget? child,
  }) : assert(transform != null),
       super(key: key, child: child);
这里的参数说明如下:
transform 是一个Matrix4 对象,用于定义三维空间的变换操作。
origin 是一个坐标偏移量,实际会加入到 Matrix4 的 translation(平移)中。
alignment:即转变进行的参考方位。
child:被转换的子组件。
我们可以通过 Transform,实现 AnimatedBuilder 的动效管理,也就是在 AnimatedBuilder 中,通过构建 Transform 对象实现动效。
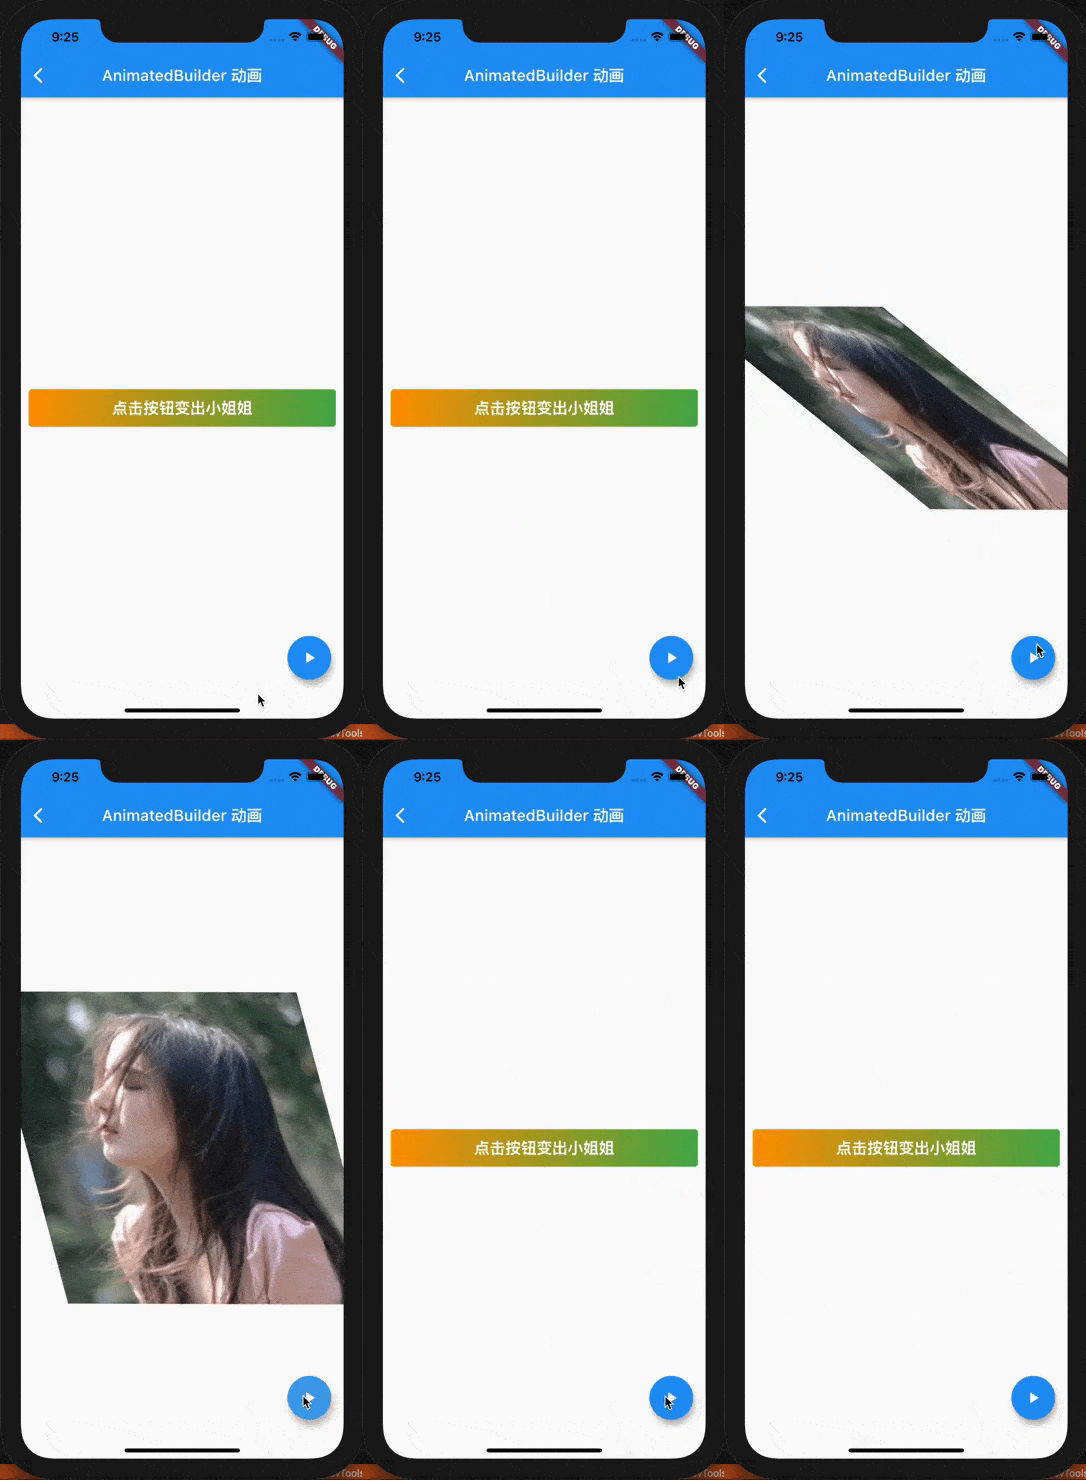
基本概念讲清楚了(敲黑板:很多时候大家都是直接简单看一下文档就开始用,甚至干脆复制示例代码就上,结果很可能会用得不对),可以开始撸代码了。我们来实现下面的动效。

这里其实是两个组件,通过 AnimatedBuilder 做了动效转换。在动效的一半时间是文字“点击按钮变出小姐姐”,之后的一半将组件更换为了小姐姐的图片了。使用AnimatedBuilder 的实现代码如下:
class RotationSwitchAnimatedBuilder extends StatelessWidget {
  final Widget child1, child2;
  final Animation<double> animation;
  const RotationSwitchAnimatedBuilder(
      {Key? key,
      required this.animation,
      required this.child1,
      required this.child2})
      : super(key: key);

  @override
  Widget build(BuildContext context) {
    return AnimatedBuilder(
      animation: animation,
      builder: (context, child) {
        if (animation.value < 0.5) {
          return Transform(
            transform: Matrix4.identity()
              ..rotateZ(animation.value * pi)
              ..setEntry(0, 1, -0.003),
            alignment: Alignment.center,
            child: child1,
          );
        } else {
          return Transform(
            transform: Matrix4.identity()
              ..rotateZ(pi)
              ..rotateZ(animation.value * pi)
              ..setEntry(1, 0, 0.003),
            child: child2,
            alignment: Alignment.center,
          );
        }
      },
    );
  }
}
注意第2个组件多转了180度,是未来保证停止后正好旋转360度,以免图片倒过来。另外就是这里的 child1和 child2也可以修改为使用 WidgetBuilder 函数来在需要的时候再构建组件。使用这个RotationSwitchAnimatedBuilder的组件就十分简单了,将需要操作的两个组件作为参数传过来,然后控制 Animation 对象来刷新界面就好了,对应的代码如下:
class AnimatedBuilderDemo extends StatefulWidget {
  const AnimatedBuilderDemo({Key? key}) : super(key: key);

  @override
  _AnimatedBuilderDemoState createState() => _AnimatedBuilderDemoState();
}

class _AnimatedBuilderDemoState extends State<AnimatedBuilderDemo>
    with SingleTickerProviderStateMixin {
  late Animation<double> animation;
  late AnimationController controller;

  @override
  void initState() {
    super.initState();
    controller =
        AnimationController(duration: const Duration(seconds: 1), vsync: this);
    animation = Tween<double>(begin: 0, end: 1.0).animate(controller);
  }

  @override
  Widget build(BuildContext context) {
    return Scaffold(
      appBar: AppBar(
        title: Text('AnimatedBuilder 动画'),
      ),
      body: RotationSwitchAnimatedBuilder(
        animation: animation,
        child1: Center(
          child: Container(
            padding: EdgeInsets.all(10),
            margin: EdgeInsets.all(10),
            constraints: BoxConstraints(minWidth: double.infinity),
            decoration: BoxDecoration(
              borderRadius: BorderRadius.circular(4.0),
              gradient: LinearGradient(
                colors: [
                  Colors.orange,
                  Colors.green,
                ],
              ),
            ),
            child: Text(
              '点击按钮变出小姐姐',
              style: TextStyle(
                fontSize: 20,
                color: Colors.white,
                fontWeight: FontWeight.bold,
              ),
              textAlign: TextAlign.center,
            ),
          ),
        ),
        child2: Center(
          child: Image.asset('images/beauty.jpeg'),
        ),
      ),
      floatingActionButton: FloatingActionButton(
        child: Icon(Icons.play_arrow, color: Colors.white),
        onPressed: () {
          if (controller.status == AnimationStatus.completed) {
            controller.reverse();
          } else {
            controller.forward();
          }
        },
      ),
    );
  }

  @override
  void dispose() {
    controller.dispose();
    super.dispose();
  }
}
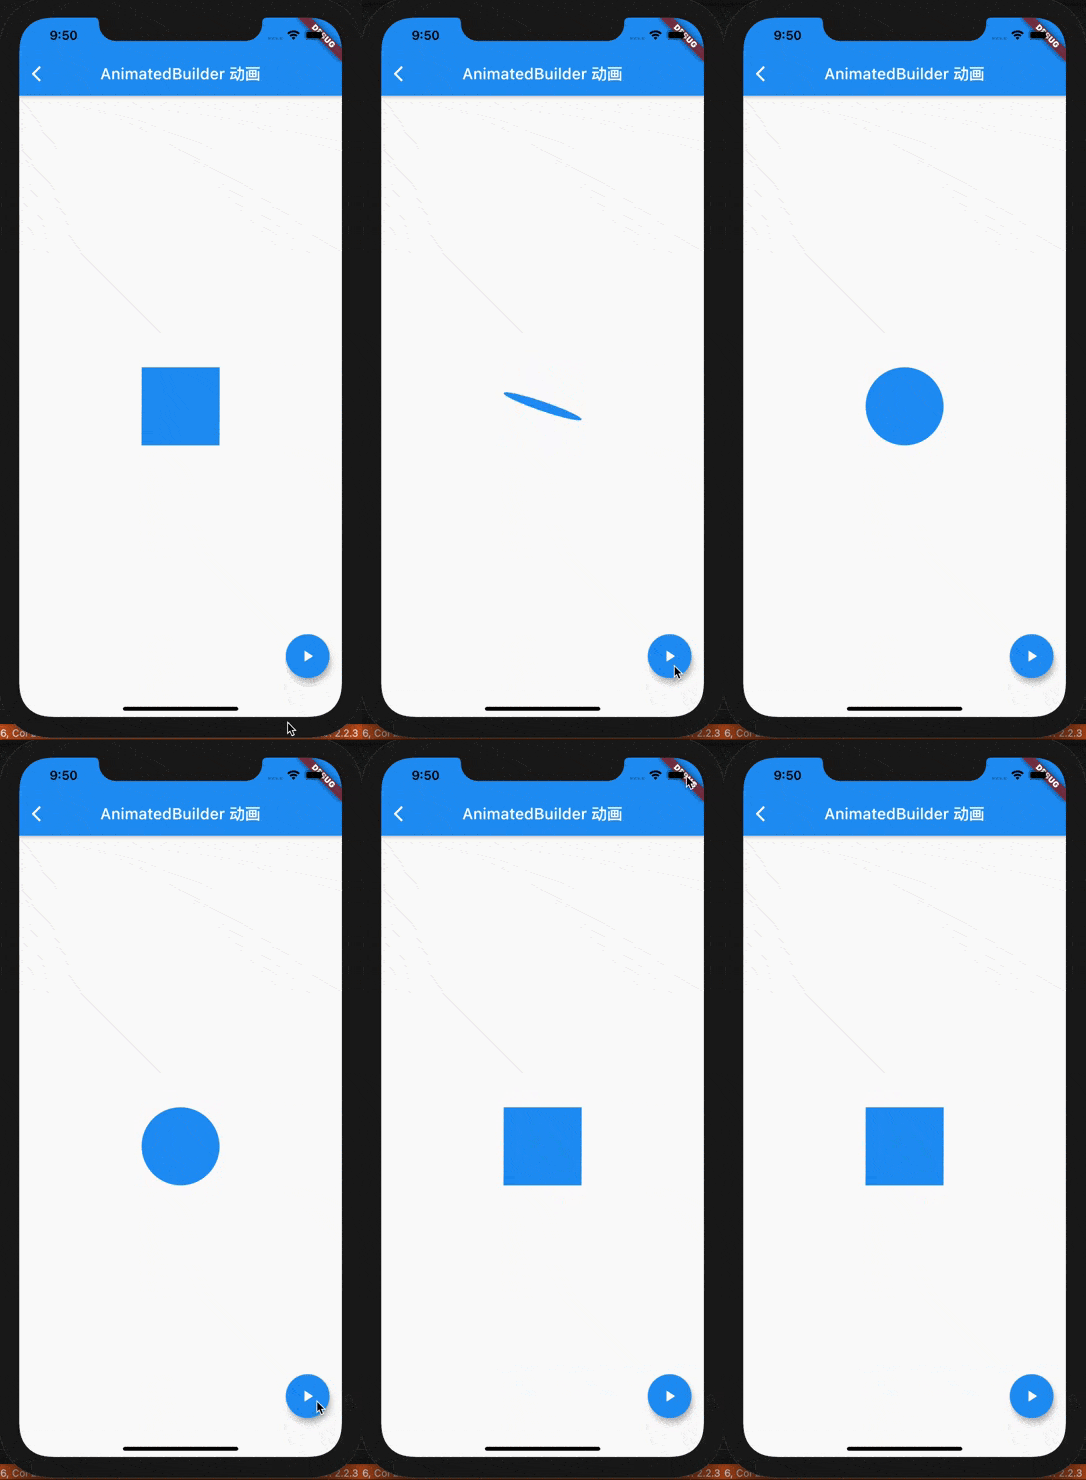
复用的话也很容易了,比如我们将一个圆形和一个矩形组件传过去,一样可以复用这个动画效果。

关于“Flutter怎么使用AnimatedBuilder实现动效复用”的内容就介绍到这里了,感谢大家的阅读。如果想了解更多行业相关的知识,可以关注亿速云行业资讯频道,小编每天都会为大家更新不同的知识点。
免责声明:本站发布的内容(图片、视频和文字)以原创、转载和分享为主,文章观点不代表本网站立场,如果涉及侵权请联系站长邮箱:is@yisu.com进行举报,并提供相关证据,一经查实,将立刻删除涉嫌侵权内容。