这篇文章主要介绍了Android Studio怎么使用自定义对话框效果的相关知识,内容详细易懂,操作简单快捷,具有一定借鉴价值,相信大家阅读完这篇Android Studio怎么使用自定义对话框效果文章都会有所收获,下面我们一起来看看吧。
兼容低版本的APP运行
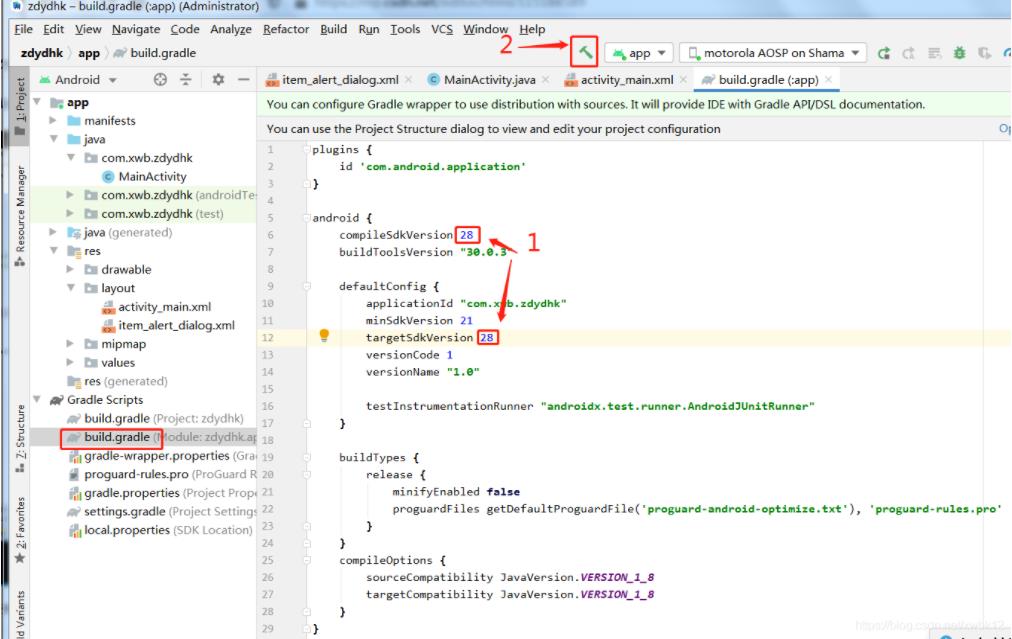
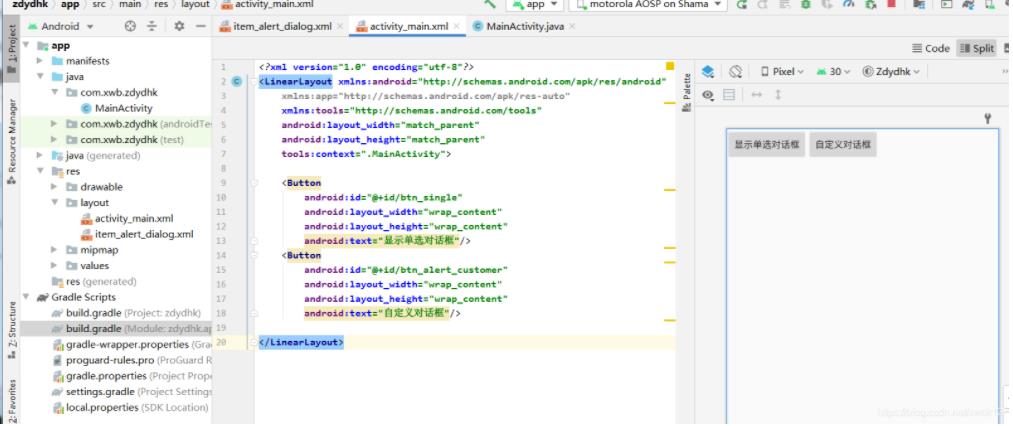
第一步:新建新的空白activity,布局XML设置如下
该APP的启动界面activity_main.xml
<?xml version="1.0" encoding="utf-8"?>
<LinearLayout xmlns:android="http://schemas.android.com/apk/res/android"
    xmlns:app="http://schemas.android.com/apk/res-auto"
    xmlns:tools="http://schemas.android.com/tools"
    android:layout_width="match_parent"
    android:layout_height="match_parent"
    tools:context=".MainActivity">

    <Button
        android:id="@+id/btn_single"
        android:layout_width="wrap_content"
        android:layout_height="wrap_content"
        android:text="显示单选对话框"/>
    <Button
        android:id="@+id/btn_alert_customer"
        android:layout_width="wrap_content"
        android:layout_height="wrap_content"
        android:text="自定义对话框"/>

</LinearLayout>自定义的对话框item_alert_dialog的布局XML设置

<?xml version="1.0" encoding="utf-8"?>
<LinearLayout xmlns:android="http://schemas.android.com/apk/res/android"
    xmlns:app="http://schemas.android.com/apk/res-auto"
    xmlns:tools="http://schemas.android.com/tools"
    android:layout_width="match_parent"
    android:layout_height="match_parent"
    tools:context=".MainActivity">

    <Button
        android:layout_width="wrap_content"
        android:layout_height="wrap_content"
        android:text="自定义Dialog界面!"
        />
    <TextView
        android:layout_width="250dp"
        android:layout_height="250dp"
        android:background="@mipmap/ic_launcher"/>

</LinearLayout>第二步:在MainActivity.java中绑定布局xml
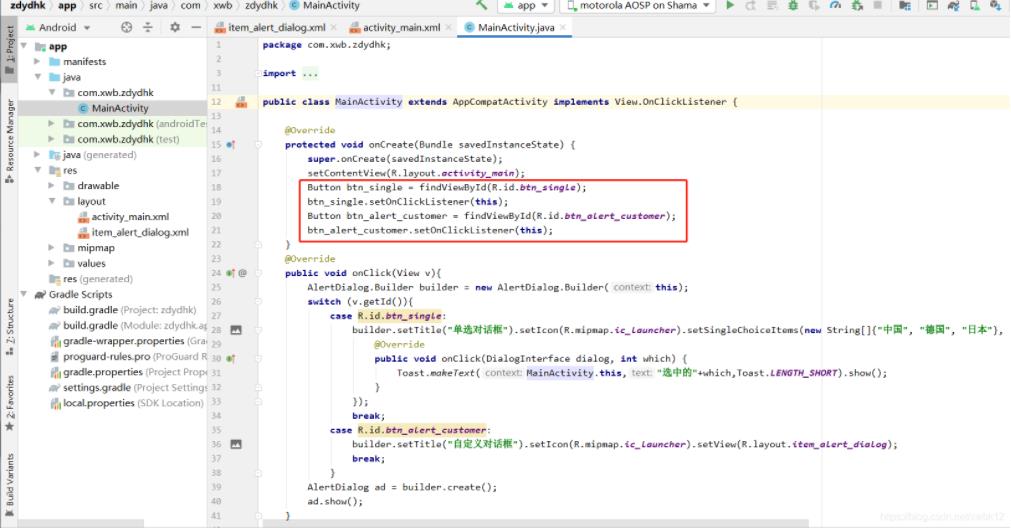
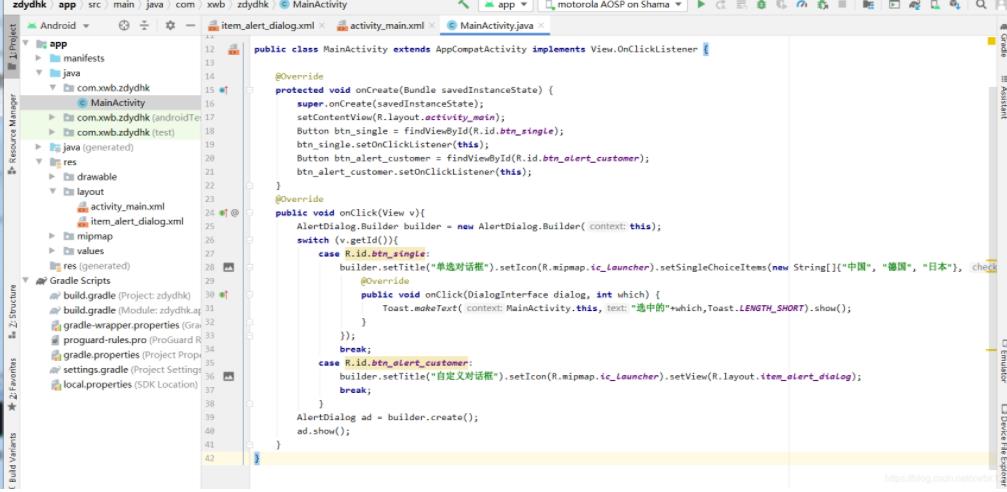
第三步:对话框实现抽象方式
package com.xwb.zdydhk;

import androidx.appcompat.app.AlertDialog;
import androidx.appcompat.app.AppCompatActivity;

import android.content.DialogInterface;
import android.os.Bundle;
import android.view.View;
import android.widget.Button;
import android.widget.Toast;

public class MainActivity extends AppCompatActivity implements View.OnClickListener {

    @Override
    protected void onCreate(Bundle savedInstanceState) {
        super.onCreate(savedInstanceState);
        setContentView(R.layout.activity_main);
        Button btn_single = findViewById(R.id.btn_single);
        btn_single.setOnClickListener(this);
        Button btn_alert_customer = findViewById(R.id.btn_alert_customer);
        btn_alert_customer.setOnClickListener(this);
    }
    @Override
    public void onClick(View v){
        AlertDialog.Builder builder = new AlertDialog.Builder(this);
        switch (v.getId()){
            case R.id.btn_single:
                builder.setTitle("单选对话框").setIcon(R.mipmap.ic_launcher).setSingleChoiceItems(new String[]{"中国", "德国", "日本"}, 0, new DialogInterface.OnClickListener() {
                    @Override
                    public void onClick(DialogInterface dialog, int which) {
                        Toast.makeText(MainActivity.this,"选中的"+which,Toast.LENGTH_SHORT).show();
                    }
                });
                break;
            case R.id.btn_alert_customer:
                //setView(R.layout.item_alert_dialog)为自定义的对话框,或图片等等
                builder.setTitle("自定义对话框").setIcon(R.mipmap.ic_launcher).setView(R.layout.item_alert_dialog);
                break;
            }
        AlertDialog ad = builder.create();
        ad.show();
    }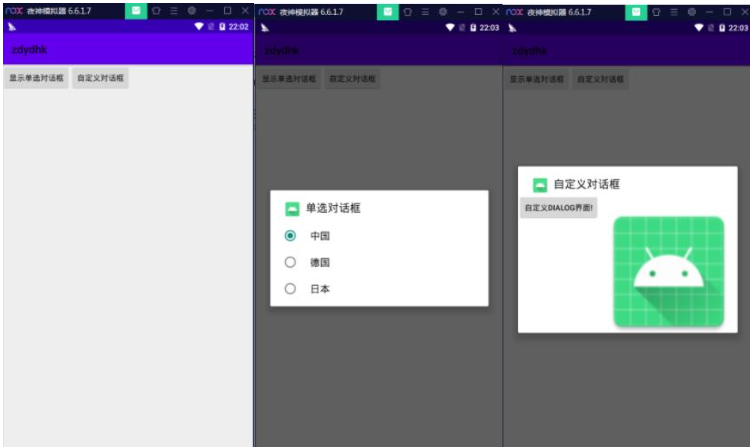
}第四步:运行APP效果
关于“Android Studio怎么使用自定义对话框效果”这篇文章的内容就介绍到这里,感谢各位的阅读!相信大家对“Android Studio怎么使用自定义对话框效果”知识都有一定的了解,大家如果还想学习更多知识,欢迎关注亿速云行业资讯频道。
亿速云「云服务器」,即开即用、新一代英特尔至强铂金CPU、三副本存储NVMe SSD云盘,价格低至29元/月。点击查看>>
免责声明:本站发布的内容(图片、视频和文字)以原创、转载和分享为主,文章观点不代表本网站立场,如果涉及侵权请联系站长邮箱:is@yisu.com进行举报,并提供相关证据,一经查实,将立刻删除涉嫌侵权内容。


 计算
计算 安全
安全 数据库
数据库 网络和加速
网络和加速 企业服务
企业服务


