这篇文章主要讲解了“WPF如何实现调用本机摄像头”,文中的讲解内容简单清晰,易于学习与理解,下面请大家跟着小编的思路慢慢深入,一起来研究和学习“WPF如何实现调用本机摄像头”吧!
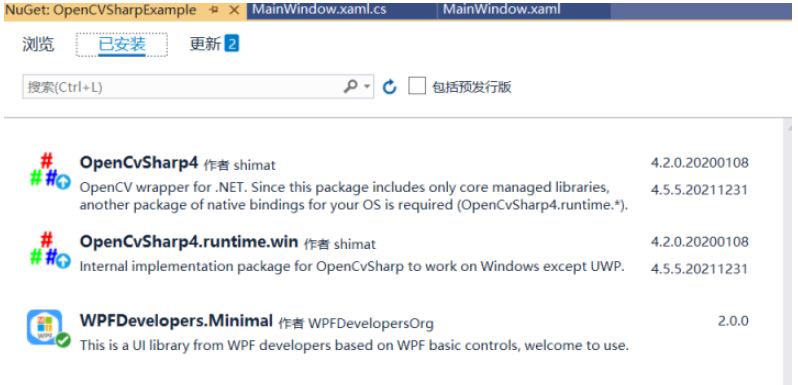
使用NuGet如下:
代码如下
一、创建MainWindow.xaml代码如下。
 <ws:Window x:Class="OpenCVSharpExample.MainWindow"
        xmlns="http://schemas.microsoft.com/winfx/2006/xaml/presentation"
        xmlns:x="http://schemas.microsoft.com/winfx/2006/xaml"
        xmlns:ws="https://github.com/WPFDevelopersOrg.WPFDevelopers.Minimal"
        xmlns:d="http://schemas.microsoft.com/expression/blend/2008"
        xmlns:mc="http://schemas.openxmlformats.org/markup-compatibility/2006"
        xmlns:local="clr-namespace:OpenCVSharpExample"
        Icon="OpenCV_Logo.png"
        mc:Ignorable="d" WindowStartupLocation="CenterScreen"
        Title="OpenCVSharpExample https://github.com/WPFDevelopersOrg" Height="450" Width="800">
    <Grid>
        <Grid.RowDefinitions>
            <RowDefinition Height="Auto"/>
            <RowDefinition />
            <RowDefinition Height="Auto"/>
        </Grid.RowDefinitions>
        <ComboBox Name="ComboBoxCamera" ItemsSource="{Binding CameraArray,RelativeSource={RelativeSource AncestorType=local:MainWindow}}"
                  Width="200" SelectedIndex="{Binding CameraIndex,RelativeSource={RelativeSource AncestorType=local:MainWindow}}"
                  SelectionChanged="ComboBoxCamera_SelectionChanged"/>
        <Image Grid.Row="1" Name="imgViewport" Margin="0,4"/>
        <StackPanel Orientation="Horizontal"
                    HorizontalAlignment="Center"
                    Grid.Row="2">
            <!--<Button Name="btRecord" Click="btRecord_Click" Content="Record" Style="{StaticResource PrimaryButton}" Width="100" Height="50" Margin="16"/>-->
            <Button Name="btStop" Click="btStop_Click" Content="Stop"  Width="100" Height="50" Margin="16"/>
        </StackPanel>
    </Grid>
</ws:Window>二、MainWindow.xaml.cs代码如下。
using OpenCvSharp;
using OpenCvSharp.Extensions;
using System;
using System.Collections.Generic;
using System.Drawing;
using System.Drawing.Imaging;
using System.IO;
using System.Management;
using System.Threading;
using System.Windows;
using System.Windows.Controls;
using System.Windows.Media.Imaging;
using System.Windows.Threading;
namespace OpenCVSharpExample
{
/// <summary>
/// MainWindow.xaml 的交互逻辑
/// </summary>
public partial class MainWindow
{
private VideoCapture capCamera;
private Mat matImage = new Mat();
private Thread cameraThread;
public List<string> CameraArray
{
get { return (List<string>)GetValue(CameraArrayProperty); }
set { SetValue(CameraArrayProperty, value); }
}
public static readonly DependencyProperty CameraArrayProperty =
DependencyProperty.Register("CameraArray", typeof(List<string>), typeof(MainWindow), new PropertyMetadata(null));
public int CameraIndex
{
get { return (int)GetValue(CameraIndexProperty); }
set { SetValue(CameraIndexProperty, value); }
}
public static readonly DependencyProperty CameraIndexProperty =
DependencyProperty.Register("CameraIndex", typeof(int), typeof(MainWindow), new PropertyMetadata(0));
public MainWindow()
{
InitializeComponent();
Width = SystemParameters.WorkArea.Width / 1.5;
Height = SystemParameters.WorkArea.Height / 1.5;
this.Loaded += MainWindow_Loaded;
}
private void MainWindow_Loaded(object sender, RoutedEventArgs e)
{
InitializeCamera();
}
private void ComboBoxCamera_SelectionChanged(object sender, SelectionChangedEventArgs e)
{
if (CameraArray.Count - 1 < CameraIndex)
return;
if (capCamera != null && cameraThread != null)
{
cameraThread.Abort();
StopDispose();
}
capCamera = new VideoCapture(CameraIndex);
capCamera.Fps = 30;
CreateCamera();
}
private void InitializeCamera()
{
CameraArray = GetAllConnectedCameras();
}
List<string> GetAllConnectedCameras()
{
var cameraNames = new List<string>();
using (var searcher = new ManagementObjectSearcher("SELECT * FROM Win32_PnPEntity WHERE (PNPClass = 'Image' OR PNPClass = 'Camera')"))
{
foreach (var device in searcher.Get())
{
cameraNames.Add(device["Caption"].ToString());
}
}
return cameraNames;
}
void CreateCamera()
{
cameraThread = new Thread(PlayCamera);
cameraThread.Start();
}
private void PlayCamera()
{
while (capCamera != null && !capCamera.IsDisposed)
{
capCamera.Read(matImage);
if (matImage.Empty()) break;
Dispatcher.BeginInvoke(DispatcherPriority.Normal, new Action(() =>
{
var converted = Convert(BitmapConverter.ToBitmap(matImage));
imgViewport.Source = converted;
}));
}
}
private void btStop_Click(object sender, RoutedEventArgs e)
{
StopDispose();
btStop.IsEnabled = false;
}
void StopDispose()
{
if (capCamera != null && capCamera.IsOpened())
{
capCamera.Dispose();
capCamera = null;
}
}
void CreateRecord()
{
cameraThread = new Thread(PlayCamera);
cameraThread.Start();
}
BitmapImage Convert(Bitmap src)
{
System.Drawing.Image img = src;
var now = DateTime.Now;
var g = Graphics.FromImage(img);
var brush = new SolidBrush(System.Drawing.Color.Red);
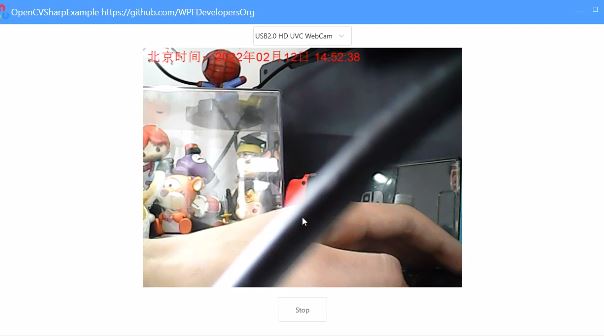
g.DrawString($"北京时间:{ now.ToString("yyyy年MM月dd日 HH:mm:ss")}", new System.Drawing.Font("Arial", 18), brush, new PointF(5, 5));
brush.Dispose();
g.Dispose();
MemoryStream ms = new MemoryStream();
img.Save(ms, ImageFormat.Bmp);
ms.Seek(0, SeekOrigin.Begin);
BitmapImage image = new BitmapImage();
image.BeginInit();
image.StreamSource = ms;
image.EndInit();
image.Freeze();
return image;
}
protected override void OnClosed(EventArgs e)
{
StopDispose();
}
}
}效果预览
感谢各位的阅读,以上就是“WPF如何实现调用本机摄像头”的内容了,经过本文的学习后,相信大家对WPF如何实现调用本机摄像头这一问题有了更深刻的体会,具体使用情况还需要大家实践验证。这里是亿速云,小编将为大家推送更多相关知识点的文章,欢迎关注!
免责声明:本站发布的内容(图片、视频和文字)以原创、转载和分享为主,文章观点不代表本网站立场,如果涉及侵权请联系站长邮箱:is@yisu.com进行举报,并提供相关证据,一经查实,将立刻删除涉嫌侵权内容。


 计算
计算 安全
安全 数据库
数据库 网络和加速
网络和加速 企业服务
企业服务


