本文主要给大家介绍ListView 的多选操作模式,文章内容都是笔者用心摘选和编辑的,具有一定的针对性,对大家的参考意义还是比较大的,下面跟笔者一起了解下ListView 的多选操作模式吧。
<LinearLayout xmlns:android="http://schemas.android.com/apk/res/android"
    xmlns:tools="http://schemas.android.com/tools"
    android:layout_width="match_parent"
    android:layout_height="match_parent"
    android:orientation="vertical" >

    <Button
        android:layout_width="match_parent"
        android:layout_height="wrap_content"
        android:gravity="center"
        android:onClick="showSelectAuthors"
        android:text="@string/select_authors"
        android:textSize="25sp" />

    <ListView
        android:id="@+id/list"
        android:layout_width="match_parent"
        android:layout_height="match_parent"
        android:choiceMode="multipleChoice" />
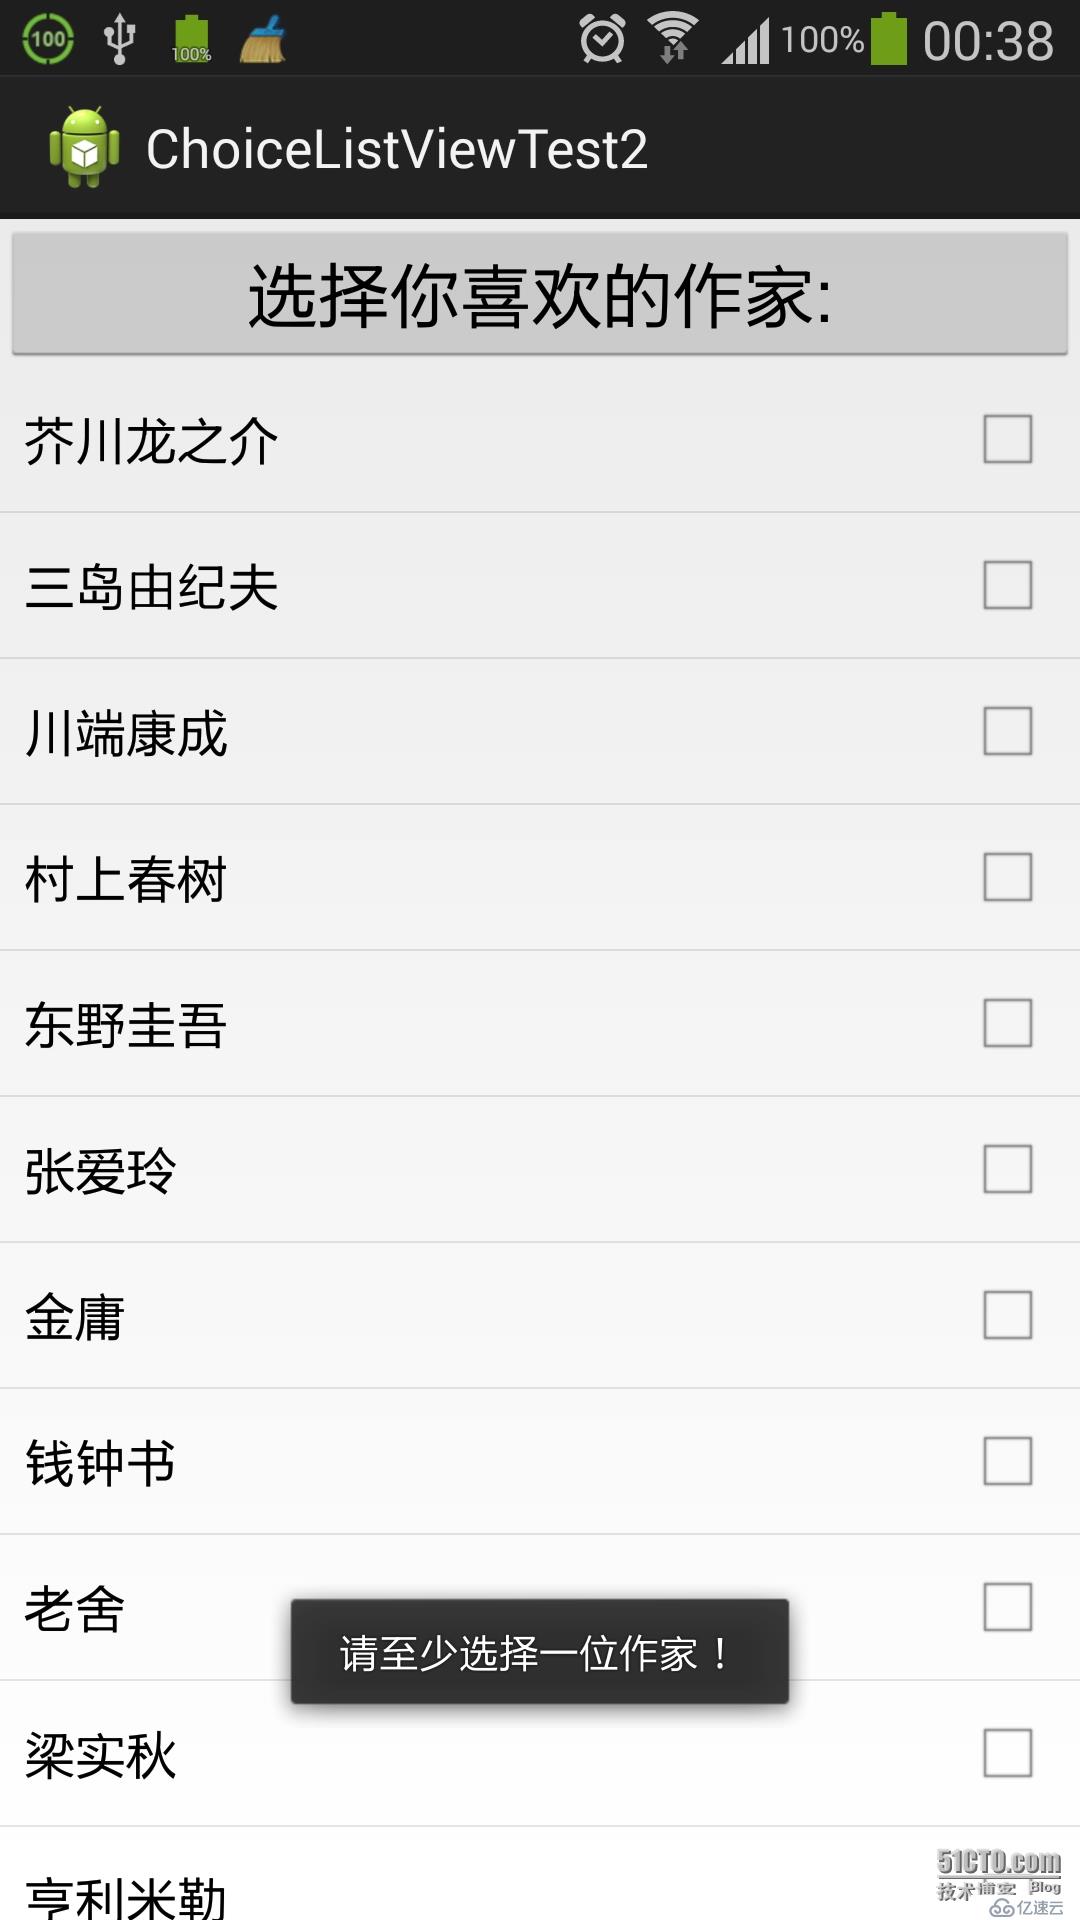
</LinearLayout>Activity的代码如下,没有用适配器来处理数据,简单使用了ArrayAdapter:
package com.example.choicelistviewtest2;

import android.app.Activity;
import android.os.Bundle;
import android.view.View;
import android.widget.ArrayAdapter;
import android.widget.ListView;
import android.widget.Toast;

public class RadioButtonListActivity extends Activity {

	private ListView radioButtonList;
	private String[] names = new String[] { "芥川龙之介", "三岛由纪夫", "川端康成", "村上春树",
			"东野圭吾", "张爱玲", "金庸", "钱钟书", "老舍", "梁实秋", "亨利米勒", "海明威", "菲兹杰拉德",
			"凯鲁亚克", "杰克伦敦", "小仲马", "杜拉斯", "福楼拜", "雨果", "巴尔扎克", "莎士比亚", "劳伦斯",
			"毛姆", "柯南道尔", "笛福" };

	@Override
	protected void onCreate(Bundle savedInstanceState) {
		super.onCreate(savedInstanceState);
		setContentView(R.layout.activity_main);

		radioButtonList = (ListView) findViewById(R.id.list);
		ArrayAdapter<String> adapter = new ArrayAdapter<String>(this,
				android.R.layout.simple_list_item_multiple_choice, names);
		radioButtonList.setAdapter(adapter);
	}

	public void showSelectAuthors(View v) {
		long[] authorsId = radioButtonList.getCheckItemIds();

		String name = "";
		String message;
		if (authorsId.length > 0) {
			// 用户至少选择了一位作家
			for (int i = 0; i < authorsId.length; i++) {
				name += "," + names[(int) authorsId[i]];
			}
			// 将第一个作家前面的“,”去掉
			message = name.substring(1);
		} else {
			message = "请至少选择一位作家!";
		}
		Toast.makeText(RadioButtonListActivity.this, message, Toast.LENGTH_LONG)
				.show();
	}

} 上面的代码是成功的,程序运行也OK,本以为可以这样结束了,却发现一个问题:

从图上可以看出“getCheckItemIds()”这个方法是弃用的。事实上ListView的getCheckItemIds()方法所得到数据并不精确,据说在某些Android版本上测试发现,当我们选中ListView的一条Item,然后再次取消,getCheckItemIds()方法还是可以拿到取消的Item的id,即返回的数组中还保留该id。这是源码自己的Bug。
虽然经过测试,我的手机上没发现这个问题(我的手机Android版本是4.3),但是我想这个方法还是避免使用吧。版本更新后Android推荐使用的是“getCheckedItemIds()”这个方法(注意方法名多加了“ed”),不过这个方法也不是那么好用——“Returns the set of checked items ids. The result is only valid if the choice mode has not been set to CHOICE_MODE_NONE and the adapter has stable IDs. (hasStableIds() == true)。”这个方法返回ListView中被选中Item的id集合。该方法使用有两个条件,第一是ListView的选择模式没有被设置为CHOICE_MODE_NONE(这一点我们满足,我们设置ListView的选择模式为CHOICE_MODE_MULTIPLE),第二是适配器有稳定的 ID(hasStableIds()==true)。这一点是不满足的,诸如ArrayAdapter、SimpleAdapter,不支持稳定的ID(可以通过adapter.hasStableIds()方法查看,返回值为false)。这就要求我们自己创建Adapter,从 hasStableIds()方法中返回true。
我只好又自定义适配器试了一下这个方法,是成功的,布局文件没有改变,就不再贴了,主要是适配器,代码如下:
package com.example.choicelistviewtest3;

import android.content.Context;
import android.view.View;
import android.view.ViewGroup;
import android.widget.BaseAdapter;

public class RadioAdapter extends BaseAdapter {

	private String[] authors;
	private Context c;

	public RadioAdapter(Context c, String[] authors) {
		super();
		this.c = c;
		this.authors = authors;
	}

	@Override
	public int getCount() {
		return authors.length;
	}

	@Override
	public Object getItem(int arg0) {
		return null;
	}

	@Override
	public long getItemId(int arg0) {
		//返回每一条Item的Id
		return arg0;
	}

	@Override
	public boolean hasStableIds() {
		//getCheckedItemIds()方法要求此处返回为真
		return true;
	}
	@Override
	public View getView(int arg0, View arg1, ViewGroup arg2) {

		ChoiceListItemView choiceListItemView = new ChoiceListItemView(c, null);
		choiceListItemView.setName(authors[arg0]);
		return choiceListItemView;
	}

}ChoiceListItemView类与《ListView的单选模式》中的大同小异,只是去掉了Button背景的设置,还原CheckBox原有的样子,因为现在ListView是多选模式。ChoiceListItemView代码与它的XML文件(Item的布局文件)如下:
package com.example.choicelistviewtest3;

import android.content.Context;
import android.util.AttributeSet;
import android.view.LayoutInflater;
import android.view.View;
import android.widget.CheckBox;
import android.widget.Checkable;
import android.widget.LinearLayout;
import android.widget.TextView;

public class ChoiceListItemView extends LinearLayout implements Checkable {

	private TextView nameTxt;
	private CheckBox selectBtn;
	public ChoiceListItemView(Context context, AttributeSet attrs) {
		super(context, attrs);

		LayoutInflater inflater = LayoutInflater.from(context);
		View v = inflater.inflate(R.layout.item_list, this, true);
		nameTxt = (TextView) v.findViewById(R.id.author);
		selectBtn = (CheckBox) v.findViewById(R.id.radio);
	}

	public void setName(String text) {
		nameTxt.setText(text);
	}

	@Override
	public boolean isChecked() {
		return selectBtn.isChecked();
	}

	@Override
	public void setChecked(boolean checked) {
		selectBtn.setChecked(checked);
	}

	@Override
	public void toggle() {
		selectBtn.toggle();
	}

}<RelativeLayout xmlns:android="http://schemas.android.com/apk/res/android"
xmlns:tools="http://schemas.android.com/tools"
android:layout_width="match_parent"
android:layout_height="wrap_content"
android:background="#fff"
android:orientation="horizontal" >
<TextView
android:id="@+id/author"
android:layout_width="wrap_content"
android:layout_height="wrap_content"
android:layout_alignParentLeft="true"
android:layout_centerVertical="true"
android:padding="10dp"
android:textSize="20sp" />
<CheckBox
android:id="@+id/radio"
android:layout_width="wrap_content"
android:layout_height="wrap_content"
android:layout_alignParentRight="true"
android:layout_centerVertical="true"
android:layout_gravity="center_vertical"
android:clickable="false"
android:focusable="false"
android:focusableInTouchMode="false"
android:padding="10dp" />
</RelativeLayout>这样,在主类中就可以使用“getCheckedItemIds()”这个方法了,代码如下:
package com.example.choicelistviewtest3;

import android.app.Activity;
import android.os.Bundle;
import android.view.View;

import android.widget.ListView;
import android.widget.Toast;

public class RadioButtonListActivity extends Activity {

	private ListView radioButtonList;
	private RadioAdapter adapter;
	private String[] authors = new String[] { "芥川龙之介", "三岛由纪夫", "川端康成", "村上春树",
			"东野圭吾", "张爱玲", "金庸", "钱钟书", "老舍", "梁实秋", "亨利米勒", "海明威", "菲兹杰拉德",
			"凯鲁亚克", "杰克伦敦", "小仲马", "杜拉斯", "福楼拜", "雨果", "巴尔扎克", "莎士比亚", "劳伦斯",
			"毛姆", "柯南道尔", "笛福" };

	@Override
	protected void onCreate(Bundle savedInstanceState) {
		super.onCreate(savedInstanceState);
		setContentView(R.layout.activity_radio_button_list);

		radioButtonList = (ListView) findViewById(R.id.list);
		adapter = new RadioAdapter(this, authors);
		radioButtonList.setAdapter(adapter);
	}

	public void showSelectAuthors(View v) {
		long[] authorsId = radioButtonList.getCheckedItemIds();
		String name = "";
		String message;
		if (authorsId.length > 0) {
			// 用户至少选择了一位作家
			for (int i = 0; i < authorsId.length; i++) {
				name += "," + authors[(int) authorsId[i]];
			}
			// 将第一个作家前面的“,”去掉
			message = name.substring(1);
		} else {
			message = "请至少选择一位作家!";
		}
		Toast.makeText(RadioButtonListActivity.this, message, Toast.LENGTH_LONG)
				.show();
	}
}它与choicelistviewtest2包中的RadioButtonListActivity 相比(也就是刚开始的那个RadioButtonListActivity 类),变化很小。显然,如果只是简单地显示一下作家的名字和复选框,而并不需要太多的要求,自定义Adapter实现拥有稳定的ID,这样做事实上是比较麻烦的。下面换一种简单的方法,还是使用ArrayAdapter,只是需要自己来写获取选中Item的ID的方法了,将choicelistviewtest2包中的RadioButtonListActivity增加一个方法:
package com.example.choicelistviewtest2;

import android.app.Activity;
import android.os.Bundle;
import android.view.View;
import android.widget.ArrayAdapter;
import android.widget.ListView;
import android.widget.Toast;

public class RadioButtonListActivity extends Activity {

	private ListView radioButtonList;
	private String[] names = new String[] { "芥川龙之介", "三岛由纪夫", "川端康成", "村上春树",
			"东野圭吾", "张爱玲", "金庸", "钱钟书", "老舍", "梁实秋", "亨利米勒", "海明威", "菲兹杰拉德",
			"凯鲁亚克", "杰克伦敦", "小仲马", "杜拉斯", "福楼拜", "雨果", "巴尔扎克", "莎士比亚", "劳伦斯",
			"毛姆", "柯南道尔", "笛福" };

	@Override
	protected void onCreate(Bundle savedInstanceState) {
		super.onCreate(savedInstanceState);
		setContentView(R.layout.activity_main);

		radioButtonList = (ListView) findViewById(R.id.list);
		ArrayAdapter<String> adapter = new ArrayAdapter<String>(this,
				android.R.layout.simple_list_item_multiple_choice, names);
		radioButtonList.setAdapter(adapter);
	}

	public void showSelectAuthors(View v) {
		// long[] authorsId = radioButtonList.getCheckItemIds();
		long[] authorsId = getListSelectededItemIds(radioButtonList);
		String name = "";
		String message;
		if (authorsId.length > 0) {
			// 用户至少选择了一位作家
			for (int i = 0; i < authorsId.length; i++) {
				name += "," + names[(int) authorsId[i]];
			}
			// 将第一个作家前面的“,”去掉
			message = name.substring(1);
		} else {
			message = "请至少选择一位作家!";
		}
		Toast.makeText(RadioButtonListActivity.this, message, Toast.LENGTH_LONG)
				.show();
	}

	// 避免使用getCheckItemIds()方法
	public long[] getListSelectededItemIds(ListView listView) {

		long[] ids = new long[listView.getCount()];//getCount()即获取到ListView所包含的item总个数
		//定义用户选中Item的总个数
		int checkedTotal = 0;
		for (int i = 0; i < listView.getCount(); i++) {
			//如果这个Item是被选中的
			if (listView.isItemChecked(i)) {
				ids[checkedTotal++] = i;
			}
		}

		if (checkedTotal < listView.getCount()) {
			//定义选中的Item的ID数组
			final long[] selectedIds = new long[checkedTotal];
			//数组复制 ids
			System.arraycopy(ids, 0, selectedIds, 0, checkedTotal);
			return selectedIds;
		} else {
			//用户将所有的Item都选了
			return ids;
		}
	}

}其中用到了System.arraycopy()这个方法,解释如下:
public static void arraycopy(Object src, int srcPos, Object dest, int destPos, int length) src:源数组; srcPos:源数组要复制的起始位置; dest:目的数组; destPos:目的数组放置的起始位置; length:复制的长度。
这就真正OK了,效果图:
看完以上关于ListView 的多选操作模式,很多读者朋友肯定多少有一定的了解,如需获取更多的行业知识信息 ,可以持续关注我们的行业资讯栏目的。
亿速云「云服务器」,即开即用、新一代英特尔至强铂金CPU、三副本存储NVMe SSD云盘,价格低至29元/月。点击查看>>
免责声明:本站发布的内容(图片、视频和文字)以原创、转载和分享为主,文章观点不代表本网站立场,如果涉及侵权请联系站长邮箱:is@yisu.com进行举报,并提供相关证据,一经查实,将立刻删除涉嫌侵权内容。


 计算
计算 安全
安全 数据库
数据库 网络和加速
网络和加速 企业服务
企业服务


