绘制一个Obj模型,效果如下图所示
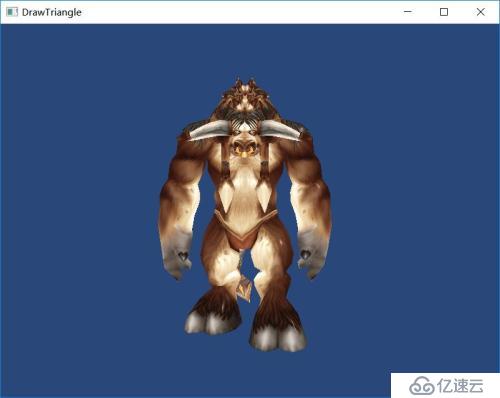
这里给模型加载顶点和纹理的信息,加上环境光、漫反射和镜面反射,这里我用的是一个方向光。
并且让模型每一帧旋转一个角度达到动态旋转的效果。
1、Obj模型基本内容及加载
v 表示顶点数据
vt 表示纹理数据
vn 表示法线数据
f 表示一个面的顶点数据的Index
这里我是直接解析的模型,代码如下所示:
objmode.h
#ifndef OBJMODE_H
#define OBJMODE_H
#include <QObject>
#include <QString>
#include <QStringList>
#include <QVector>
#include <QFile>
#include <QTextStream>
struct VertexData
{
    float postion[3];
    float texcoord[2];
    float normal[3];
};

struct VertexPos
{
    float postion[3];
};
struct VertexTex
{
    float coord[2];
};
struct VertexNor
{
    float normal[3];
};
struct VertexIndex
{
    int posIndex;
    int coordIndex;
    int normalIndex;
};

class ObjMode : QObject
{
public:
    ObjMode();
    ~ObjMode();

    bool loadObjModel(QString nFileStr, QVector&nVertextData, QVector&index);

private:
    QVectorm_VertexInfo;
    QVectorm_TextureInfo;
    QVectorm_NormalInfo;

    QVectorm_VertexIndex;
    QVectorm_FaceIndex;
};

#endif // OBJMODE_H其中loadObjModel()函数就是加载模型的函数,输入为文件路径,会返回顶点的数据内容和每个面的三角形对应的顶点的索引。
函数实现如下所示:
bool ObjMode::loadObjModel(QString nFileStr, QVector<VertexData> &nVertextData, \
                            QVector<unsigned int> &index)
{
    QFile nObjFile(nFileStr);
    if (!nObjFile.exists())
        return false;

    if (!nObjFile.open(QFile::ReadOnly))
        return false;

    nVertextData.clear();
    index.clear();

    m_TextureInfo.clear();
    m_NormalInfo.clear();
    m_VertexInfo.clear();
    m_VertexIndex.clear();
    m_FaceIndex.clear();

    QTextStream nTextStream(&nObjFile);
    for (;!nTextStream.atEnd();)
    {
        QString nLineString = nTextStream.readLine();
        QByteArray nData = nLineString.toLocal8Bit();
        if (nData.length() <= 2)
            continue;
        if (nData.at(0) == 'v')
        {
            QStringList nStrList = nLineString.split(" ");
            if (nData[1] == 't')
            {
                if (nStrList.count() <= 0 || nStrList.at(0) != "vt")
                    continue;
                VertexTex nTexture;
                for (int i=1; i<nStrList.count(); ++i)
                    nTexture.coord[i - 1] = nStrList.at(i).toFloat();
                m_TextureInfo << nTexture;
            }
            else if (nData[1] == 'n')
            {
                if (nStrList.count() <= 0 || nStrList.at(0) != "vn")
                    continue;
                VertexNor nNormal;
                for (int i=1; i<nStrList.count(); ++i)
                    nNormal.normal[i - 1] = nStrList.at(i).toFloat();
                m_NormalInfo << nNormal;
            }
            else
            {
                if (nStrList.count() <= 0 || nStrList.at(0) != "v")
                    continue;
                VertexPos nPos;
                for (int i=1; i<nStrList.count(); ++i)
                    nPos.postion[i - 1] = nStrList.at(i).toFloat();
                m_VertexInfo << nPos;
            }
        }
        else if (nData[0] == 'f')
        {
            QStringList nStrList = nLineString.split(" ");
            if (nStrList.count() <= 0 || nStrList.at(0) != "f")
                continue;
            for (int i=1; i<nStrList.count(); ++i)
            {
                VertexIndex nIndex;
                QString nFaceIndexStr = nStrList.at(i);
                QStringList nFaceList = nFaceIndexStr.split("/");
                nIndex.posIndex = nFaceList.at(0).toUInt() - 1;
                nIndex.coordIndex = nFaceList.at(1).toUInt() - 1;
                nIndex.normalIndex = nFaceList.at(2).toUInt() - 1;
                bool isFinded = false;
                for (int j=0; j<m_VertexIndex.count(); ++j)
                {
                    if (nIndex.posIndex == m_VertexIndex.at(j).posIndex && \
                        nIndex.coordIndex == m_VertexIndex.at(j).coordIndex && \
                        nIndex.normalIndex == m_VertexIndex.at(j).normalIndex)
                    {
                        isFinded = true;
                        m_FaceIndex << j;
                        break;
                    }
                }
                if (!isFinded)
                {
                    m_VertexIndex << nIndex;
                    m_FaceIndex << m_VertexIndex.count() - 1;
                }
            }
        }
    }
    nObjFile.close();

    for (int i=0; i<m_VertexIndex.count(); ++i)
    {
        VertexData nPerVertextData;
        int posIndex = m_VertexIndex.at(i).posIndex;
        int textureIndex = m_VertexIndex.at(i).coordIndex;
        int normalIndex = m_VertexIndex.at(i).normalIndex;
        memcpy(nPerVertextData.postion, m_VertexInfo.at(posIndex).postion, sizeof(VertexPos));
        memcpy(nPerVertextData.texcoord, m_TextureInfo.at(textureIndex).coord, sizeof(VertexTex));
        memcpy(nPerVertextData.normal, m_NormalInfo.at(normalIndex).normal, sizeof(VertexNor));
        nVertextData.push_back(nPerVertextData);
    }

    for (int i=0; i<m_FaceIndex.count(); ++i)
    {
        index.push_back(m_FaceIndex.at(i));
    }

    return true;
}2、创建纹理
GLuint OpenGLOperate::createTexture(QString nFile)
{
    GLuint textureId = 0;
    QFile file(nFile);
    if (!file.exists())
        return 0;
    QImage p_w_picpath(nFile);
    QImage textureImage;
    int width = p_w_picpath.width();
    int height = p_w_picpath.height();
    textureImage = p_w_picpath.convertToFormat(QImage::Format_RGBA8888);
    textureImage = textureImage.mirrored();
    m_OpenGLCore->glGenTextures(1, &textureId);
    m_OpenGLCore->glBindTexture(GL_TEXTURE_2D, textureId);
    m_OpenGLCore->glTexParameteri(GL_TEXTURE_2D, GL_TEXTURE_WRAP_T, GL_CLAMP_TO_EDGE);
    m_OpenGLCore->glTexParameteri(GL_TEXTURE_2D, GL_TEXTURE_WRAP_S, GL_CLAMP_TO_EDGE);
    m_OpenGLCore->glTexParameteri(GL_TEXTURE_2D, GL_TEXTURE_MIN_FILTER, GL_LINEAR);
    m_OpenGLCore->glTexParameteri(GL_TEXTURE_2D, GL_TEXTURE_MAG_FILTER, GL_LINEAR);
    m_OpenGLCore->glTexImage2D(GL_TEXTURE_2D, 0, GL_RGB, width, height, 0, \
                               GL_RGBA, GL_UNSIGNED_BYTE, textureImage.bits());
    m_OpenGLCore->glBindTexture(GL_TEXTURE_2D, 0);
    return textureId;
}为Shader的纹理赋值,默认使用0号纹理单元
m_Texture = m_OpenGLOperate->createTexture(":/niutou.bmp");
OpenGLCore->glBindTexture(GL_TEXTURE_2D, m_Texture);
OpenGLCore->glUniform1i(m_TextureLocation, 0);3、关于环境光、漫反射及高光
环境光:在无光源下的环境的亮度;这里将环境光直接写到fragment shader中(也可以在用uniform在CPU上设置)
设置环境光的亮度及材质
// Ambient
vec4 M_AmbientLightColor = vec4(0.2, 0.2, 0.2, 1.0);
vec4 M_AmbientMaterial = vec4(0.2, 0.2, 0.2, 1.0);
vec4 ambientColor = M_AmbientLightColor * M_AmbientMaterial;漫反射:在光的照射下物体反射的颜色,也就是物体反射的颜色
光照强度的计算:物体表面的点指向光源的向量 点乘 法线,就是发光强度。
分析:指向光源的向量与法线的夹角为0度时,反射的光线越多,发光强度越大。夹角为90度时,发光强度就为0,如果大于90度则为背光面。
// Diffuse
vec3 M_LightPos = vec3(10.0, 10.0, 0.0);
vec3 LightNormal = normalize(M_LightPos);       // 指向光源的单位向量,方向光
vec3 NormalNormal = normalize(M_normal);      //  法线的单位向量

// 点乘获取光照强度
vec4 M_DiffuseLightColor = vec4(1.0, 1.0, 1.0, 1.0);
vec4 M_DiffuseMaterial = vec4(0.9, 0.9, 0.9, 1.0);
vec4 diffuseColor = M_DiffuseLightColor * M_DiffuseMaterial *
max(0.0, dot(NormalNormal, LightNormal));镜面发射:高光,在金属等物体表面的光
标准phong模型 光照强度的计算:反射光线 点乘 直线眼睛的向量作为基底,然后取一个幂
分析:当反射光线与指向眼睛的向量夹角为0度时,则为最亮的部分
// 镜面反射
vec4 specularLightColor = vec4(1.0, 1.0, 1.0, 1.0);
vec4 specularMaterial = vec4(0.4, 0.4, 0.4, 1.0);
vec3 reflerDir = normalize(reflect(-LightNormal, NormalNormal));
vec3 eyeDir = normalize(vec3(0.0) - M_WordPos);
vec4 specularColor = specularLightColor * specularMaterial *
pow(max(0.0, dot(reflerDir, eyeDir)), 180);4、法线矩阵(Normal Matrix)
当模型矩阵变换时,法线也会变,需要重新计算法线,公式为:
法线矩阵 = 模型矩阵的逆的转置
变换后的法线 = 法线矩阵 * 法线
QMatrix4x4 nMormalMat;    // 法线矩阵
QMatrix4x4 nModeMat;      // 模型矩阵
nModeMat.translate(0, -50, -200);
if (m_Rote > 360)
    m_Rote = 0;
else
    m_Rote += 1.0f;
nModeMat.rotate(m_Rote, 0.0f, 1.0f, 0.0f);
QMatrix4x4 nNormalMatrix = nModeMat.inverted().transposed();Vertex Shader:
attribute vec3 pos;
attribute vec2 coord;
attribute vec3 normal;

uniform mat4 M;
uniform mat4 V;
uniform mat4 P;
uniform mat4 NM;

varying vec2 M_coord;
varying vec3 M_normal;
varying vec3 M_WordPos;

void main()
{
        M_coord = coord;
        M_WordPos = vec3(M * vec4(pos, 1.0));
        M_normal = mat3(NM) * normal;// 计算法线
        gl_Position = P * V * M * vec4(pos, 1.0);
}Fragment Shader
uniform sampler2D U_MainTexture;
varying vec2 M_coord;
varying vec3 M_normal;
varying vec3 M_WordPos;

//uniform vec3 M_LightPos;        // 平行光
//uniform vec4 M_AmbientLightColor;
//uniform vec4 M_AmbientMaterial;
//uniform vec4 M_DiffuseLightColor;
//uniform vec4 M_DiffuseMaterial;

void main()
{
        // Ambient
        vec4 M_AmbientLightColor = vec4(0.2, 0.2, 0.2, 1.0);
        vec4 M_AmbientMaterial = vec4(0.2, 0.2, 0.2, 1.0);
        vec4 ambientColor = M_AmbientLightColor * M_AmbientMaterial;

        // Diffuse
        vec3 M_LightPos = vec3(10.0, 10.0, 0.0);
        vec3 LightNormal = normalize(M_LightPos);       // 指向光源的单位向量
        vec3 NormalNormal = normalize(M_normal);      //  法线的单位向量

        // 点乘获取光照强度
        vec4 M_DiffuseLightColor = vec4(1.0, 1.0, 1.0, 1.0);
        vec4 M_DiffuseMaterial = vec4(0.9, 0.9, 0.9, 1.0);
        vec4 diffuseColor = M_DiffuseLightColor * M_DiffuseMaterial *
                            max(0.0, dot(NormalNormal, LightNormal));

        // 镜面反射
        vec4 specularLightColor = vec4(1.0, 1.0, 1.0, 1.0);
        vec4 specularMaterial = vec4(0.4, 0.4, 0.4, 1.0);
        vec3 reflerDir = normalize(reflect(-LightNormal, NormalNormal));
        vec3 eyeDir = normalize(vec3(0.0) - M_WordPos);
        vec4 specularColor = specularLightColor * specularMaterial *
                             pow(max(0.0, dot(reflerDir, eyeDir)), 180);

        gl_FragColor = ambientColor + texture2D(U_MainTexture, M_coord) * 1
                       + specularColor;
}为了使模型看的更清楚,我没用漫反射。如果使用漫反射可以将最后一句改成:
gl_FragColor = ambientColor +
         texture2D(U_MainTexture, M_coord) * diffuseColor +
         specularColor;
亿速云「云服务器」,即开即用、新一代英特尔至强铂金CPU、三副本存储NVMe SSD云盘,价格低至29元/月。点击查看>>
免责声明:本站发布的内容(图片、视频和文字)以原创、转载和分享为主,文章观点不代表本网站立场,如果涉及侵权请联系站长邮箱:is@yisu.com进行举报,并提供相关证据,一经查实,将立刻删除涉嫌侵权内容。


 计算
计算 安全
安全 数据库
数据库 网络和加速
网络和加速 企业服务
企业服务


