这篇文章将为大家详细讲解有关antd design table如何更改某行数据的样式,文章内容质量较高,因此小编分享给大家做个参考,希望大家阅读完这篇文章后对相关知识有一定的了解。
import styless from './component/record.css';--->引入css样式。
css:
.csbsTypes{
 font-family:微软雅黑, "Open Sans", "宋体";
 font-weight: bold;
 }
代码:
<Table
title={()=><div style={{textAlign: 'center',backgroundColor:'#170A29'}}></div>}
columns={R1columns}
dataSource={this.state.RateData}
pagination={false}
rowClassName={(record, index) => record.csbsType ==='不限范围'?'csbsTypes':''}-->因为rowClassName方法返回的是String类型,所以直接将样式名字填进去,就会自动查找此样式
/>显示结果就是:在csbsType ===“不限范围“”的这一行字体会被加粗```
补充知识:vue 给ant design table 组件自定义点击行(选中行)样式和斑马纹样式
写在开头:
element-ui的table组件有几个属性很好用,但是ant-design中table组件是没有的。
比如:
stripe: 是否为斑马纹 table。
highlight-current-row: 是否要高亮当前行。
当然,还有好几个其他的属性,但是本文先只讲这两个。既然element-ui有,ant-design没有,那我在用ant-design的table组件时,想要实现这两个功能怎么办?
答案是凉拌。既然它没有,那就自己写,也就是二次封装。
ok,先来实现这个属性的功能:highlight-current-row。
highlight-current-row
首先,当然是给定义prop变量:highlightCurrentRow;再定义一个另外一个prop变量currentRow。
然后在watch中监听currentRow的变化,每次当currentRow变化的时候,渲染一下上一个选中行和当前选中行的样式。
currentRow (val) {
   if (this.highlightCurrentRow) {
    this.renderRowStyleAfterRowClick(val)
   }
  }
highlightCurrentRow为true的时候,才需要渲染新的样式。
renderRowStyleAfterRowClick:
// 选中某一行后,渲染表格行的样式
  renderRowStyleAfterRowClick (currentRow) {
   const elements = document.getElementsByClassName('ant-table-row')
   const rowSelectionElement = document.getElementsByClassName('row-selection')
   // 获取上一个选中行,并移除它的选中样式
   if (rowSelectionElement.length > 0) {
    rowSelectionElement[0].classList.remove('row-selection')
   }
   // 给当前选中行添加选中行的样式
   if (elements.length > 0) {
    const rowList = [...elements]
    rowList.find(t => t.dataset.rowKey === currentRow.id).classList.add('row-selection')
   }
  }
代码其实很简单:
先拿表格当前页的所有row元素(table组件没有提供当前点击行的原生class)和当前选中row元素。
如果当前有选中的行,先移除这个之前添加过的css class 'row-selection'。
然后再给当前选中行添class 'row-selection'。
那个这里就有疑问了,我怎么样才能找到当前行呢?table组件并没有提供当前选中行的class(至少我没有找到),所有我只能t通过class name 'ant-table-row' 拿到所有row, 然后再从中找出你当前点击的那一行。
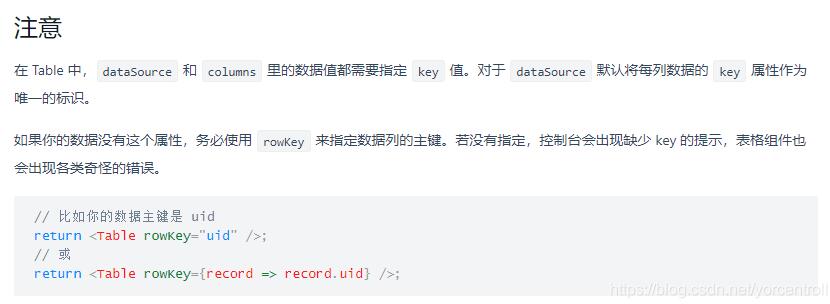
这个时候需要利用一个很关键的属性: rowKey。
还记得ant-design table组件的api文件最后面的那个注意吗?

这里提醒你,rowKey用来指定数据列的住建,也就是每一行的唯一标志,那么好办了 。
我们引用table组件的时候,将rowKey设置为表格数据源的主键,这样我们就能从元素中的dataset中获取到rowKey,然后找出当前点击行。
rowList.find(t => t.dataset.rowKey === currentRow.id)
然后给这个元素动态添加class ‘'row-selection'。
// 给表格添加悬停样式和当前点击行添加选中样式
.ant-table-row {
 &:hover > td {
  background-color: @background-color !important;
  color: #fff !important;
 }
 &.row-selection {
  background-color: @background-color !important;
  color: #fff !important;
 }
}
这里设置hover时行样式和点击时行样式一样,是为了不让行点击后,该行悬停时,出现其他不一样的样式。如果不想设置成一样,可以单独设置行点击时的hover样式和行点击时的样式一样。
// 给表格添加悬停样式和当前点击行添加选中样式
.ant-table-row {
 &.row-selection {
  background-color: @background-color !important;
  color: #fff !important;
  &:hover > td {
    background-color: @background-color !important;
    color: #fff !important;
   }
 }
}
这样,我们的目的就达到了。
在行点击时,修改currentRow,table组件内部通过watch监测到currentRow的变化,就会触发改变样式的方法。
<s-table
    ref="table"
    size="default"
    rowKey="id"
    :columns="columns"
    :verticalScroll="false"
    :data="loadData"
    :stripe="true"
    :highlightCurrentRow="true"
    :currentRow="selectedCustomer"
    :customRow="rowClick">
...
rowClick: record => ({
// 事件
on: {
click: () => {
this.handleCurrentRowChanged(record)
}
}
})handleCustomerChanged (record) {
this.selectedCustomer = record
}这样就可以了。
stripe(斑马纹行)
实现行的stripe功能,还是比较简单的。
添加prop 变量 stripe, 在组件的update函数钩子内,调用实现斑马纹的方法就可以了
 updated () {
  if (this.stripe) {
   this.renderStripe()
  }
}
实现斑马纹的方式有多种,这里只展示期中一种:
// 对表格行进行斑马行格式显示
  renderStripe () {
   const table = document.getElementsByClassName('ant-table-row')
   if (table.length > 0) {
    const rowList = [...table]
    rowList.forEach(row => {
     const index = rowList.indexOf(row)
     if (index % 2 !== 0) {
      row.style.backgroundColor = '#f7f7f7'
     } else {
      row.style.backgroundColor = '#ffffff'
     }
    })
   }
  },
获取到table的所有行,然后对其进行隔行设置不一样的行背景色,目的就达到了。
关于antd design table如何更改某行数据的样式就分享到这里了,希望以上内容可以对大家有一定的帮助,可以学到更多知识。如果觉得文章不错,可以把它分享出去让更多的人看到。
免责声明:本站发布的内容(图片、视频和文字)以原创、转载和分享为主,文章观点不代表本网站立场,如果涉及侵权请联系站长邮箱:is@yisu.com进行举报,并提供相关证据,一经查实,将立刻删除涉嫌侵权内容。