基于Serverless +企业微信如何打造nCoV疫情监控小助手,很多新手对此不是很清楚,为了帮助大家解决这个难题,下面小编将为大家详细讲解,有这方面需求的人可以来学习下,希望你能有所收获。
最近的一些疫情信息很让人揪心,为了方便大家掌握疫情信息,在空闲之余做了一个关于 nCoV 的疫情监控小助手。主要的功能是通过企业微信的 WebHook 来推送疫情信息。这里将使用 Serverless 的整体代码思路和架构方式分享给大家。
首先,我们需要解决的是数据来源问题,这里我们可以使用 python 爬虫来做这件事情,但是由于个人比较懒所以直接用的 2019-nCoV-Crawler ,这个项目已经集成了现有的 API,所以我们直接调用即可。当然有能力的同学也可以自己部署 Python,我这边是自己部署的,但是这不是本次的重点,就不在赘述。
现在,我们有了数据,但是数据怎么打到服务器呢?又该如何触发?当然使用 CVM 也是可以的,但是似乎太笨拙,并且消耗量很大,需要自己搭好所有环境。所以,这里我们选用 Serverless 方式来部署。
我们来看看整体业务的代码部分吧,毕竟这里是整个机器人的核心。我们来看代码(请求三次接口):
<?php
function main_handler($event, $context) {
// 广东省情况
$curlsz = curl_init();
curl_setopt_array($curlsz, array(
  CURLOPT_URL => "https://lab.isaaclin.cn/nCoV/api/area?latest=0&province=%E5%B9%BF%E4%B8%9C%E7%9C%81",
  CURLOPT_RETURNTRANSFER => true,
  CURLOPT_ENCODING => "",
  CURLOPT_MAXREDIRS => 10,
  CURLOPT_TIMEOUT => 3000,
  CURLOPT_HTTP_VERSION => CURL_HTTP_VERSION_1_1,
  CURLOPT_CUSTOMREQUEST => "GET",
  CURLOPT_HTTPHEADER => array(
    "Accept: */*",
    "Cache-Control: no-cache",
    "Connection: keep-alive",
    "Host: lab.isaaclin.cn",
    "Postman-Token: 680e5ea7-5c2e-4fb6-9295-7e336f2252c6,abd73e01-2a60-42b5-9bbe-92aa83805a7e",
    "User-Agent: PostmanRuntime/7.15.0",
    "accept-encoding: gzip, deflate",
    "cache-control: no-cache"
  ),
));

$responsesz = curl_exec($curlsz);
$echo_responsesz = json_decode($responsesz, true);
$err = curl_error($curlsz);
curl_close($curlsz);

// 湖北省情况
$curlhb = curl_init();
curl_setopt_array($curlhb, array(
  CURLOPT_URL => "https://lab.isaaclin.cn/nCoV/api/area?latest=0&province=%E6%B9%96%E5%8C%97%E7%9C%81",
  CURLOPT_RETURNTRANSFER => true,
  CURLOPT_ENCODING => "",
  CURLOPT_MAXREDIRS => 10,
  CURLOPT_TIMEOUT => 3000,
  CURLOPT_HTTP_VERSION => CURL_HTTP_VERSION_1_1,
  CURLOPT_CUSTOMREQUEST => "GET",
  CURLOPT_HTTPHEADER => array(
    "Accept: */*",
    "Cache-Control: no-cache",
    "Connection: keep-alive",
    "Host: lab.isaaclin.cn",
    "Postman-Token: 680e5ea7-5c2e-4fb6-9295-7e336f2252c6,abd73e01-2a60-42b5-9bbe-92aa83805a7e",
    "User-Agent: PostmanRuntime/7.15.0",
    "accept-encoding: gzip, deflate",
    "cache-control: no-cache"
  ),
));

$responsehb = curl_exec($curlhb);
$echo_responsehb = json_decode($responsehb, true);
$err = curl_error($curlhb);
curl_close($curlhb);

// 全国总体情况
$curlall = curl_init();
curl_setopt_array($curlall, array(
  CURLOPT_URL => "https://lab.isaaclin.cn/nCoV/api/overall",
  CURLOPT_RETURNTRANSFER => true,
  CURLOPT_ENCODING => "",
  CURLOPT_MAXREDIRS => 10,
  CURLOPT_TIMEOUT => 3000,
  CURLOPT_HTTP_VERSION => CURL_HTTP_VERSION_1_1,
  CURLOPT_CUSTOMREQUEST => "GET",
  CURLOPT_HTTPHEADER => array(
    "Accept: */*",
    "Cache-Control: no-cache",
    "Connection: keep-alive",
    "Host: lab.isaaclin.cn",
    "Postman-Token: 680e5ea7-5c2e-4fb6-9295-7e336f2252c6,abd73e01-2a60-42b5-9bbe-92aa83805a7e",
    "User-Agent: PostmanRuntime/7.15.0",
    "accept-encoding: gzip, deflate",
    "cache-control: no-cache"
  ),
));

$responseall = curl_exec($curlall);
$echo_responseall = json_decode($responseall, true);
$err = curl_error($curlall);
curl_close($curlall);

//判断是否为深圳地域(这里逻辑写的比较简单,但是够用了)
if ($echo_responsesz['results'][0]['cities'][0]['cityName'] == '深圳') {
  $echo_responseszqz = $echo_responsesz['results'][0]['cities'][0]['confirmedCount'];
  $echo_responseszys = $echo_responsesz['results'][0]['cities'][0]['suspectedCount'];
  $echo_responseszzy = $echo_responsesz['results'][0]['cities'][0]['curedCount'];
  $echo_responseszsw = $echo_responsesz['results'][0]['cities'][0]['deadCount'];
} else {
  $echo_responseszqz = $echo_responsesz['results'][0]['cities'][1]['confirmedCount'];
  $echo_responseszys = $echo_responsesz['results'][0]['cities'][1]['suspectedCount'];
  $echo_responseszzy = $echo_responsesz['results'][0]['cities'][1]['curedCount'];
  $echo_responseszsw = $echo_responsesz['results'][0]['cities'][1]['deadCount'];
}

if ($err) {
  echo "cURL Error #:" . $err;
} else {
//疫情监控告警机器人
$sc = $sc=" **2019-nCoV 疫情信息同步:** \n
> 全国疫情:
> 确诊人数<font color=\"info\">".$echo_responseall['results'][0]['confirmedCount']."</font>,疑似感染人数<font color=\"info\">".$echo_responseall['results'][0]['suspectedCount']."</font>,治愈人数<font color=\"info\">".$echo_responseall['results'][0]['curedCount']."</font>,死亡人数<font color=\"info\">".$echo_responseall['results'][0]['deadCount']."</font>\n
> 广东省:
> 确诊人数<font color=\"info\">".$echo_responsesz['results'][0]['confirmedCount']."</font>,疑似感染人数<font color=\"info\">".$echo_responsesz['results'][0]['suspectedCount']."</font>,治愈人数<font color=\"info\">".$echo_responsesz['results'][0]['curedCount']."</font>,死亡人数<font color=\"info\">".$echo_responsesz['results'][0]['deadCount']."</font>\n
> 湖北省:
> 确诊人数<font color=\"info\">".$echo_responsehb['results'][0]['confirmedCount']."</font>,疑似感染人数<font color=\"info\">".$echo_responsehb['results'][0]['suspectedCount']."</font>,治愈人数<font color=\"info\">".$echo_responsehb['results'][0]['curedCount']."</font>,死亡人数<font color=\"info\">".$echo_responsehb['results'][0]['deadCount']."</font>\n
> 深圳市:
> 确诊人数<font color=\"info\">".$echo_responseszqz."</font>,疑似感染人数<font color=\"info\">".$echo_responseszys."</font>,治愈人数<font color=\"info\">".$echo_responseszzy."</font>,死亡人数<font color=\"info\">".$echo_responseszsw."</font>\n

> <font color=\"info\">".$echo_responseall['results'][0]['note1']."</font>
> <font color=\"info\">".$echo_responseall['results'][0]['note2']."</font>
> <font color=\"info\">".$echo_responseall['results'][0]['note3']."</font>
> <font color=\"info\">".$echo_responseall['results'][0]['remark1']."</font>
> <font color=\"info\">".$echo_responseall['results'][0]['remark2']."</font>
> <font color=\"info\"> 信息出处:".$echo_responseall['results'][0]['generalRemark']."</font> \n
>[更多数据请查看](https://news.qq.com/zt2020/page/feiyan.htm) \n
";
$post = array('msgtype' => 'markdown', 'markdown' => array('content' => $sc));
$curl = curl_init();
curl_setopt_array($curl, array(
  CURLOPT_URL => "https://qyapi.weixin.qq.com/cgi-bin/webhook/send?key=",  //这里的地址填写为企业微信的HOOK路径,https://work.weixin.qq.com/api/doc/90000/90136/91770
  CURLOPT_RETURNTRANSFER => true,
  CURLOPT_ENCODING => "",
  CURLOPT_MAXREDIRS => 10,
  CURLOPT_TIMEOUT => 10,
  CURLOPT_HTTP_VERSION => CURL_HTTP_VERSION_1_1,
  CURLOPT_CUSTOMREQUEST => "POST",
  CURLOPT_POSTFIELDS => json_encode($post,JSON_UNESCAPED_UNICODE),
  CURLOPT_HTTPHEADER => array(
    "Cache-Control: no-cache",
    "Postman-Token: ab32082b-ce64-4832-b51f-8f2f1b3e98ef"
  ),
));

$response = curl_exec($curl);
$err = curl_error($curl);

curl_close($curl);

return "运行成功";
}

}

?>是不是很简单呢?请求数据,发送数据。
那么我们接下了重点看下如何将我们的业务代码上传到云端呢? 这里的云端我用的是腾讯云 Serverless 服务 SCF云函数 。整个部署,使用过程都是免费的,对于开发者来讲小项目使用的话免费额度是完全够用的。无需担心额外付费。
Serverless 部署,选用的是比较流行的 Serverless Framework,使用和部署也是完全免费的,那么下面我就来介绍下具体的部署过程吧。
首先,第一步,我们来安装一个 Serverless Framework 的开发框架:
$ npm install -g serverless然后,我们创建一个函数目录:
$ mkdir nCov-function
$ cd nCov-function相关函数目录的内容如下:
|- code
  |- index.php  // 这里就是上面的业务代码存放位置
|- serverless.yml //serverless 配置文件接下来,是我们的重头戏,配置函数 yml 文件:
# serverless.yml
myFunction:
  component: "@serverless/tencent-scf"  //引用tencent-scf component
  inputs:
    name: nCoVFunction   //函数名称
    enableRoleAuth: true
    codeUri: ./code  //代码本地存放位置
    handler: index.main_handler
    runtime: Php5
    region: ap-shanghai //函数运行地域
    description: My Serverless nCoV Function.
    memorySize: 128  //运行内存
    timeout: 20  //超时时间
    exclude:
      - .gitignore
      - .git/**
      - node_modules/**
      - .serverless
      - .env
    include:
      - ./nCoVFunction.zip
    environment:
      variables:
        TEST: vale
    vpcConfig:
      subnetId: ''
      vpcId: ''
    events:
      - timer:  // 定时触发器
          name: timer
          parameters:
            cronExpression: '0 0 10,21 * * * *'  //明天早上10点,晚上21点
enable: true万事具备,我们就可以直接部署 SLS 了。
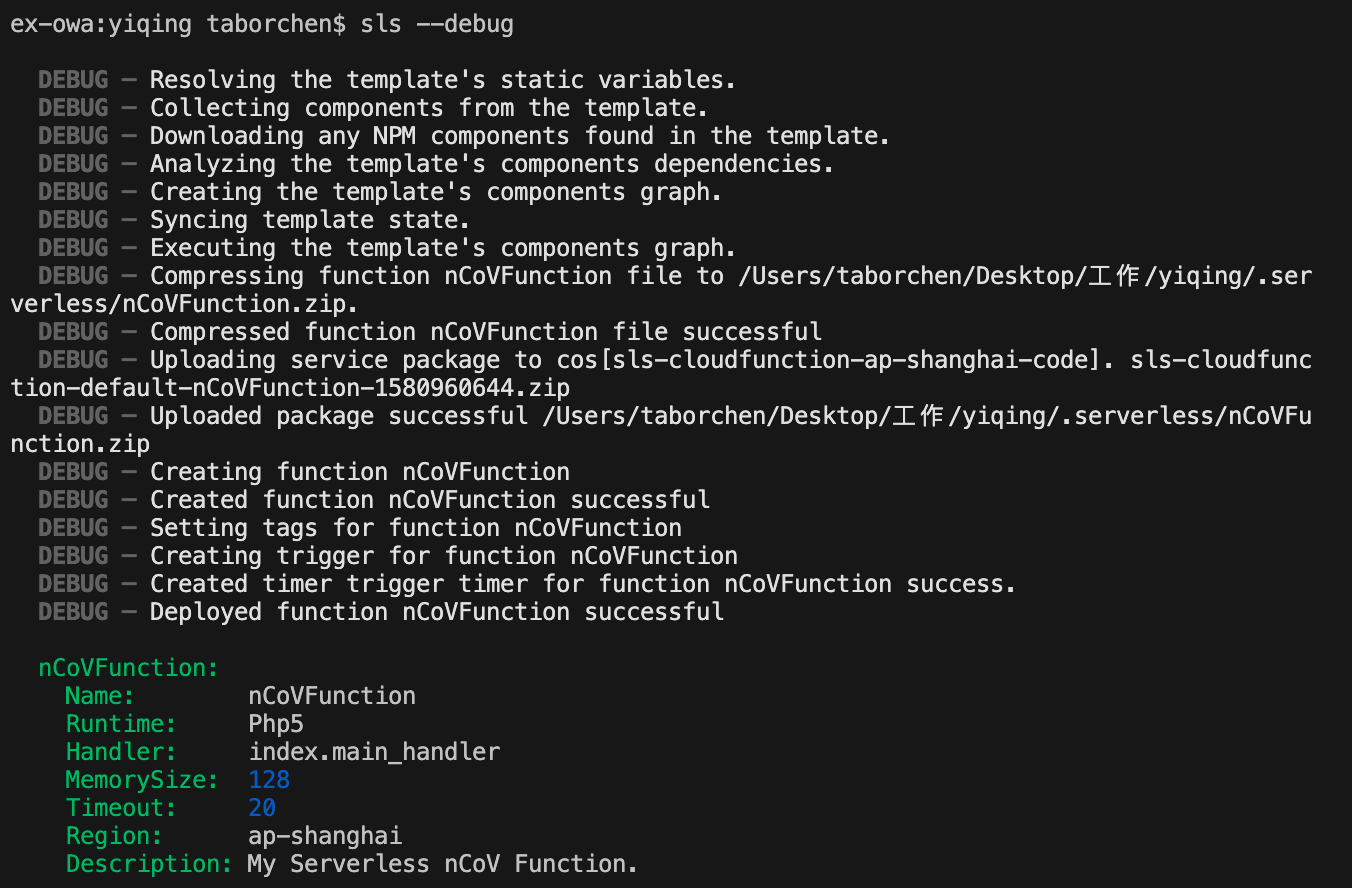
通过 sls 命令(serverless 的缩写)进行部署,并可以添加 –debug 参数查看部署过程中的信息:
taborchen$ sls --debug

  DEBUG ─ Resolving the template's static variables.
  DEBUG ─ Collecting components from the template.
  DEBUG ─ Downloading any NPM components found in the template.
  DEBUG ─ Analyzing the template's components dependencies.
  DEBUG ─ Creating the template's components graph.
  DEBUG ─ Syncing template state.
  DEBUG ─ Executing the template's components graph.
  DEBUG ─ Compressing function nCoVFunction file to /Users/taborchen/Desktop/工作/yiqing/.ser
verless/nCoVFunction.zip.
  DEBUG ─ Compressed function nCoVFunction file successful
  DEBUG ─ Uploading service package to cos[sls-cloudfunction-ap-shanghai-code]. sls-cloudfunc
tion-default-nCoVFunction-1580960644.zip
  DEBUG ─ Uploaded package successful /Users/taborchen/Desktop/工作/yiqing/.serverless/nCoVFu
nction.zip
  DEBUG ─ Creating function nCoVFunction
  DEBUG ─ Created function nCoVFunction successful
  DEBUG ─ Setting tags for function nCoVFunction
  DEBUG ─ Creating trigger for function nCoVFunction
  DEBUG ─ Created timer trigger timer for function nCoVFunction success.
DEBUG ─ Deployed function nCoVFunction successful运行结果如下:

这样,我们就完成了一个 nCoV 的在线触发函数机器人。
看完上述内容是否对您有帮助呢?如果还想对相关知识有进一步的了解或阅读更多相关文章,请关注亿速云行业资讯频道,感谢您对亿速云的支持。
亿速云「云数据库 MySQL」免部署即开即用,比自行安装部署数据库高出1倍以上的性能,双节点冗余防止单节点故障,数据自动定期备份随时恢复。点击查看>>
免责声明:本站发布的内容(图片、视频和文字)以原创、转载和分享为主,文章观点不代表本网站立场,如果涉及侵权请联系站长邮箱:is@yisu.com进行举报,并提供相关证据,一经查实,将立刻删除涉嫌侵权内容。
原文链接:https://my.oschina.net/serverlesscloud/blog/3164755