本篇文章给大家分享的是有关C# 中怎么利用WPF自定义菜单切换动画,小编觉得挺实用的,因此分享给大家学习,希望大家阅读完这篇文章后可以有所收获,话不多说,跟着小编一起来看看吧。
添加Nuget库
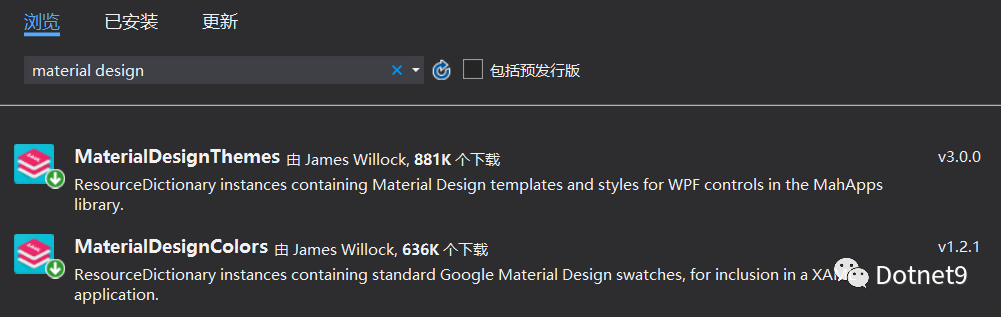
使用 .Net Core 3.1 创建名为“CustomMenu”的WPF解决方案,添加两个Nuget库:MaterialDesignThemes和MaterialDesignColors。
只修改了App.xaml(添加MD控件样式)和MainWindow.xaml(主窗口实现效果)。
<Application x:Class="CustomMenu.App" xmlns="http://schemas.microsoft.com/winfx/2006/xaml/presentation" xmlns:x="http://schemas.microsoft.com/winfx/2006/xaml" xmlns:local="clr-namespace:CustomMenu" StartupUri="MainWindow.xaml"> <Application.Resources> <ResourceDictionary> <ResourceDictionary.MergedDictionaries> <ResourceDictionary Source="pack://application:,,,/MaterialDesignThemes.Wpf;component/Themes/MaterialDesignTheme.Dark.xaml" /> <ResourceDictionary Source="pack://application:,,,/MaterialDesignThemes.Wpf;component/Themes/MaterialDesignTheme.Defaults.xaml" /> </ResourceDictionary.MergedDictionaries> <!--PRIMARY--> <SolidColorBrush x:Key="PrimaryHueLightBrush" Color="#349FDA"/> <SolidColorBrush x:Key="PrimaryHueLightForegroundBrush" Color="#FF333333"/> <SolidColorBrush x:Key="PrimaryHueMidBrush" Color="#0288d1"/> <SolidColorBrush x:Key="PrimaryHueMidForegroundBrush" Color="#FFDDDDDD"/> <SolidColorBrush x:Key="PrimaryHueDarkBrush" Color="#015f92"/> <SolidColorBrush x:Key="PrimaryHueDarkForegroundBrush" Color="#FFFFFF"/> <!--ACCENT--> <SolidColorBrush x:Key="SecondaryAccentBrush" Color="#FF50F350"/> <SolidColorBrush x:Key="SecondaryAccentForegroundBrush" Color="#FFFFFF"/> </ResourceDictionary> </Application.Resources></Application>添加菜单、设置菜单项切换动画等:
<Window x:Class="CustomMenu.MainWindow" xmlns="http://schemas.microsoft.com/winfx/2006/xaml/presentation" xmlns:x="http://schemas.microsoft.com/winfx/2006/xaml" xmlns:d="http://schemas.microsoft.com/expression/blend/2008" xmlns:mc="http://schemas.openxmlformats.org/markup-compatibility/2006" xmlns:local="clr-namespace:CustomMenu" xmlns:materialDesign="http://materialdesigninxaml.net/winfx/xaml/themes" mc:Ignorable="d" Title="MainWindow" Height="600" Width="1080" Background="#FF292929" ResizeMode="NoResize" WindowStyle="None" WindowStartupLocation="CenterScreen"> <Window.Resources> <Storyboard x:Key="Move0"> <DoubleAnimationUsingKeyFrames Storyboard.TargetProperty="(UIElement.RenderTransform).(TransformGroup.Children)[3].(TranslateTransform.Y)" Storyboard.TargetName="ellipse"> <EasingDoubleKeyFrame KeyTime="0:0:0.4" Value="0"> <EasingDoubleKeyFrame.EasingFunction> <BackEase EasingMode="EaseInOut"/> </EasingDoubleKeyFrame.EasingFunction> </EasingDoubleKeyFrame> </DoubleAnimationUsingKeyFrames> </Storyboard> <Storyboard x:Key="Move1"> <DoubleAnimationUsingKeyFrames Storyboard.TargetProperty="(UIElement.RenderTransform).(TransformGroup.Children)[3].(TranslateTransform.Y)" Storyboard.TargetName="ellipse"> <EasingDoubleKeyFrame KeyTime="0:0:0.4" Value="40"> <EasingDoubleKeyFrame.EasingFunction> <BackEase EasingMode="EaseInOut"/> </EasingDoubleKeyFrame.EasingFunction> </EasingDoubleKeyFrame> </DoubleAnimationUsingKeyFrames> </Storyboard> <Storyboard x:Key="Move2"> <DoubleAnimationUsingKeyFrames Storyboard.TargetProperty="(UIElement.RenderTransform).(TransformGroup.Children)[3].(TranslateTransform.Y)" Storyboard.TargetName="ellipse"> <EasingDoubleKeyFrame KeyTime="0:0:0.4" Value="80"> <EasingDoubleKeyFrame.EasingFunction> <BackEase EasingMode="EaseInOut"/> </EasingDoubleKeyFrame.EasingFunction> </EasingDoubleKeyFrame> </DoubleAnimationUsingKeyFrames> </Storyboard> </Window.Resources> <Window.Triggers> <EventTrigger RoutedEvent="ListBoxItem.Selected" SourceName="item0"> <BeginStoryboard x:Name="Move0_BeginStoryboard" Storyboard="{StaticResource Move0}"/> </EventTrigger> <EventTrigger RoutedEvent="ListBoxItem.Selected" SourceName="item1"> <BeginStoryboard x:Name="Move1_BeginStoryboard" Storyboard="{StaticResource Move1}"/> </EventTrigger> <EventTrigger RoutedEvent="ListBoxItem.Selected" SourceName="item2"> <BeginStoryboard x:Name="Move2_BeginStoryboard" Storyboard="{StaticResource Move2}"/> </EventTrigger> </Window.Triggers> <Grid> <Grid.RowDefinitions> <RowDefinition Height="40"/> <RowDefinition Height="*"/> </Grid.RowDefinitions> <Border Grid.Row="0" BorderBrush="{StaticResource SecondaryAccentBrush}" BorderThickness="0 0 0 1"> <StackPanel HorizontalAlignment="Right" VerticalAlignment="Center" Orientation="Horizontal"> <Button Style="{StaticResource MaterialDesignFlatButton}"> <materialDesign:PackIcon Kind="Minus"/> </Button> <Button Style="{StaticResource MaterialDesignFlatButton}"> <materialDesign:PackIcon Kind="Close"/> </Button> </StackPanel> </Border> <Grid Grid.Row="1"> <Grid.ColumnDefinitions> <ColumnDefinition Width="200"/> <ColumnDefinition Width="*"/> </Grid.ColumnDefinitions> <ListView Width="200" HorizontalAlignment="Left"> <ListViewItem x:Name="item0" Content="首页" Height="40"/> <ListViewItem x:Name="item1" Content="浏览" Height="40"/> <ListViewItem x:Name="item2" Content="视频" Height="40"/> </ListView> <Grid Grid.ColumnSpan="2" Width="5" Margin="195 0" HorizontalAlignment="Left"> <Rectangle Fill="{StaticResource SecondaryAccentBrush}" Width="2" HorizontalAlignment="Right"/> <Ellipse x:Name="ellipse" Width="10" Height="10" VerticalAlignment="Top" Fill="{StaticResource SecondaryAccentBrush}" Margin="0 15" RenderTransformOrigin="0.5 0.5"> <Ellipse.RenderTransform> <TransformGroup> <ScaleTransform/> <SkewTransform/> <RotateTransform/> <TranslateTransform/> </TransformGroup> </Ellipse.RenderTransform> </Ellipse> </Grid> </Grid> </Grid></Window>以上就是C# 中怎么利用WPF自定义菜单切换动画,小编相信有部分知识点可能是我们日常工作会见到或用到的。希望你能通过这篇文章学到更多知识。更多详情敬请关注亿速云行业资讯频道。
亿速云「云服务器」,即开即用、新一代英特尔至强铂金CPU、三副本存储NVMe SSD云盘,价格低至29元/月。点击查看>>
免责声明:本站发布的内容(图片、视频和文字)以原创、转载和分享为主,文章观点不代表本网站立场,如果涉及侵权请联系站长邮箱:is@yisu.com进行举报,并提供相关证据,一经查实,将立刻删除涉嫌侵权内容。
原文链接:https://my.oschina.net/dotnet9/blog/4442799


 计算
计算 安全
安全 数据库
数据库 网络和加速
网络和加速 企业服务
企业服务


