本篇文章给大家分享的是有关如何深入了解Python二维直方图,小编觉得挺实用的,因此分享给大家学习,希望大家阅读完这篇文章后可以有所收获,话不多说,跟着小编一起来看看吧。
只统计像素的灰度值这一特征,可将其成为一维直方图。二维直方图可以统计像素的色相和饱和度,用于查找图像的颜色直方图。
OpenCV仍然使用cv2.calcHist()函数来查找图像的颜色直方图,只是在指定参数时与之前有所区别。
cv2.calcHist()函数的基本格式如下:
hist =cv2.calcHist(image, channels, mask, histSize, ranges)
image参数指定的原图像应从BGR色彩空间转换为HSV色彩空间, 实际参数需要用方括号括起来
channels参数设置为[0,1]时, 表示同时处理色相和饱和度
histSize参数设置BINS值为[180,256]时, 表示色相为180, 饱和度为256
ranges参数设置为[0,180,0,256]时, 表示色相的取值范围为[0,180], 饱和度的取值范围为[0,2565]
cv2.calcHist()函数返回的颜色直方图可以直接使用cv2.show()函数显示。
import cv2
import numpy as np
import matplotlib.pyplot as plt

img = cv2.imread('XIAN.jpg')
cv2.namedWindow('orininal', cv2.WINDOW_NORMAL)
cv2.imshow('orininal', img)

img2 = cv2.cvtColor(img, cv2.COLOR_BGR2HSV)
hist = cv2.calcHist([img2], [0, 1], None, [180, 256], [0,180,0,256])

cv2.namedWindow('2DHist', cv2.WINDOW_NORMAL)
cv2.imshow('2DHist', hist)

cv2.waitKey(0)
cv2.destroyAllWindows()

plt.imshow(hist, interpolation = 'nearest')    # 绘制颜色直方图
plt.show()                                     # 显示颜色直方图
cv2.calcHist()函数返回的颜色直方图是一个大小为180*256的二维数组,用cv2.imshow()函数显示时是一副灰度图像,不能直接显示出颜色的分布情况。
可以使用matplotlib.pyplot.imshow()函数绘制具有不同颜色的二维直方图。
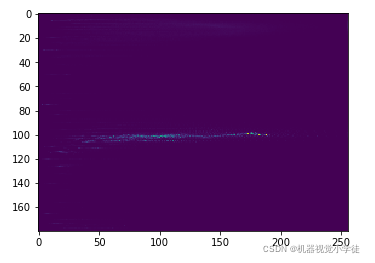
Numpy的np.histogram2d()函数用于计算二维直方图,其基本格式如下:
hist, xedges, yedges = np.histogram2d(x, y, bins, range)
hist为返回的直方图
xedges为返回的x的直方图的BINS边界值
yedges为返回的y的直方图的BINS边界值
x和y为原图对应通道转换成的一维数组
bins为BINS的值, 如[180,256]
range为像素范围, 格式为[[0, 180],[0, 256]]
img = cv2.imread('building.jpg')
cv2.imshow('orininal', img)

img2 = cv2.cvtColor(img, cv2.COLOR_BGR2HSV)
h, s, v = cv2.split(img2)

hist, x, y = np.histogram2d(h.ravel(), s.ravel(), [180, 256], [[0, 180],[0, 256]])

cv2.imshow('2DHist', hist)

cv2.waitKey(0)
cv2.destroyAllWindows()

plt.imshow(hist, interpolation = 'nearest')
plt.show()
可以使用matplotlib.pyplot.imshow()函数绘制具有不同颜色的二维直方图。
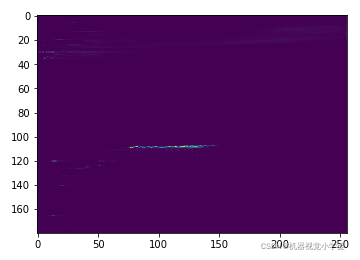
import cv2
import numpy as np
import matplotlib.pyplot as plt

img = cv2.imread('home.jpg')

plt.figure(figsize = (25,25))
imgrgb = cv2.cvtColor(img, cv2.COLOR_BGR2RGB)
plt.subplot(2, 2, 1)
plt.title('Original')
plt.axis('off')
plt.imshow(imgrgb)

histb, e1 = np.histogram(img[0].ravel(), 256, [0, 255])   #计算B通道直方图
histg, e2 = np.histogram(img[1].ravel(), 256, [0, 255])   #计算G通道直方图
histr, e3 = np.histogram(img[2].ravel(), 256, [0, 255])   #计算R通道直方图
plt.subplot(2, 2, 2)
plt.plot(histb, color = 'b')
plt.plot(histg, color = 'g')
plt.plot(histr, color = 'r')
plt.title('Hist')


img2 = cv2.cvtColor(img, cv2.COLOR_BGR2HSV)           #转换色彩空间为HSV
h, s, v = cv2.split(img2)
hist, x, y=np.histogram2d(h.ravel(), s.ravel(), [180, 256], [[0, 180], [0, 256]])        #计算颜色直方图
plt.subplot(2, 2, 3)
plt.title('2Dhist')                                 #设置子图窗口标题
plt.imshow(hist, interpolation = 'nearest',cmap = 'gray')                                    #绘制颜色直方图
plt.show()                                          #显示颜色直方图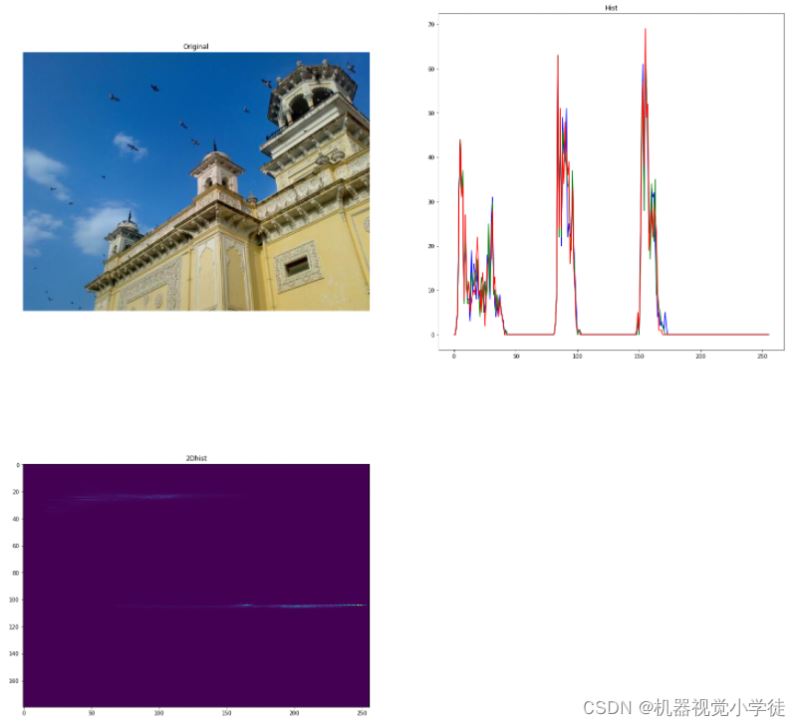
# 2.使用OpenCV函数计算直方图
import cv2
import numpy as np
import matplotlib.pyplot as plt

img = cv2.imread('flower.jpg')

plt.figure(figsize = (25,25))
imgrgb=cv2.cvtColor(img, cv2.COLOR_BGR2RGB)
plt.subplot(2, 2, 1)
plt.imshow(imgrgb)
plt.title('Original')
plt.axis('off')

histb = cv2.calcHist([img], [0], None, [256], [0,255])   #计算B通道直方图
histg = cv2.calcHist([img], [1], None, [256], [0,255])   #计算G通道直方图
histr = cv2.calcHist([img], [2], None, [256], [0,255])   #计算R通道直方图
plt.subplot(2, 2, 2)
plt.plot(histb, color= 'b')
plt.plot(histg, color= 'g')
plt.plot(histr, color= 'r')
plt.title('Hist')


img2=cv2.cvtColor(img,cv2.COLOR_BGR2HSV)
hist = cv2.calcHist([img2], [0, 1], None, [180, 256], [0, 180, 0, 256])
plt.subplot(2, 2, 3)
plt.title('2Dhist')                                 #设置子图窗口标题
plt.imshow(hist,interpolation = 'nearest',cmap = 'gray')                                    #绘制颜色直方图
plt.show()                                          #显示颜色直方图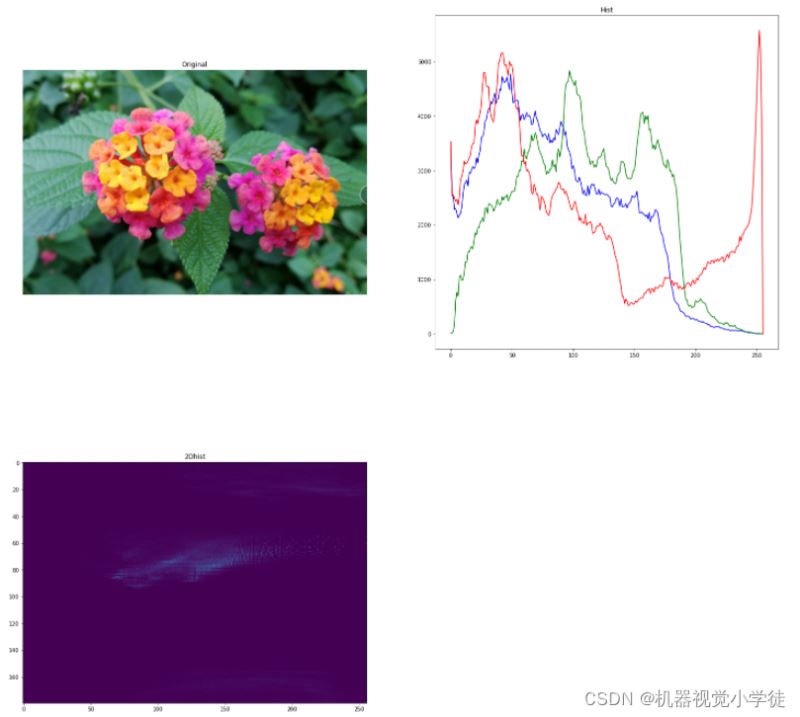
以上就是如何深入了解Python二维直方图,小编相信有部分知识点可能是我们日常工作会见到或用到的。希望你能通过这篇文章学到更多知识。更多详情敬请关注亿速云行业资讯频道。
免责声明:本站发布的内容(图片、视频和文字)以原创、转载和分享为主,文章观点不代表本网站立场,如果涉及侵权请联系站长邮箱:is@yisu.com进行举报,并提供相关证据,一经查实,将立刻删除涉嫌侵权内容。