жӮЁеҘҪпјҢзҷ»еҪ•еҗҺжүҚиғҪдёӢи®ўеҚ•е“ҰпјҒ
жӮЁеҘҪпјҢзҷ»еҪ•еҗҺжүҚиғҪдёӢи®ўеҚ•е“ҰпјҒ
иҝҷзҜҮж–Үз« дё»иҰҒд»Ӣз»ҚдәҶVueдёӯеҰӮдҪ•иҝӣиЎҢзҪ‘йЎөйў„жёІжҹ“пјҢе…·жңүдёҖе®ҡеҖҹйүҙд»·еҖјпјҢж„ҹе…ҙи¶Јзҡ„жңӢеҸӢеҸҜд»ҘеҸӮиҖғдёӢпјҢеёҢжңӣеӨ§е®¶йҳ…иҜ»е®ҢиҝҷзҜҮж–Үз« д№ӢеҗҺеӨ§жңү收иҺ·пјҢдёӢйқўи®©е°Ҹзј–еёҰзқҖеӨ§е®¶дёҖиө·дәҶи§ЈдёҖдёӢгҖӮ
йҖҡеёёжғ…еҶөдёӢпјҢVueйЎ№зӣ®жҳҜеҚ•йЎөйЎ№зӣ®пјҢд№ҹе°ұжҳҜжёІжҹ“еҮәжқҘзҡ„йЎ№зӣ®пјҢеҸӘжңүдёҖдёӘindex.htmlгҖӮ
иҝҷж ·зҡ„зјәзӮ№еҫҲжҳҺжҳҫпјҡ
йғЁзҪІеҲ°NginxпјҢйңҖиҰҒеҒҡtry_files $uri $uri/ /index.htmlеҶ…йғЁйҮҚе®ҡеҗ‘пјҢжүҚеҸҜд»Ҙз”ЁйҖҡиҝҮи·Ҝз”ұи®ҝй—®йЎөйқўгҖӮ
SEOдёҚеҸӢеҘҪпјҢжҗңзҙўеј•ж“Һ收еҪ•ж•ҲжһңдёҚдҪігҖӮ
иҖҢйў„жёІжҹ“пјҢе°ұжҳҜжҠҠеҺҹжқҘзҡ„еҚ•index.htmlпјҢжёІжҹ“жҲҗеӨҡдёӘзӣ®еҪ•пјҢжҜҸдёӘзӣ®еҪ•еҸҲжңүдёҖдёӘindex.htmlгҖӮиҝҷж ·е°ұдёҚйңҖиҰҒеҶ…йғЁйҮҚе®ҡеҗ‘и®ҝй—®и·Ҝз”ұпјҢд№ҹжӣҙеҲ©дәҺжҗңзҙўеј•ж“Һ收еҪ•гҖӮ

жң¬ж¬Ўйў„жёІжҹ“дҪҝз”Ёprerender-spa-pluginиҝӣиЎҢйў„жёІжҹ“гҖӮ
е®ғзҡ„дё»иҰҒеҺҹзҗҶжҳҜеҗҜеҠЁжөҸи§ҲеҷЁпјҢжёІжҹ“е®ҢжҲҗеҗҺжҠ“еҸ–HTMLпјҢ然еҗҺеҶҚеҲӣе»әзӣ®еҪ•пјҢдҝқеӯҳдёәindex.htmlгҖӮ
жіЁж„Ҹпјҡ
е®ҳзҪ‘зӣ®еүҚеҸӘжңүVue2.xзҡ„DemoпјҢе®һйҷ…дёҠжҳҜж”ҜжҢҒVue3зҡ„пјҲжң¬ж¬Ўжј”зӨәд№ҹжҳҜдҪҝз”ЁVue3пјү
иҷҪ然жңҖиҝ‘зҡ„дёҖдёӘеҸ‘еёғзүҲжң¬жҳҜ2018е№ҙпјҲжңҖиҝ‘еә”иҜҘдјҡеҸ‘еёғж–°зүҲжң¬пјүпјҢдҪҶжҳҜдёҖзӣҙжңүз»ҙжҠӨпјҢеҸҜд»ҘдҪҝз”ЁгҖӮ
е®үиЈ…
йҰ–е…ҲпјҢжҲ‘们用npmиҝӣиЎҢе®үиЈ…пјҡ
npm i prerender-spa-plugin
йңҖиҰҒжіЁж„ҸпјҢеӣ дёә
prerender-spa-pluginдјҡе®үиЈ…дёҖдёӘChromiumпјҢжүҖд»Ҙе®үиЈ…дјҡжҜ”иҫғд№…гҖӮ

еҪ“然пјҢиҝҷз§Қдҫқиө–пјҢеҸӘжңүеңЁжү“еҢ…ж—¶еҖҷжүҚдҪҝз”ЁгҖӮжүҖд»ҘпјҢжӣҙеҘҪзҡ„е®үиЈ…ж–№ејҸпјҢеә”иҜҘжҳҜпјҡ
npm i prerender-spa-plugin -D
зҺ°еңЁпјҢжҲ‘们е°ұжқҘйЎ№зӣ®еј•з”ЁпјҢдҪҝз”Ёж–№жі•еҫҲз®ҖеҚ•пјҢж–№дҫҝеңЁдёӨдёӘең°ж–№иҝҪеҠ пјҡ
App.vue
vue.config.js
App.vue
йҰ–е…ҲпјҢжҲ‘们еңЁApp.vueеҶ…иҝҪеҠ и§ҰеҸ‘еҷЁдәӢ件пјҡ
mounted() {
  document.dispatchEvent(new Event('render-event'))
}ж·»еҠ иҝҷдёӘи§ҰеҸ‘еҷЁпјҢжҳҜеҗҺз»ӯжү“еҢ…ж—¶еҖҷпјҢдјҡиҮӘеҠЁи§ҰеҸ‘пјҢ并е®ҢжҲҗжёІжҹ“гҖӮ
vue.config.js
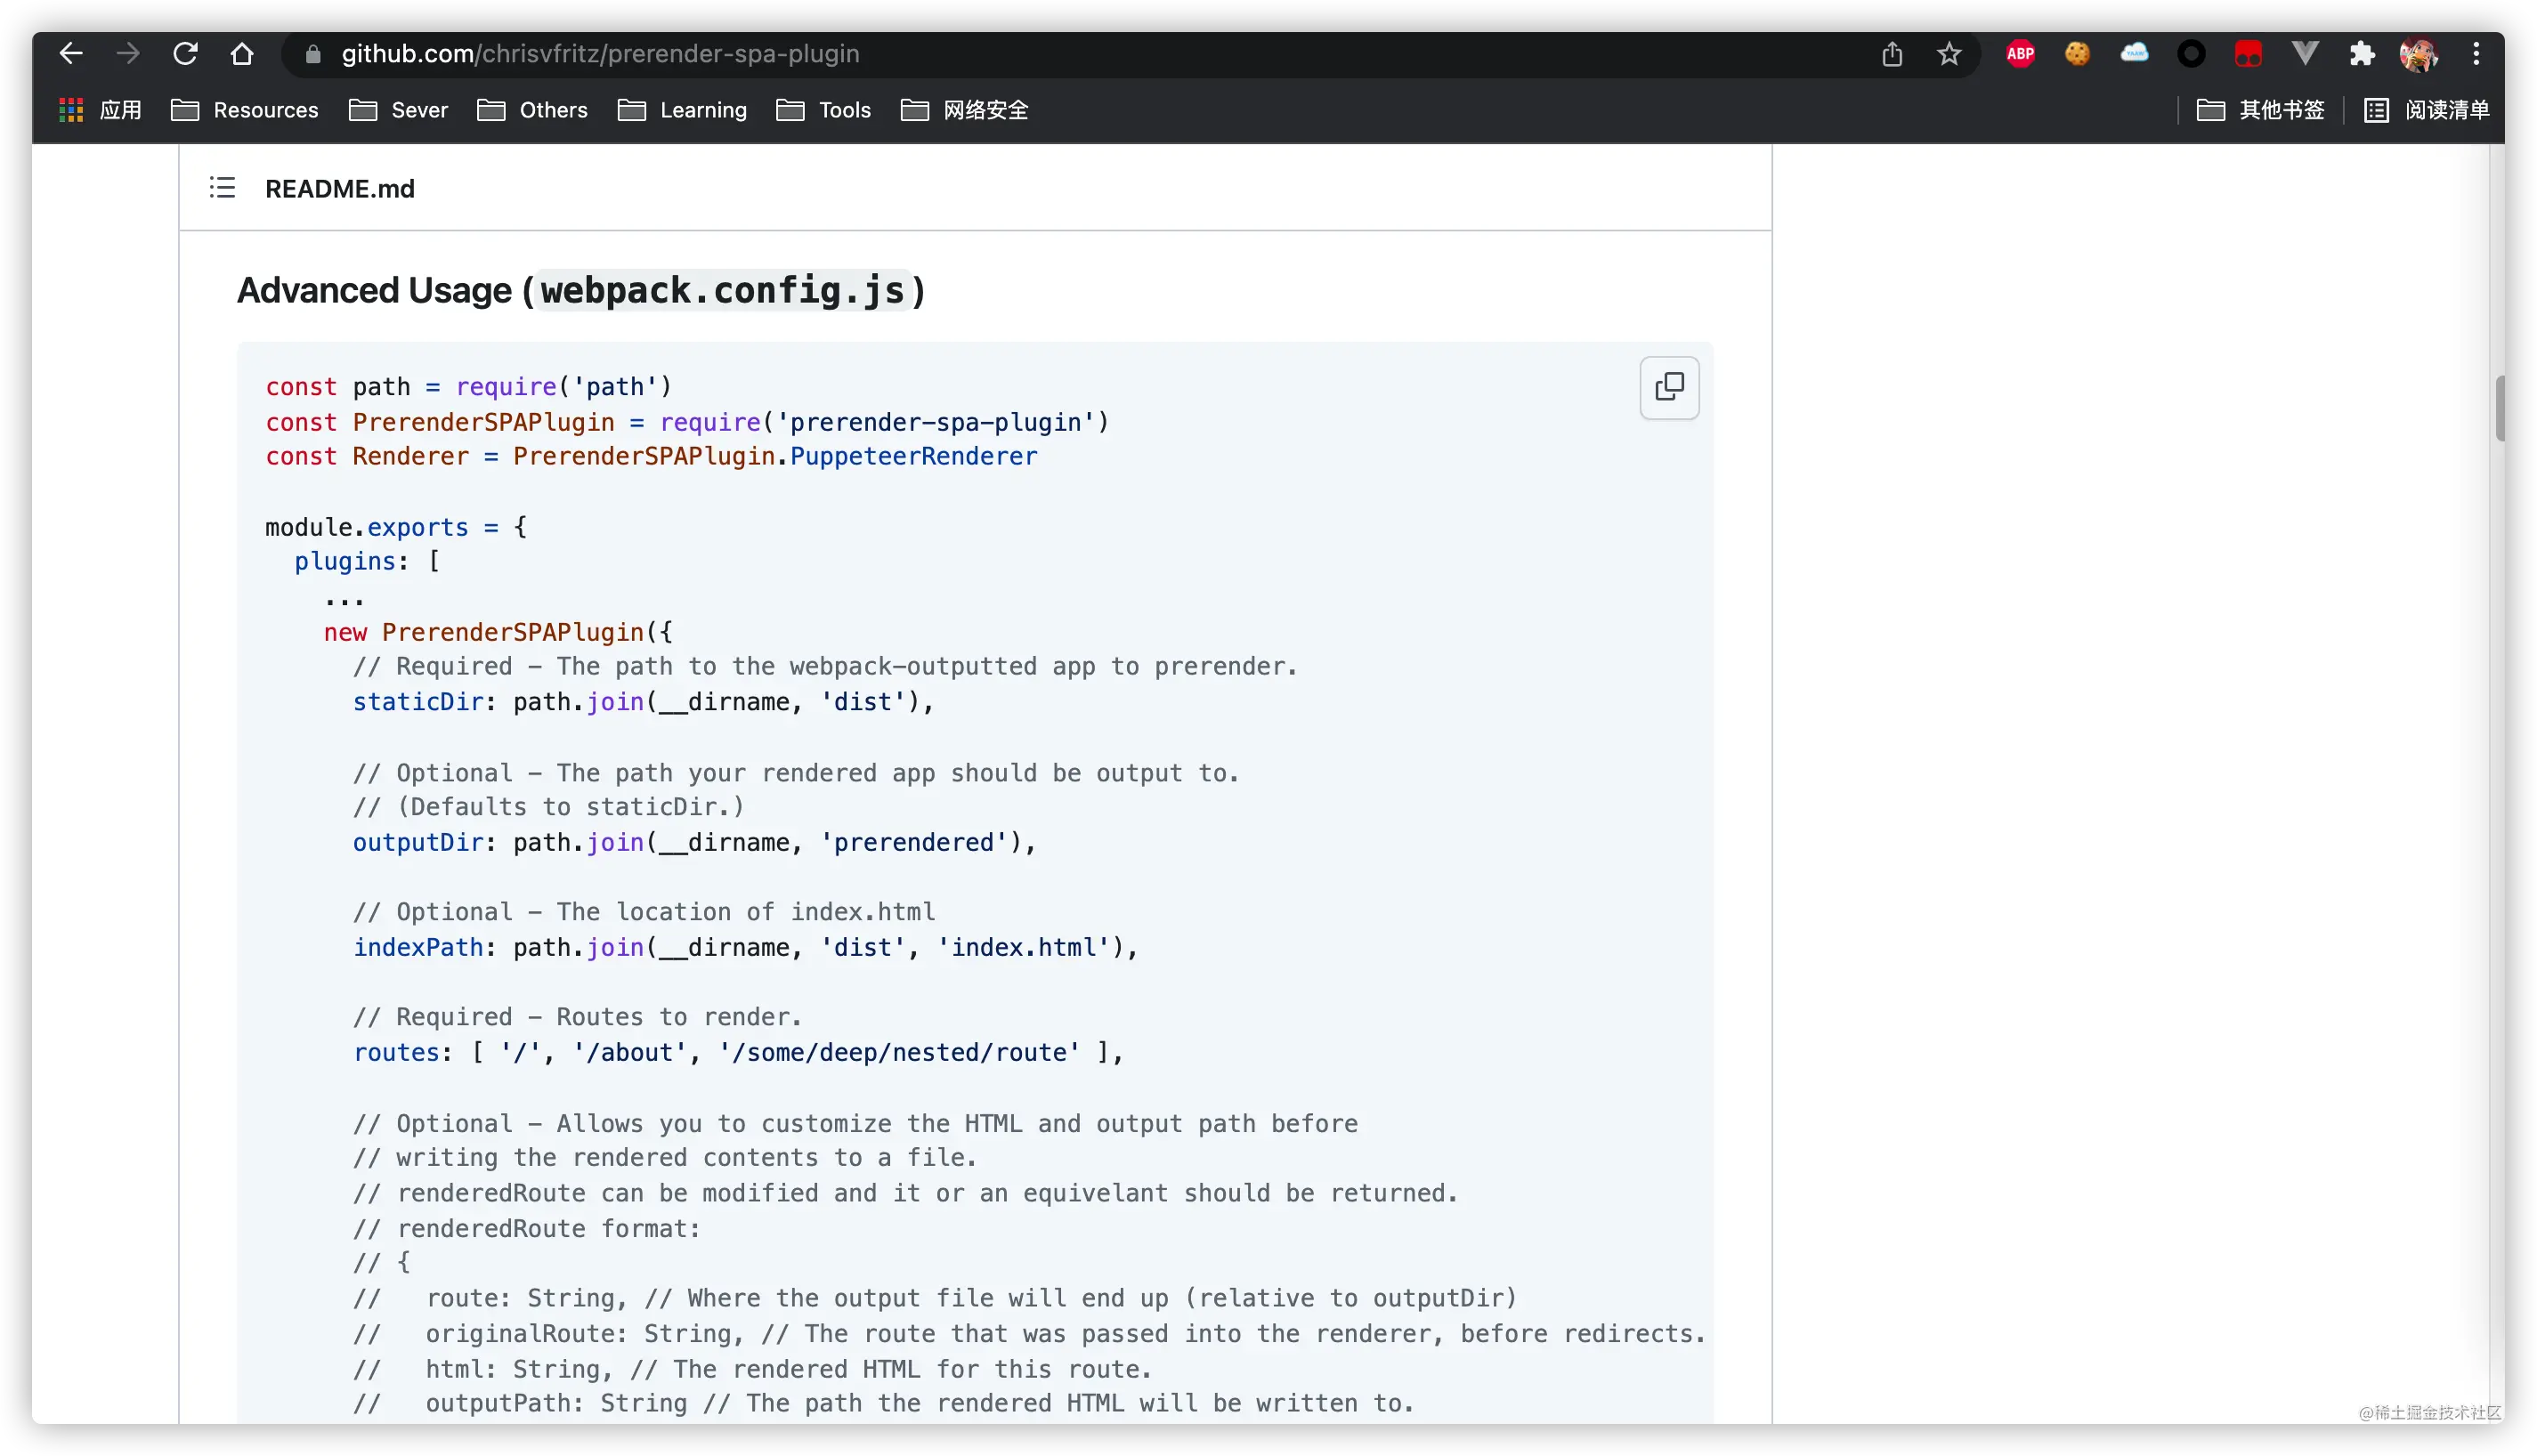
ж №жҚ®prerender-spa-pluginйЎ№зӣ®ж–ҮжЎЈпјҡ
const path = require('path')
const PrerenderSPAPlugin = require('prerender-spa-plugin')

module.exports = {
  plugins: [
    ...
    new PrerenderSPAPlugin({
      // Required - The path to the webpack-outputted app to prerender.
      staticDir: path.join(__dirname, 'dist'),
      // Required - Routes to render.
      routes: [ '/', '/about', '/some/deep/nested/route' ],
    })
  ]
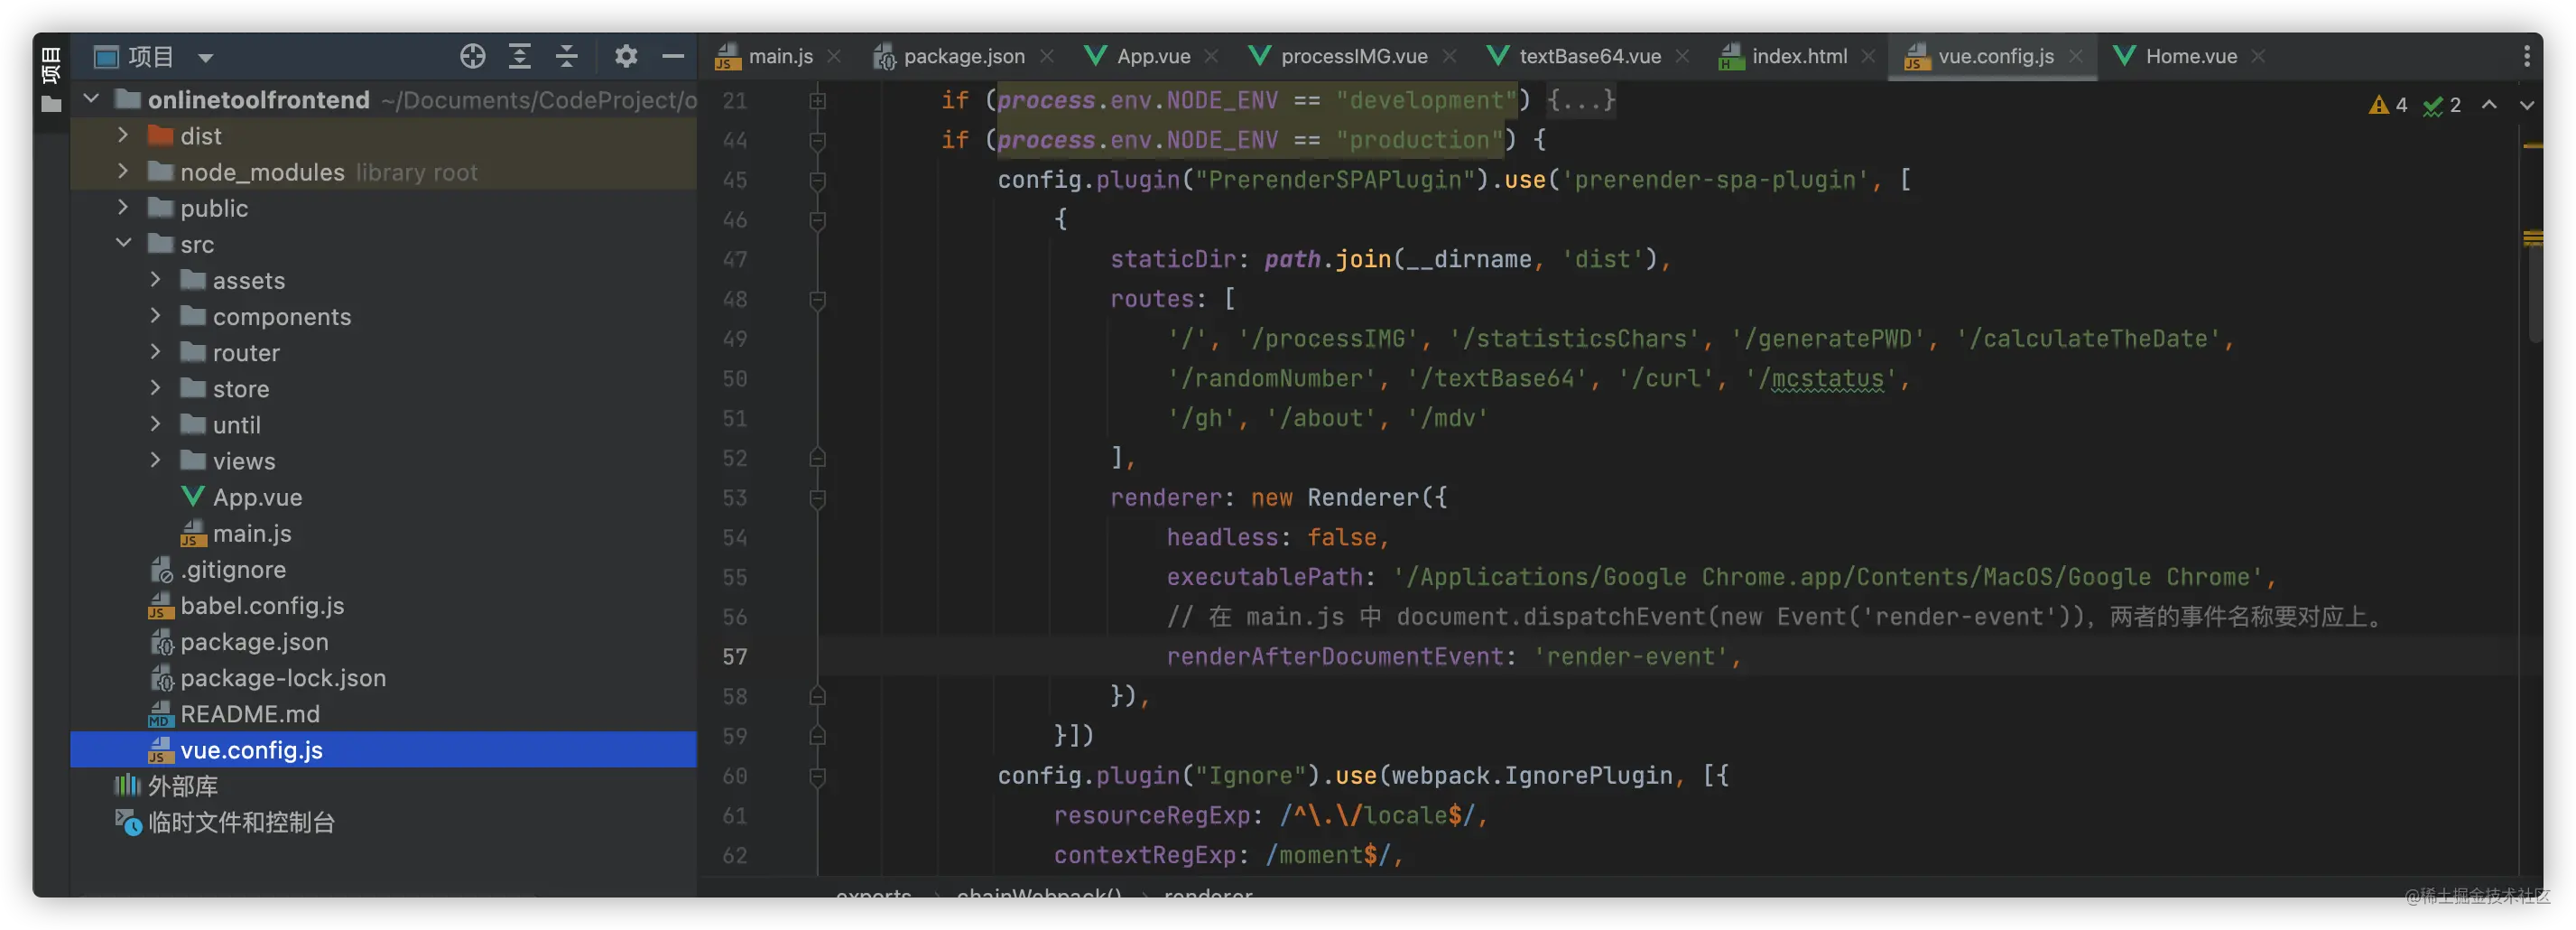
}еҗҢж—¶дёҖдәӣй«ҳзә§дҪҝз”ЁйңҖиҰҒеј•е…ҘPuppeteerRendererиҝӣиЎҢиҮӘе®ҡд№үгҖӮжүҖд»ҘпјҢжҲ‘иҮӘе·ұзҡ„vue.config.jsй…ҚзҪ®пјҡ
module.exports = {
вҖҰвҖҰ
chainWebpack: config => {
if (process.env.NODE_ENV == "development") {
вҖҰвҖҰ
}
if (process.env.NODE_ENV == "production") {
config.plugin("PrerenderSPAPlugin").use('prerender-spa-plugin', [
{
staticDir: path.join(__dirname, 'dist'),
routes: [
'/', '/processIMG', '/statisticsChars', '/generatePWD', '/calculateTheDate',
'/randomNumber', '/textBase64', '/curl', '/mcstatus',
'/gh', '/about', '/mdv'
],
renderer: new PuppeteerRenderer({
headless: false,
executablePath: '/Applications/Google Chrome.app/Contents/MacOS/Google Chrome',
// еҜ№еә”App.vue
renderAfterDocumentEvent: 'render-event',
}),
}])
])
}
}жҲ‘дҪҝз”Ёзҡ„жҳҜй“ҫејҸеҮҪж•°гҖӮиҝҷж ·зҡ„еҘҪеӨ„пјҢжҳҜж–№дҫҝжҲ‘иҝӣиЎҢif-elseзӯүеҮҪж•°ејҸеҲӨж–ӯгҖӮ
е…¶дёӯпјҢrendererеұһжҖ§пјҡ
headlessпјҡиҝҷдёӘе°ұжҳҜChromeзҡ„headlessеұһжҖ§пјҢеёёз”ЁдәҺDebugгҖӮжӣҙеӨҡеҸҜд»ҘеҸӮиҖғпјҡGoogle Chrome
executablePathпјҡйҮҚе®ҡеҗ‘жөҸи§ҲеҷЁең°еқҖпјӣжҲ‘иҝҷйҮҢйҮҚе®ҡеҗ‘дҪҝз”ЁжҲ‘з”өи„‘иҮӘеёҰзҡ„ChromeжөҸи§ҲеҷЁдәҶгҖӮпјҲеҸҜйҖүпјҢеҸҜд»ҘзӣҙжҺҘдёҚеҠ пјҢй»ҳи®Өи°ғз”ЁChromiumпјү
renderAfterDocumentEventпјҡйңҖиҰҒеҗҢApp.vueдёӯ document.dispatchEvent(new Event('render-event'))зҡ„дәӢ件еҗҚз§°иҰҒеҜ№еә”дёҠгҖӮ
иҖҢroutesж•°з»„пјҢйҮҢйқўе°ұжҳҜйңҖиҰҒйў„жёІжҹ“зҡ„и·Ҝз”ұең°еқҖгҖӮ

еҪ“然пјҢжӣҙеӨҡзҡ„еҸҜйҖүеҸӮж•°пјҢдҪ д№ҹеҸҜд»ҘеҸӮиҖғе®ҳж–№зҡ„ж–ҮжЎЈпјҡ

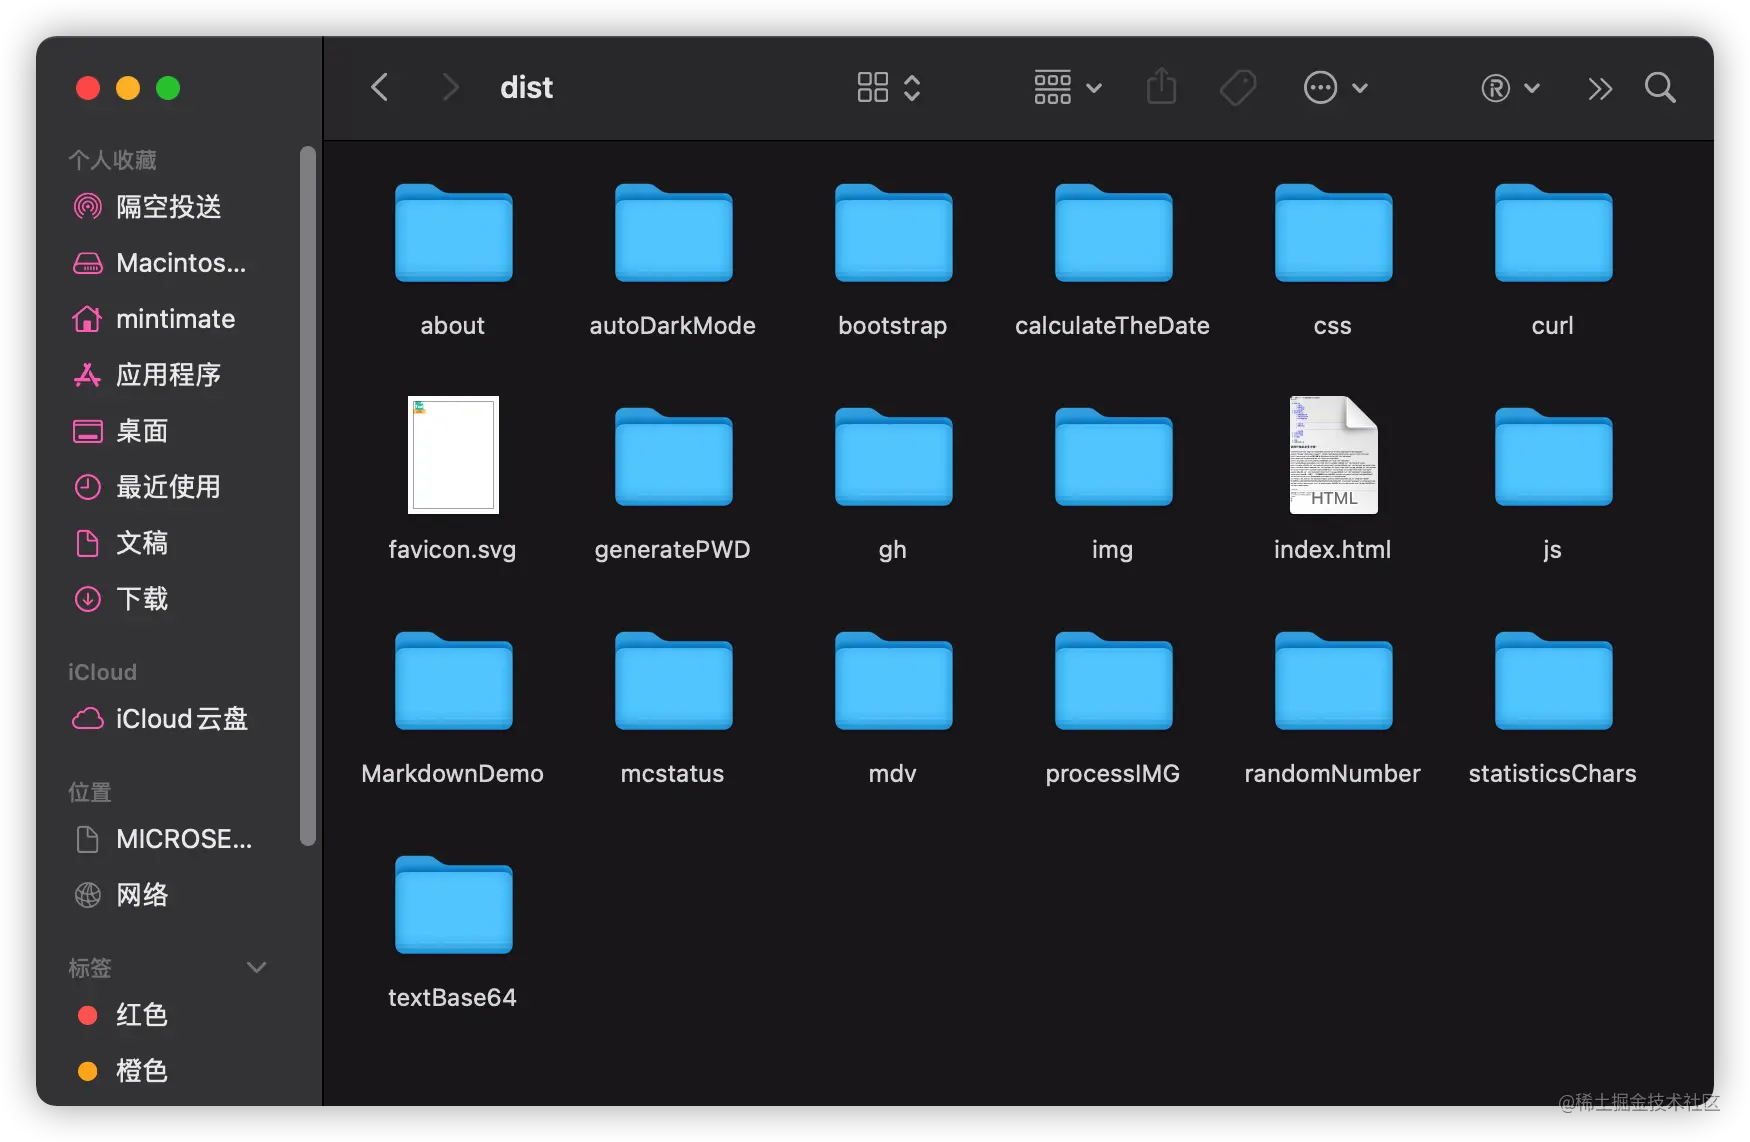
staticDirйңҖиҰҒжҢҮеҗ‘зј–иҜ‘еҗҺзҡ„иҫ“еҮәж–Ү件еӨ№гҖӮ
д№ӢеҗҺпјҢжҲ‘们е°ұеҸҜд»Ҙжү“еҢ…йЎ№зӣ®дәҶпјҡ
npm run build
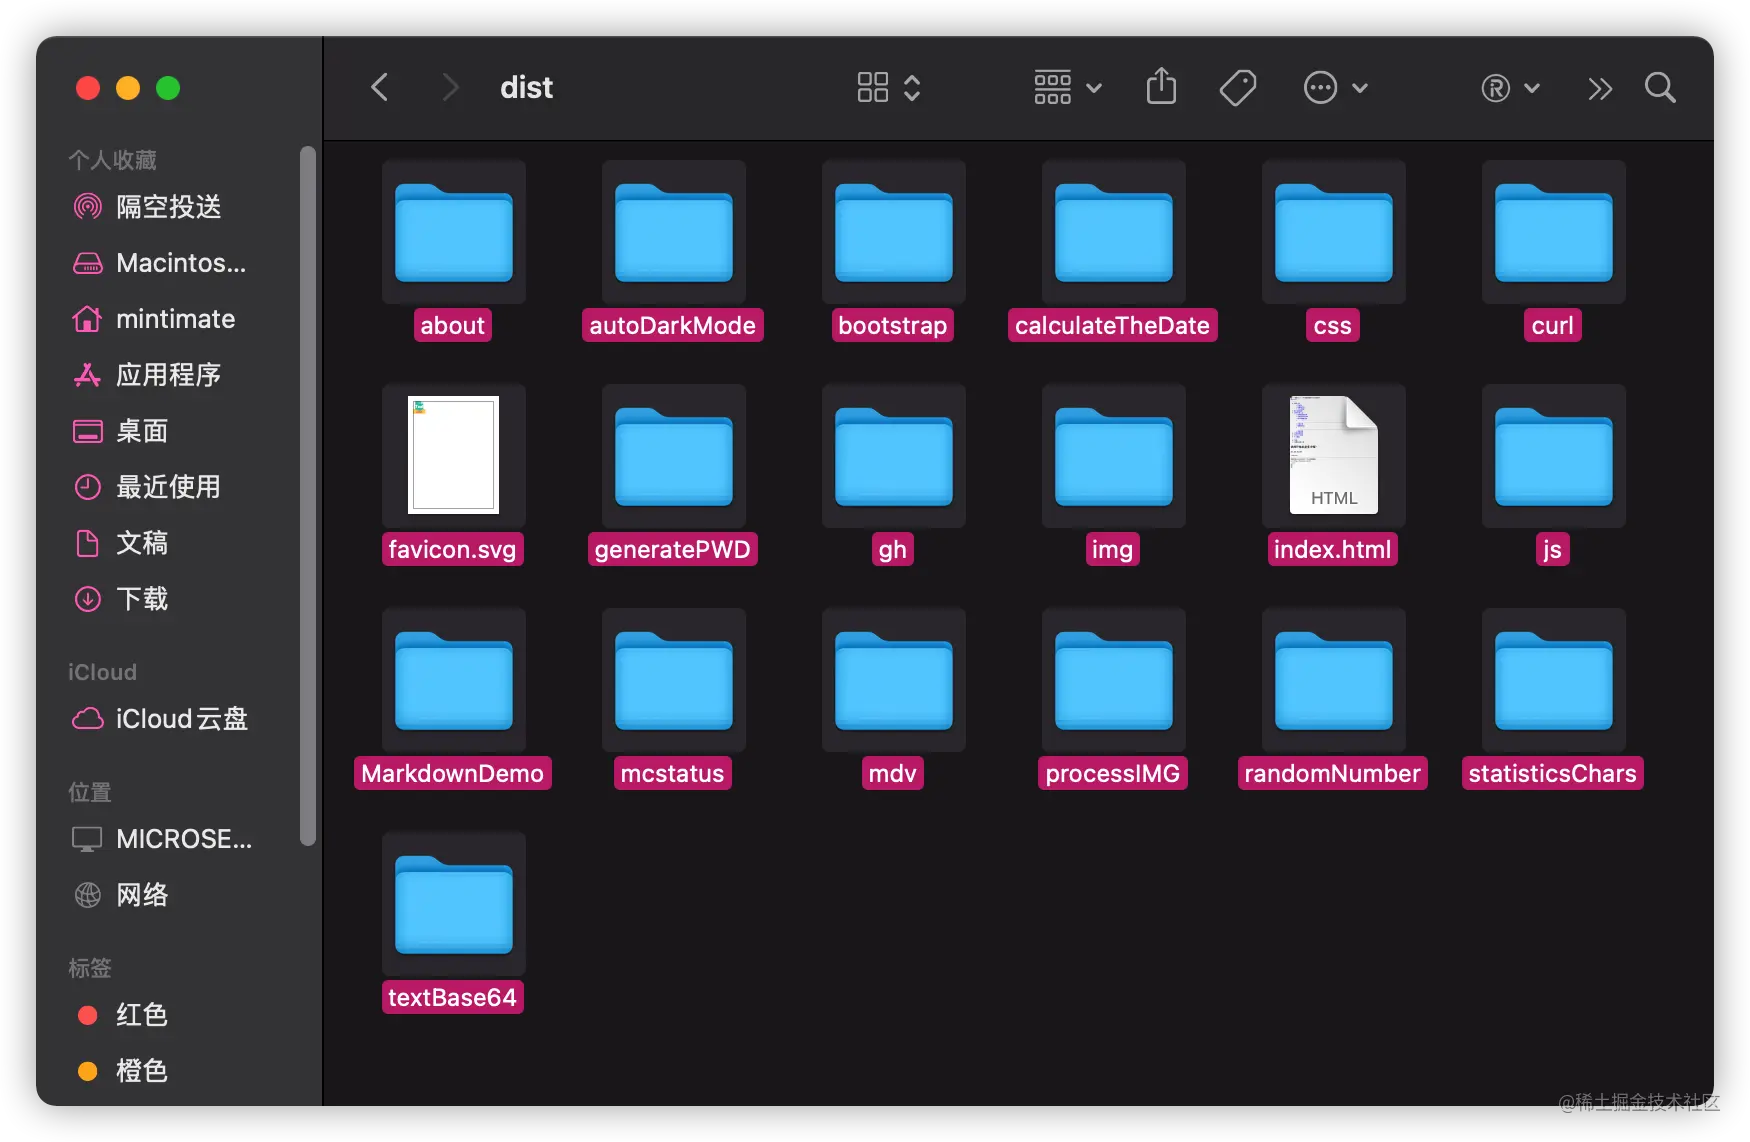
жү“еҢ…еҗҺзҡ„ж•Ҳжһңпјҡ

зңӢзңӢйў„жёІжҹ“зҡ„йЎөйқўпјҡ

еӣ дёәжҲ‘жңүдҪҝз”ЁVue-metaзҡ„组件пјҢжүҖд»Ҙйў„жёІжҹ“зҡ„ж–Ү件д№ҹе°ұжңүmetaеұһжҖ§дәҶгҖӮ
еҰӮжһңдҪ д№ҹжғіз”ЁVue-meta组件й…ҚеҗҲ
prerender-spa-pluginпјҢеҸҜд»ҘеҸӮиҖғж–Үз« пјҡhttps://juejin.cn/post/7056972997894094861
йңҖиҰҒжіЁж„ҸпјҢеҰӮжһңеҮәзҺ°д»Җд№Ҳй”ҷиҜҜпјҢеҸҜд»Ҙе°қиҜ•пјҡ
# еҲ йҷӨйЎ№зӣ®node_modules rm -rf node_modules # йҮҚж–°е®үиЈ… npm install
иҝҷж ·зҡ„ж–Ү件пјҢе°ұеҸҜд»ҘиҝӣиЎҢйғЁзҪІдәҶгҖӮ
жҲ‘们дҪҝз”ЁNginxиҝӣиЎҢйғЁзҪІпјҢдёҠж¬ЎеҲ°Nginx Webж–Ү件еӨ№еҶ…пјҢдҝ®ж”№configж–Ү件пјҢе°ұдёҚйңҖиҰҒпјҡ
location / {
  try_files $uri $uri/ /index.html;
}жқҘе®һзҺ°еҶ…йғЁйҮҚе®ҡеҗ‘дәҶгҖӮеӣ дёәжңүзңҹе®һзҡ„зӣ®еҪ•пјҢеҸҜд»ҘеҺ»жҺүгҖӮ
дҪҶжҳҜпјҢж•°жҚ®д»ЈзҗҶпјҢжңҖеҘҪдҪҝз”ЁNginxжқҘе®һзҺ°гҖӮжҜ”еҰӮпјҢејҖеҸ‘зҺҜеўғпјҢж•°жҚ®д»ЈзҗҶпјҡ
config.devServer.proxy({
        '/dataApiJava': {
            target: JavaBaseURL,
            pathRewrite: {'^/dataApiJava': ""},
            ws: true,
            changeOrigin: true
        },
        '/dataApiPython': {
            target: PythonBaseURL,
            pathRewrite: {'^/dataApiPython': ""},
            ws: true,
            changeOrigin: true
        },
        '/ghs': {
            target: GithubSpeedURL,
            pathRewrite: {'^/ghs': ""},
            ws: true,
            changeOrigin: true
        }
    }
)еҜ№еә”зҡ„Nginxй…ҚзҪ®пјҢеҸҜд»Ҙиҝҷж ·еҶҷпјҡ
location /dataApiPython/{
proxy_pass http://127.0.0.1:8099/;
proxy_set_header Host $host;
proxy_set_header X-Real-IP $remote_addr;
proxy_set_header X-Forwarded-For $proxy_add_x_forwarded_for;
proxy_set_header REMOTE-HOST $remote_addr;
add_header X-Cache $upstream_cache_status;
}
location /dataApiJava/ {
proxy_ssl_server_name on;
proxy_pass https://вҖҰвҖҰ.cn/;
}
location /ghs/ {
proxy_ssl_server_name on;
proxy_pass https://вҖҰвҖҰ/gh/;
}з»ҷеӨ§е®¶еұ•зӨәдёүз§Қй…ҚзҪ®пјҢжҢүйңҖи®ҫзҪ®е“ҰгҖӮ
ж„ҹи°ўдҪ иғҪеӨҹи®Өзңҹйҳ…иҜ»е®ҢиҝҷзҜҮж–Үз« пјҢеёҢжңӣе°Ҹзј–еҲҶдә«зҡ„вҖңVueдёӯеҰӮдҪ•иҝӣиЎҢзҪ‘йЎөйў„жёІжҹ“вҖқиҝҷзҜҮж–Үз« еҜ№еӨ§е®¶жңүеё®еҠ©пјҢеҗҢж—¶д№ҹеёҢжңӣеӨ§е®¶еӨҡеӨҡж”ҜжҢҒдәҝйҖҹдә‘пјҢе…іжіЁдәҝйҖҹдә‘иЎҢдёҡиө„и®Ҝйў‘йҒ“пјҢжӣҙеӨҡзӣёе…ізҹҘиҜҶзӯүзқҖдҪ жқҘеӯҰд№ !
е…ҚиҙЈеЈ°жҳҺпјҡжң¬з«ҷеҸ‘еёғзҡ„еҶ…е®№пјҲеӣҫзүҮгҖҒи§Ҷйў‘е’Ңж–Үеӯ—пјүд»ҘеҺҹеҲӣгҖҒиҪ¬иҪҪе’ҢеҲҶдә«дёәдё»пјҢж–Үз« и§ӮзӮ№дёҚд»ЈиЎЁжң¬зҪ‘з«ҷз«ӢеңәпјҢеҰӮжһңж¶үеҸҠдҫөжқғиҜ·иҒ”зі»з«ҷй•ҝйӮ®з®ұпјҡis@yisu.comиҝӣиЎҢдёҫжҠҘпјҢ并жҸҗдҫӣзӣёе…іиҜҒжҚ®пјҢдёҖз»ҸжҹҘе®һпјҢе°Ҷз«ӢеҲ»еҲ йҷӨж¶үе«ҢдҫөжқғеҶ…е®№гҖӮ