这篇文章主要讲解了“Spring Boot集成Swagger2怎么构建API文档”,文中的讲解内容简单清晰,易于学习与理解,下面请大家跟着小编的思路慢慢深入,一起来研究和学习“Spring Boot集成Swagger2怎么构建API文档”吧!
Swagger 是一种接口描述语言,主要用于生成、描述、调用以及可视化 RESTful 风格的 Web 服务接口文档。以前的项目可能更多的是前后端未分开同时进行开发,所以接口文档可能不是那么重要。但现在主流的项目基本都是前后端分离,如果前后端没有沟通好,就有可能导致接口文档更新不及时,造成一些不必要的麻烦。而通俗地讲,Swagger 就是帮我们写接口文档的。它不仅能自动生成实时接口文档,还能生成测试用例,方便我们进行测试。
Swagger 主要提供了如下几种开源工具:
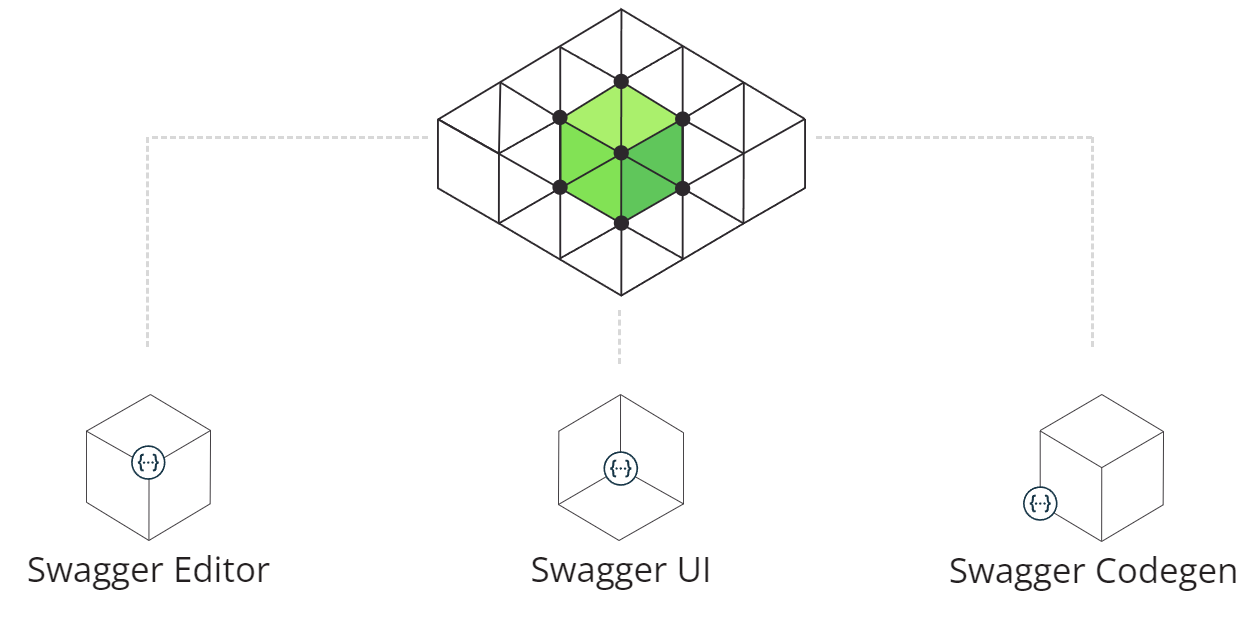
Swagger 所提供的的编辑器,主要用于编辑 Swagger 描述文件,支持实时预览描述文件更新后的效果,类似于我们的 Markdown 编辑器,左边编写源码,右边就可以进行实时预览。该编辑器不仅提供在线使用,还支持本地部署。
提供可视化的 UI 页面,用于展示 Swagger 的描述文件。接口的调用方、测试等都可以通过该页面查阅接口的相关信息,并且进行简单的接口请求测试。
通过使用该工具,可以将 Swagger 的描述文件生成 HTML 和 CWIKI 形式的接口文档,而且还能生成针对多种不同语言的服务端和客户端的代码。
平时和我们打交道最多的,可能就是 Swagger UI 这个工具了,它主要用于显示接口文档。根据我们代码中按照 Swagger 规范所设置的描述,自动生成接口说明文档。一个简单的示例如下:

通过以上对 Swagger 简单的介绍之后,我们来看看如何在 Spring Boot 项目中使用 Swagger。
首先需要创建一个简单的 Spring Boot 项目,如果你还不知道如何创建,
创建好之后的项目接口如下:
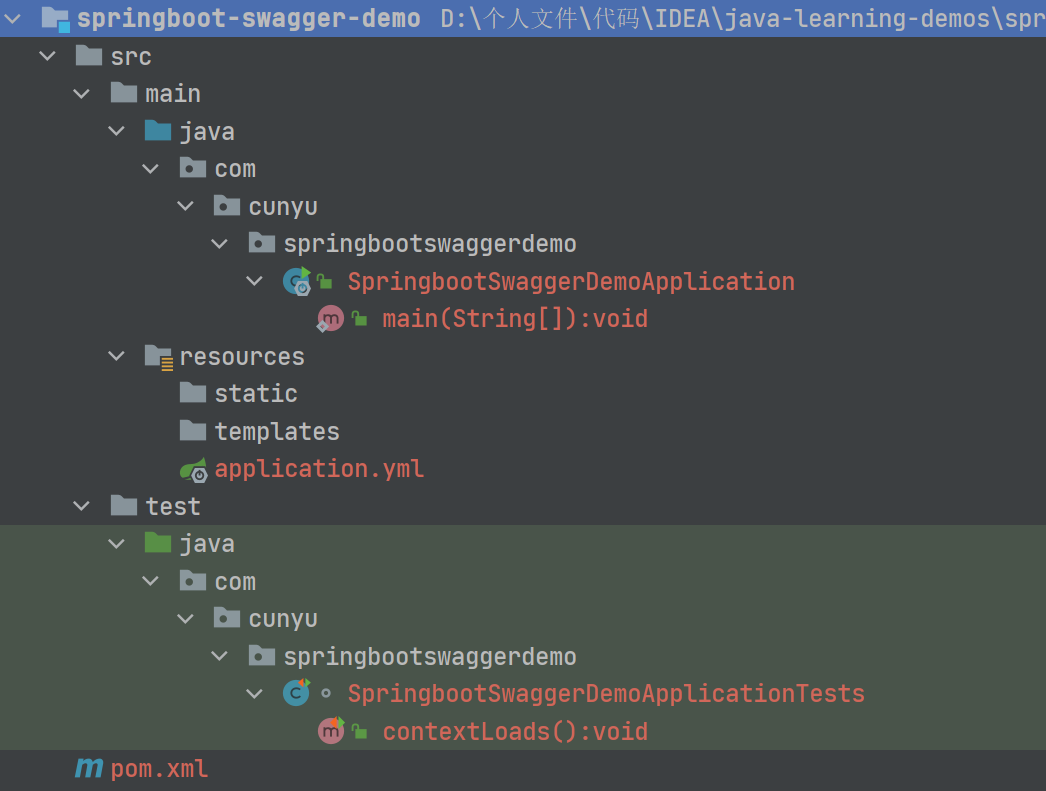
创建好Spring Boot 项目之后,需要配置项目 pom.xml 文件,在其中引入 Swagger 的相关依赖。
<dependency>
    <groupId>io.springfox</groupId>
    <artifactId>springfox-swagger2</artifactId>
    <version>2.9.2</version>
</dependency>

<dependency>
    <groupId>io.springfox</groupId>
    <artifactId>springfox-swagger-ui</artifactId>
    <version>2.9.2</version>
</dependency>引入依赖后,接下来就是构建 Swagger 的配置类了。
package com.cunyu.springbootswaggerdemo.config;

import org.springframework.context.annotation.Bean;
import org.springframework.context.annotation.Configuration;
import springfox.documentation.builders.RequestHandlerSelectors;
import springfox.documentation.service.ApiInfo;
import springfox.documentation.service.Contact;
import springfox.documentation.spi.DocumentationType;
import springfox.documentation.spring.web.plugins.Docket;
import springfox.documentation.swagger2.annotations.EnableSwagger2;

import java.util.ArrayList;

/**
 * Created with IntelliJ IDEA.
 *
 * @author : 村雨遥
 * @version : 1.0
 * @project : springboot-swagger-demo
 * @package : com.cunyu.springbootswaggerdemo.config
 * @className : Swagger2Configuration
 * @createTime : 2022/1/5 22:21
 * @email : 747731461@qq.com
 * @微信 : cunyu1024
 * @公众号 : 村雨遥
 * @网站 : https://cunyu1943.github.io
 * @description :
 */
@Configuration
@EnableSwagger2
public class Swagger2Configuration {

    /**
     * 配置 Swagger 2
     * 注册一个 Bean 属性
     * enable():是否启用 Swagger,启用后才能在浏览器中进行访问
     * groupName():用于配置 API 文档的分组
     */
    @Bean
    public Docket docket() {
        return new Docket(DocumentationType.SWAGGER_2)
                .apiInfo(apiInfo())
                .enable(true)
                .groupName("v1")
                .select()
                // 过滤路径
                //.paths(PathSelectors.ant())
                // 指定扫描的包
                .apis(RequestHandlerSelectors.basePackage("com.cunyu.springbootswaggerdemo.controller"))
                .build();
    }

    private ApiInfo apiInfo() {
        /*作者信息*/
        Contact contact = new Contact("村雨遥", "https://cunyu1943.github.io", "747731461@qq.com");
        return new ApiInfo(
                "Swagger 测试接口文档",
                "Spring Boot 集成 Swagger 测试接口文档",
                "v1.0",
                "https://cunyu1943.github.io",
                contact,
                "Apache 2.0",
                "http://www.apache.org/licenses/LICENSE-2.0",
                new ArrayList()
        );
    }
}配置好 Swagger 后,在我们的项目中添加一个简单的接口,这里以一个简单的有参和无参接口为例。
package com.cunyu.springbootswaggerdemo.controller;

import io.swagger.annotations.Api;
import io.swagger.annotations.ApiOperation;
import io.swagger.annotations.ApiParam;
import org.springframework.web.bind.annotation.GetMapping;
import org.springframework.web.bind.annotation.PostMapping;
import org.springframework.web.bind.annotation.RestController;

/**
 * Created with IntelliJ IDEA.
 *
 * @author : 村雨遥
 * @version : 1.0
 * @project : springboot-swagger-demo
 * @package : com.cunyu.springbootswaggerdemo.controller
 * @className : SwaggerDemoController
 * @createTime : 2022/1/5 22:21
 * @email : 747731461@qq.com
 * @微信 : cunyu1024
 * @公众号 : 村雨遥
 * @网站 : https://cunyu1943.github.io
 * @description :
 */

@Api
@RestController
public class SwaggerDemoController {
    @ApiOperation(value = "hello world 接口")
    @GetMapping("hello")
    public String hello() {
        return "hello world";
    }

    @ApiOperation(value = "有参接口")
    @PostMapping("demo")
    public String demo(@ApiParam(name = "name", value = "村雨遥", required = true) String name) {
        return "hello," + name;
    }
}完成上述步骤后,我们启动项目,然后在浏览器中访问如下地址,就可以访问我们项目的接口文档了。
http://localhost:8080/swagger-ui.html
访问如上地址后,如果出现下面的界面,说明我们 Spring Boot 集成 Swagger2 就到此成功了。

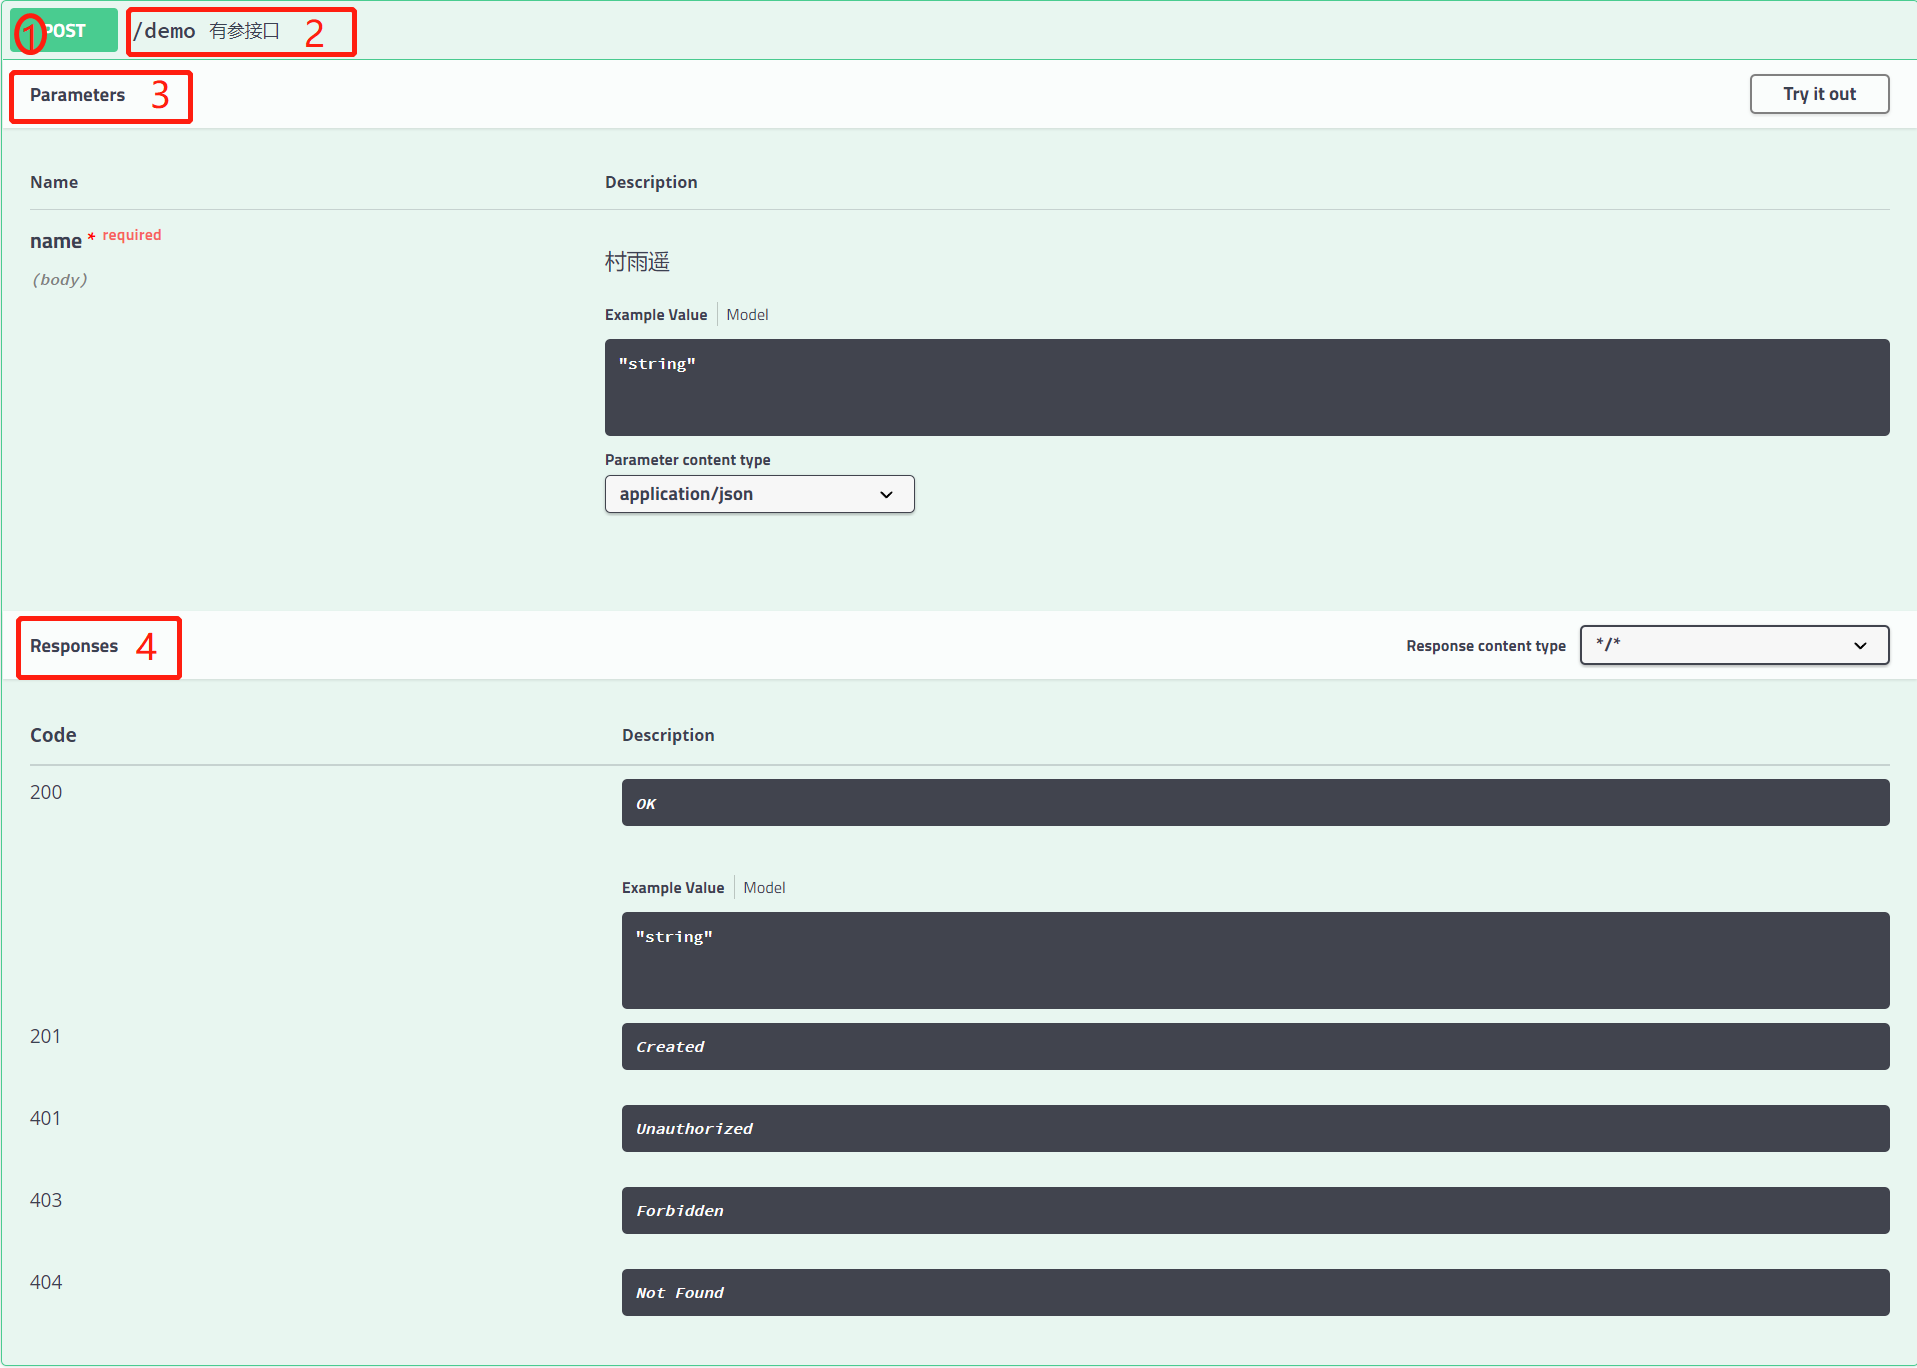
点开具体的接口,就会有这个接口的一些详细信息,如下图所示,一般包括:
接口请求方式
接口请求路径及描述
接口请求参数
接口响应
如果我们要进行简单的测试,则点击上图中右上方的 Try it out,然后我们就可以编辑请求参数的值,编辑完成之后点击下方的 Execute 即可查看接口返回值。
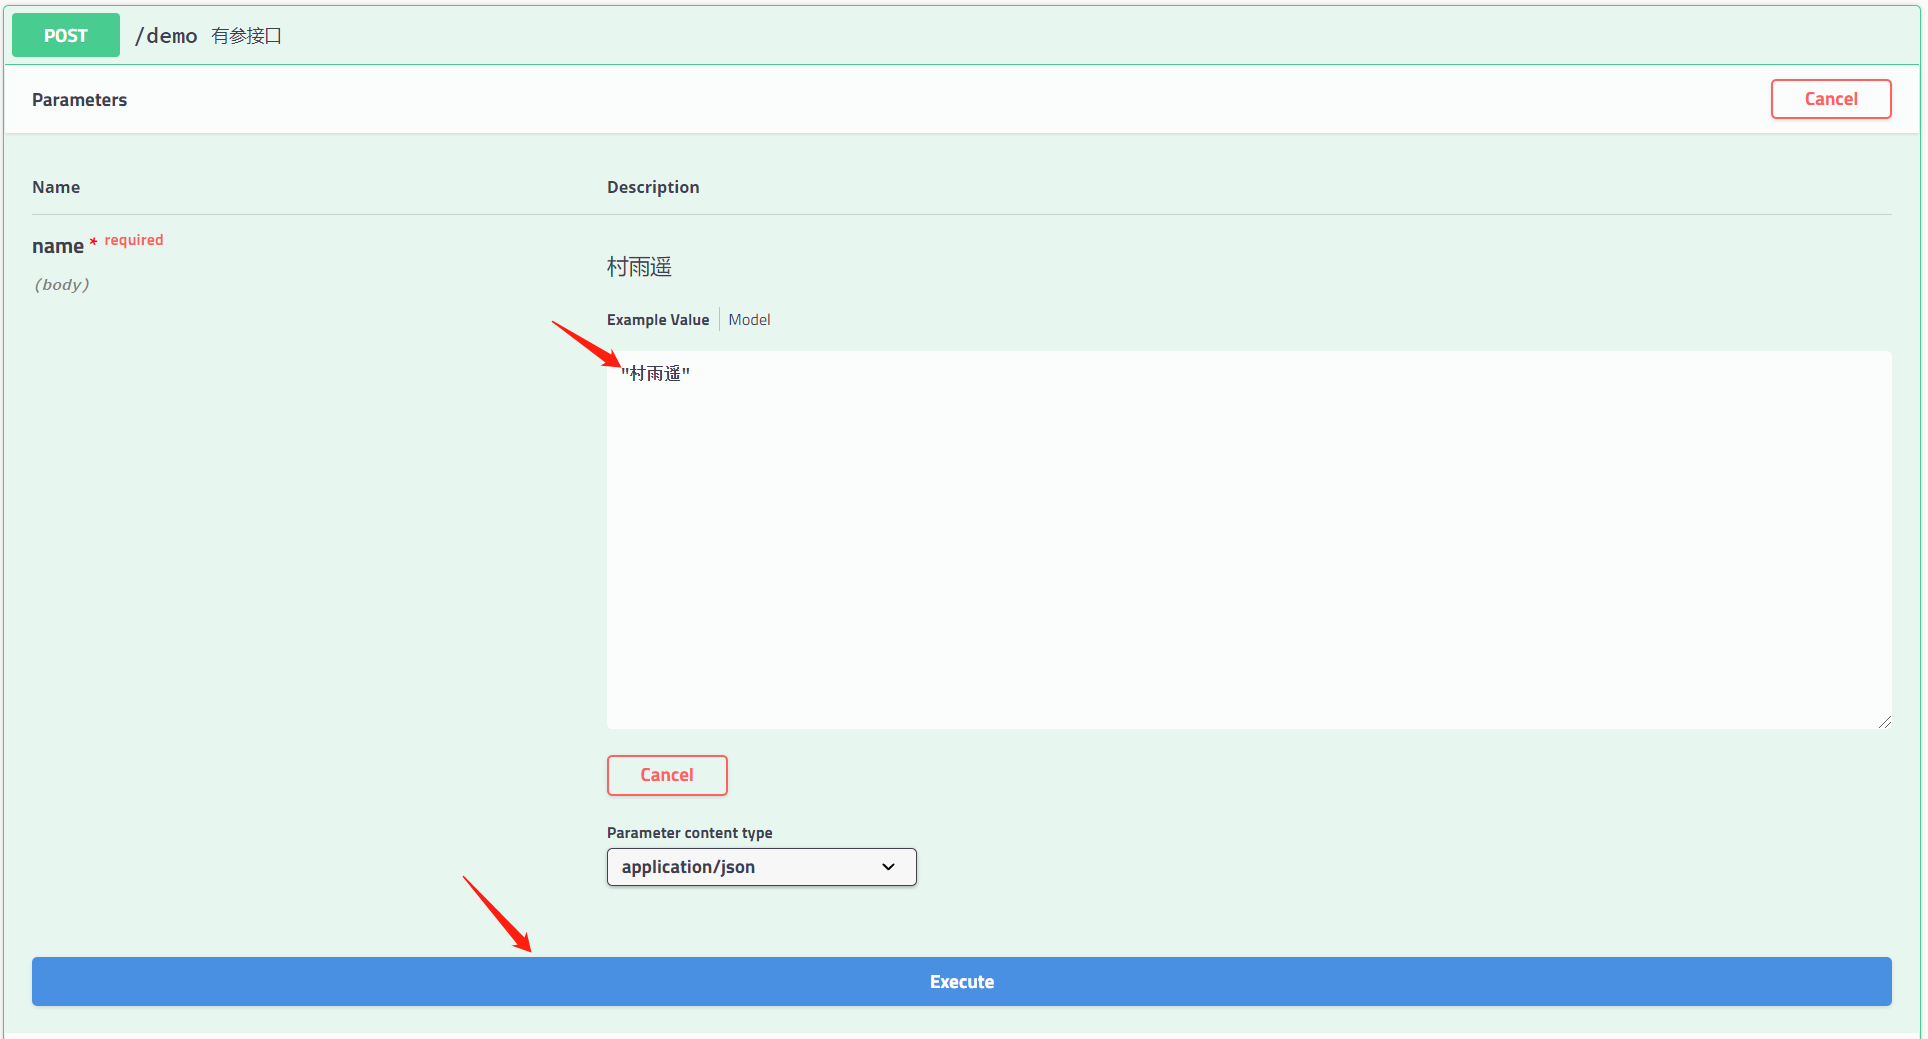
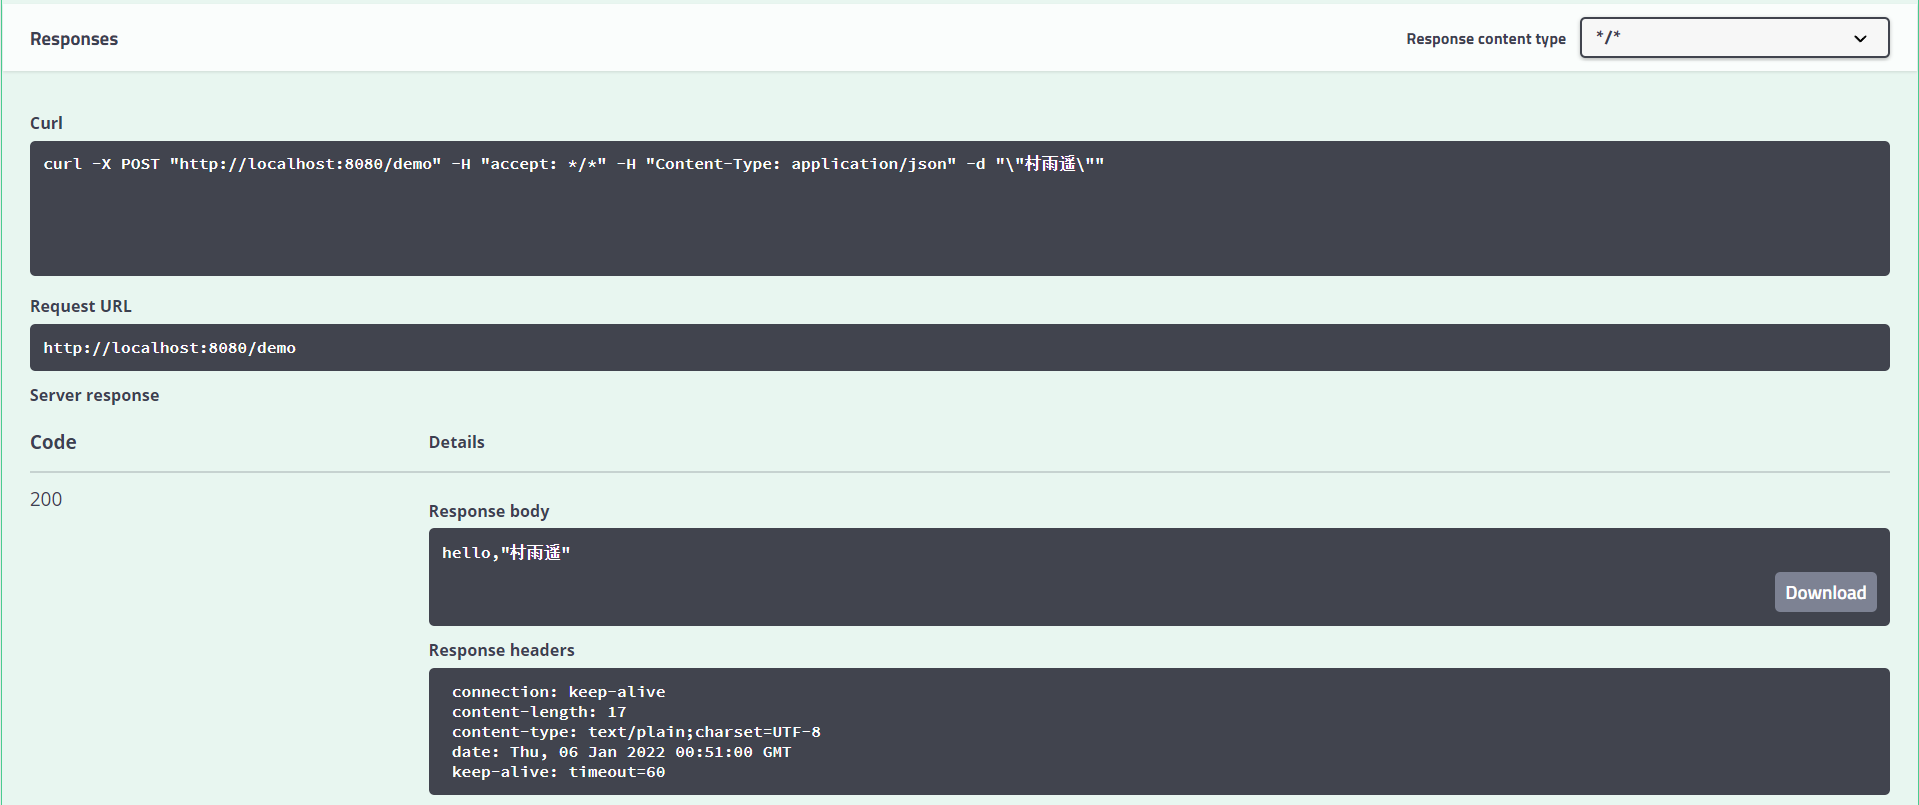
以我给的接口为例,我传入了一个参数 name,然后执行 demo 接口,最后会给我返回 hello,name 的结果,其中 name 是我传入的参数值,这里我传入了村雨遥,所以结果应该会得到 hello,村雨遥,可以看到 Swagger 测试中也给我返回了对应的结果,说明我们的接口测试成功!
注意:
如果在整合过程中出现如下错误:org.springframework.context.ApplicationContextException:Failed to start bean 'documentationPluginsBootstrapper'; nested exception is java.lang.NullPointerException
这里可能是由于 Spring Boot 版本过高导致,我写作本文时,一开始使用的 SpringBoot 2.6.2 版本,所以出现了该错误,而当我将 SpringBoot 降级为 2.5.6 时,该错误就不再出现。所以如果你也出现了这个问题,也可以尝试降低 SpringBoot 版本来解决。
感谢各位的阅读,以上就是“Spring Boot集成Swagger2怎么构建API文档”的内容了,经过本文的学习后,相信大家对Spring Boot集成Swagger2怎么构建API文档这一问题有了更深刻的体会,具体使用情况还需要大家实践验证。这里是亿速云,小编将为大家推送更多相关知识点的文章,欢迎关注!
亿速云「云服务器」,即开即用、新一代英特尔至强铂金CPU、三副本存储NVMe SSD云盘,价格低至29元/月。点击查看>>
免责声明:本站发布的内容(图片、视频和文字)以原创、转载和分享为主,文章观点不代表本网站立场,如果涉及侵权请联系站长邮箱:is@yisu.com进行举报,并提供相关证据,一经查实,将立刻删除涉嫌侵权内容。