这篇文章主要介绍“vue中的可拖拽宽度div怎么实现”,在日常操作中,相信很多人在vue中的可拖拽宽度div怎么实现问题上存在疑惑,小编查阅了各式资料,整理出简单好用的操作方法,希望对大家解答”vue中的可拖拽宽度div怎么实现”的疑惑有所帮助!接下来,请跟着小编一起来学习吧!
主要思路
在需要拖拽宽度的区域设置一个div,高度设为 100%,宽度尽量窄一些(也不要太窄,3~6px左右)
在此div上绑定当“鼠标按下”时,触发document绑定“鼠标移动”方法和"鼠标抬起"方法
通过鼠标移动方法不断获取当前鼠标位置,设置需要变化大小div的宽高。
鼠标抬起时取消鼠标移动方法和鼠标抬起方法的绑定。
<template>
  <div class="container" id="content_box">
    <div class="tab">左侧Tab</div>
    <div class="menu" ref="menu">
      左侧菜单
      <div class="menu-resize" ref="menuResize"></div>
    </div>
    <div class="content">
      中心区域
      <div class="opera" ref="opera">
        <div class="opera-resize" ref="operaResize"></div>
        操作区域
      </div>
    </div>
  </div>
</template>

<script>
export default {
  name: "dropWidth",
  mounted() {
    this.$nextTick(() => {
      this.dropSize();
    })
  },
  methods: {
    dropSize() {
      let that = this,
          menuWidth = 200,
          operaHeight = 200;
      this.$refs.menuResize.onmousedown = function () {
        document.onmousemove = function (e) {
          let clientX = e.clientX;
          // 最大宽度
          if(clientX>=330){
            clientX = 330;
          }
          // 最小宽度
          if(clientX<=230){
            clientX = 230;
          }
          // TODO 这里减的是最左侧tab的宽度
          menuWidth = clientX - 30;
          that.$refs.menu.style.width = clientX - 30 +"px";
        }

        document.onmouseup = function () {
          console.log('当前宽度', menuWidth);
          document.onmousemove = null;
          document.onmouseup = null;
          that.releaseCapture && that.releaseCapture()
        }
      }

      this.$refs.operaResize.onmousedown = function () {
        document.onmousemove = function (e) {
          let clientY = e.clientY;
          console.log(clientY)
          // 最大宽度
          if(clientY<=100){
            clientY = 100;
          }
          // 最小宽度
          if(clientY>=300){
            clientY = 300;
          }
          operaHeight = clientY;
          // TODO 这里需要取反向
          that.$refs.opera.style.height = 400 - clientY +"px";
        }

        document.onmouseup = function () {
          console.log('当前宽度', operaHeight);
          document.onmousemove = null;
          document.onmouseup = null;
          that.releaseCapture && that.releaseCapture()
        }
      }
    }
  }
}
</script>

<style scoped>
.container {
  width: 1000px;
  height: 400px;
  border: 2px solid #dddddd;

  display: flex;
  justify-content: center;
}

.tab {
  width: 30px;
  height: 100%;
  background-color: #EC8C32;

  flex-shrink: 0;
  flex-grow: 0;
}

.menu {
  width: 200px;
  background-color: #AAB6E0;

  flex-shrink: 0;
  flex-grow: 0;
  position: relative;
}

.content {
  width: 100%;
  position: relative;
}

.opera {
  width: 100%;
  height: 200px;
  position: absolute;
  bottom: 0;
  background-color: #F2BE25;
}

.menu-resize {
  width: 5px;
  height: 100%;

  position: absolute;
  top: 0;
  right: 0;
  cursor: col-resize;
}

.opera-resize {
  width: 100%;
  height: 5px;
  position: absolute;
  top: 0;
  left: 0;
  cursor: row-resize;
}
</style>
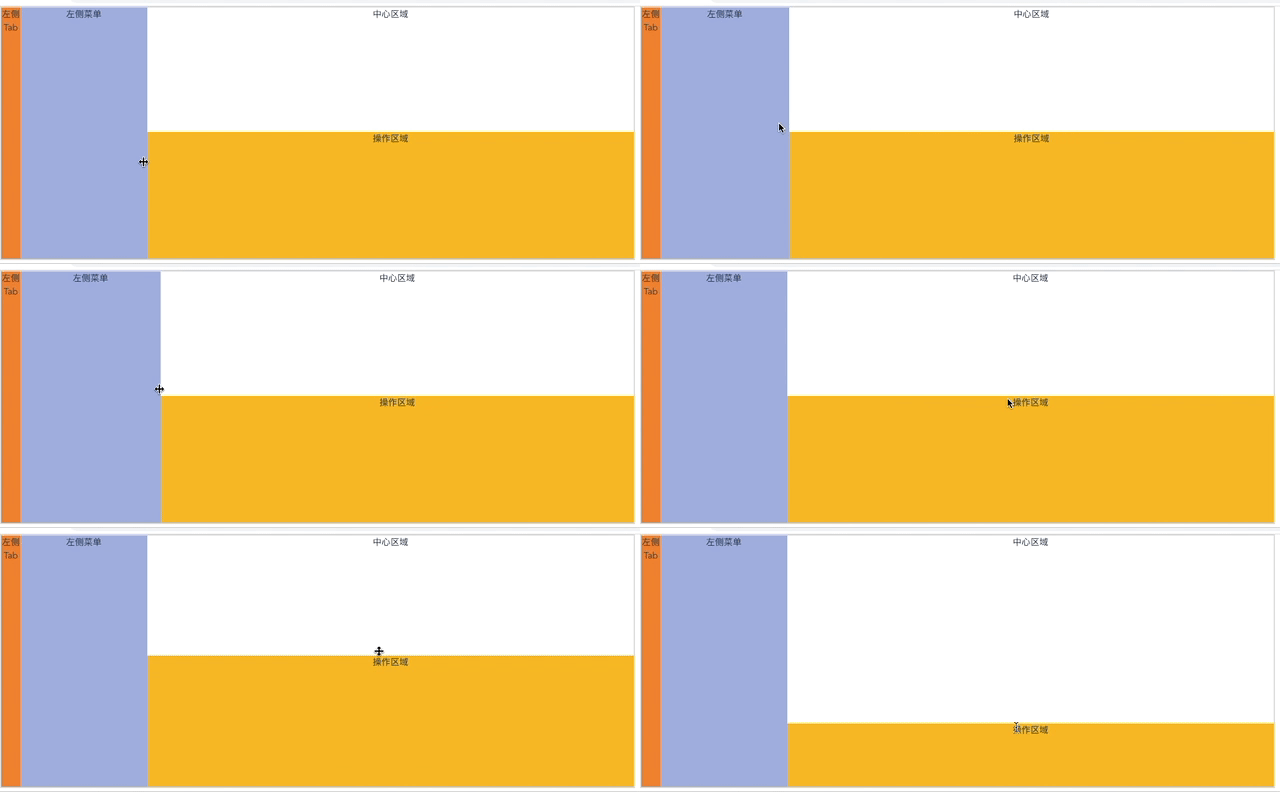
实现效果

到此,关于“vue中的可拖拽宽度div怎么实现”的学习就结束了,希望能够解决大家的疑惑。理论与实践的搭配能更好的帮助大家学习,快去试试吧!若想继续学习更多相关知识,请继续关注亿速云网站,小编会继续努力为大家带来更多实用的文章!
免责声明:本站发布的内容(图片、视频和文字)以原创、转载和分享为主,文章观点不代表本网站立场,如果涉及侵权请联系站长邮箱:is@yisu.com进行举报,并提供相关证据,一经查实,将立刻删除涉嫌侵权内容。