一个项目中往往有三层即 Dao 层、 Service 层和 Web 层。 在整合之前, 分析一下 SSM 这三大框架的整合思路。
1、 在 dao 层中, mybatis 整合 spring, 通过 spring 管理 SqlSessionFactory、 mapper 代理对象。
在整合过程中, 需要 mybatis 和 spring 的整合包。 整合包如下:
<!-- mybatis 与 spring 继承 -->
<dependency>
    <groupId>org.mybatis</groupId>
    <artifactId>mybatis-spring</artifactId>
</dependency>
2、 使用 mybatis 框架, 须创建该框架的核心配置文件——mybatis-config.xml。
3、 使用 spring 框架, 须创建一个 spring-dao.xml 配置文件, 该文件的内容有:
1) 配置数据源。
2) 需要让 spring 容器管理 SqlsessionFactory, 其是单例存在的。
3) 把 mapper 的代理对象放到 spring 容器中, 使用扫描包的方式加载 mapper 的代理对象。
所有的 service 实现类都要放到 spring 容器中管理。 由 spring 创建数据库连接池, 并由spring 来管理事务。
| 整合内容 | 对应工程 |
|---|---|
| Service 接口 | ycshop-manager-interfaces |
| Service 实现类 | ycshop-manager-service |
| Spring-service.xml 配置文件 | ycshop-manager-service |
表现层由 springmvc 来管理 controller。 总的来说, springmvc 框架的核心配置文件的内
容有:
1. 需要扫描 controller
2. 配置注解驱动
3. 配置视图解析器
在项目 ycshop-manager-service 工程中创建 mybatis-config.xml 文件。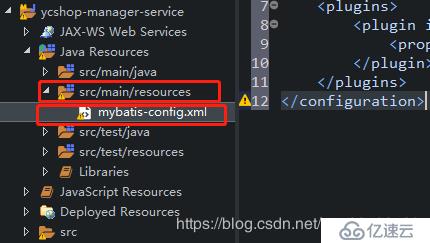
内容如下:
<?xml version="1.0" encoding="UTF-8"?>
<!DOCTYPE configuration
PUBLIC "-//mybatis.org//DTD Config 3.0//EN"
"http://mybatis.org/dtd/mybatis-3-config.dtd">
<configuration>
    <!-- mybatis 的分页插件, 这个可以没有。 但是这个配置文件必须要有 -->
    <plugins>
        <plugin interceptor="com.github.pagehelper.PageInterceptor">
            <property name="helperDialect" value="mysql" />
        </plugin>
    </plugins>
</configuration>将与数据库的连接属性配置到配置文件中, 方便修改。 具体内容如下:
jdbc.url=jdbc:mysql://47.100.x.x:3306/ycshop?characterEncoding=utf-8
jdbc.user=xxx
jdbc.pwd=aaa
jdbc.driver=com.mysql.jdbc.Driver
jdbc.initPoolSize=5
jdbc.maxPoolSize=10
其中47.100.x.x是数据库url
ycshop是数据库名
xxx是数据库连接的用户名
aaa是数据库连接的密码
在这个配置文件中配置数据库连接池、 SqlSessionFactory(Mybatis 的连接工厂)、 Mybatis
映射文件的包扫描器, 配置内容如下:
<?xml version="1.0" encoding="UTF-8"?>
<beans xmlns="http://www.springframework.org/schema/beans"
    xmlns:xsi="http://www.w3.org/2001/XMLSchema-instance"
    xmlns:context="http://www.springframework.org/schema/context"
    xsi:schemaLocation="http://www.springframework.org/schema/beans http://www.springframework.org/schema/beans/spring-beans.xsd
        http://www.springframework.org/schema/context http://www.springframework.org/schema/context/spring-context-4.3.xsd">
    <!-- 引入外部配置文件(数据库的连接方式) -->
    <context:property-placeholder location="classpath:db.properties" />
    <!-- 配置 C3P0 的数据源 -->
    <bean id="dataSource" class="com.mchange.v2.c3p0.ComboPooledDataSource">
        <property name="user" value="${jdbc.user}"></property>
        <property name="password" value="${jdbc.pwd}"></property>
        <property name="driverClass" value="${jdbc.driver}"></property>
        <property name="jdbcUrl" value="${jdbc.url}"></property>
        <property name="initialPoolSize" value="${jdbc.initPoolSize}"></property>
        <property name="maxPoolSize" value="${jdbc.maxPoolSize}"></property>
    </bean>
    <!-- mapper 配置 -->
    <!-- 让 spring 管理 sqlsessionfactory 使用 mybatis 和 spring 整合包中的 -->
    <bean id="sqlSessionFactory" class="org.mybatis.spring.SqlSessionFactoryBean">
        <!-- 数据库连接池 -->
        <property name="dataSource" ref="dataSource" />
        <!-- 加载 mybatis 的全局配置文件, 虽然这个全局配置文件是空的, 但是这个全 局配置文件是必不可少的 -->
        <property name="configLocation" value="classpath:mybatis-config.xml" />
        <!-- 扫描 sql 配置文件:mapper 需要的 xml 文件 -->
        <property name="mapperLocations" value="classpath:mapper/*.xml" />
    </bean>
    <!-- 配置 Mapper 扫描器 -->
    <bean class="org.mybatis.spring.mapper.MapperScannerConfigurer">
        <property name="basePackage" value="cn.yuechenc.manager.dao.mapper" />
    </bean>
</beans>在此配置文件中配置所有的 service 包扫描以及事务管理配置。 具体配置文件如下:
<?xml version="1.0" encoding="UTF-8"?>
<beans xmlns="http://www.springframework.org/schema/beans"
    xmlns:xsi="http://www.w3.org/2001/XMLSchema-instance"
    xmlns:aop="http://www.springframework.org/schema/aop"
    xmlns:context="http://www.springframework.org/schema/context"
    xmlns:tx="http://www.springframework.org/schema/tx"
    xsi:schemaLocation="http://www.springframework.org/schema/beans http://www.springframework.org/schema/beans/spring-beans.xsd
        http://www.springframework.org/schema/context http://www.springframework.org/schema/context/spring-context-4.3.xsd
        http://www.springframework.org/schema/aop http://www.springframework.org/schema/aop/spring-aop-4.3.xsd
        http://www.springframework.org/schema/tx http://www.springframework.org/schema/tx/spring-tx-4.3.xsd">
    <context:component-scan base-package="cn.yuechenc.manager.service"></context:component-scan>
    <!-- spring 声明式事务管理控制 配置事务管理器类 -->
    <bean id="txManager"
        class="org.springframework.jdbc.datasource.DataSourceTransactionManager">
        <property name="dataSource" ref="dataSource" />
    </bean>
    <!-- 配置事务增强(如何管理事务, 只读、 读写...) -->
    <tx:advice id="txAdvice" transaction-manager="txManager">
        <tx:attributes>
            <tx:method name="save*" propagation="REQUIRED" />
            <tx:method name="insert*" propagation="REQUIRED" />
            <tx:method name="delete*" propagation="REQUIRED" />
            <tx:method name="update*" propagation="REQUIRED" />
            <tx:method name="find*" propagation="SUPPORTS" read-only="true" />
            <tx:method name="get*" propagation="SUPPORTS" read-only="true" />
        </tx:attributes>
    </tx:advice>
    <!-- aop 配置, 拦截哪些方法(切入点表达式, 拦截上面的事务增强) -->
    <aop:config>
        <aop:pointcut id="pt"
            expression="execution(* cn.yuechenc.manager.service.*.*(..))" />
        <aop:advisor advice-ref="txAdvice" pointcut-ref="pt" />
    </aop:config>
</beans>在上面的整合过程中, 编写了两个 spring 的配置文件:spring-dao.xml;spring-service.xml。
那么那么程序是怎么知道这 2 个文件的呢? 这就需要在服务层初始化 spring 容器了, 方法是
在 ycshop-manager-service 工程下的 web.xml 文件中进行配置。
内容如下:
<?xml version="1.0" encoding="UTF-8"?>
<web-app xmlns:xsi="http://www.w3.org/2001/XMLSchema-instance"
    xmlns="http://xmlns.jcp.org/xml/ns/javaee"
    xsi:schemaLocation="http://xmlns.jcp.org/xml/ns/javaee
http://xmlns.jcp.org/xml/ns/javaee/web-app_3_1.xsd"
    id="WebApp_ID" version="3.1">
    <context-param>
        <param-name>contextConfigLocation</param-name>
        <param-value>classpath:spring-*.xml</param-value>
    </context-param>
    <listener>
        <listener-class>org.springframework.web.context.ContextLoaderListener</listener-class>
    </listener>
</web-app>在ycshop-manager-web 工程中创建 spring-mvc.xml 文件。 如下: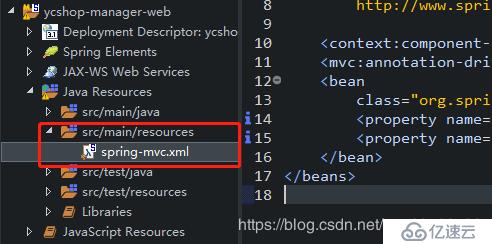
具体内容如下:
<?xml version="1.0" encoding="UTF-8"?>
<beans xmlns="http://www.springframework.org/schema/beans"
    xmlns:xsi="http://www.w3.org/2001/XMLSchema-instance"
    xmlns:context="http://www.springframework.org/schema/context"
    xmlns:mvc="http://www.springframework.org/schema/mvc"
    xsi:schemaLocation="http://www.springframework.org/schema/mvc http://www.springframework.org/schema/mvc/spring-mvc-4.3.xsd
        http://www.springframework.org/schema/beans http://www.springframework.org/schema/beans/spring-beans.xsd
        http://www.springframework.org/schema/context http://www.springframework.org/schema/context/spring-context-4.3.xsd">

    <context:component-scan base-package="cn.yuechenc.manager.controller" />
    <mvc:annotation-driven />
    <bean
        class="org.springframework.web.servlet.view.InternalResourceViewResolver">
        <property name="prefix" value="/WEB-INF/jsp/" />
        <property name="suffix" value=".jsp" />
    </bean>
</beans>在 ycshop-manager-web 工程中创建 web.xml 配置文件。 文件内容如下:
<?xml version="1.0" encoding="UTF-8"?>
<web-app xmlns="http://xmlns.jcp.org/xml/ns/javaee" xmlns:xsi="http://www.w3.org/2001/XMLSchema-instance"
    xsi:schemaLocation="http://xmlns.jcp.org/xml/ns/javaee http://xmlns.jcp.org/xml/ns/javaee/web-app_3_1.xsd"
    version="3.1">
    <welcome-file-list>
        <welcome-file>index.jsp</welcome-file>
    </welcome-file-list>
    <servlet>
        <servlet-name>dispatcherServlet</servlet-name>
        <servlet-class>org.springframework.web.servlet.DispatcherServlet</servlet-class>
        <init-param>
            <param-name>contextConfigLocation</param-name>
            <!-- spring-*.xml:表示所有以 spirng-开头, 以.xml 结束的所有文件 classpath:表示类路径下 -->
            <param-value>classpath:spring-*.xml</param-value>
        </init-param>
    </servlet>
    <servlet-mapping>
        <servlet-name>dispatcherServlet</servlet-name><!-- 匹配所有以.do 结尾的请求 -->
        <url-pattern>/</url-pattern>
    </servlet-mapping>
</web-app>
到此, 开发框架就已尽整合完成, 并且完成了一个简单的示例程序。 但是到目前为止,
我们运行程序的时候是不会成功的。 原因很简单, 在 web 层中并没有对 servie 层(服务层
接口实现) 的引用。 而 service 层是独立发布的, 而现在我们 web 层并不能引用到 service 服
务层的实现。
现在就需要使用到 dubbo 来进行服务的发布。
下一篇中来进行 dubbo 服务的发布和引用。
免责声明:本站发布的内容(图片、视频和文字)以原创、转载和分享为主,文章观点不代表本网站立场,如果涉及侵权请联系站长邮箱:is@yisu.com进行举报,并提供相关证据,一经查实,将立刻删除涉嫌侵权内容。


