本篇内容主要讲解“vue移动端实现手指滑动效果的方法”,感兴趣的朋友不妨来看看。本文介绍的方法操作简单快捷,实用性强。下面就让小编来带大家学习“vue移动端实现手指滑动效果的方法”吧!
本文实例为大家分享了vue移动端实现手指滑动效果的具体代码,供大家参考,具体内容如下
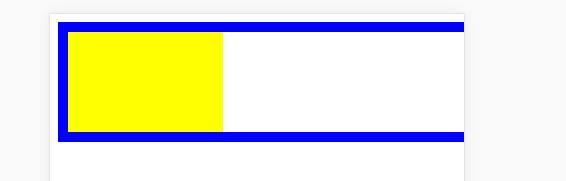
滑动时候黄色块宽度跟着变化
通过touch点击实现
目前感觉宽度变化有点问题,还在思考中
下面上代码:
<template lang="html">
  <div class="back" ref="back" @touchstart.prevent="touchStart" @touchmove.prevent="touchMove">
    <div class="back-r"
 @touchstart.prevent="touchStart" @touchmove.prevent="touchMove"
 @touchend="touchEnd"
 ref="right"></div>
  </div>
</template>

<script>
export default {
  data() {
  },
  created() {
    this.touch = {}
  },
  methods: {
    touchStart(e) {
      const touch = e.touches[0]

  //点击时的位子
      this.touch.startX = touch.pageX
      this.touch.startY = touch.pageY
   console.log('----',this.$refs.right.clientWidth)
    },
//开始点击
    touchMove(e) {
      console.log("move");
      const touch = e.touches[0]
   //滑动位置和初始位置差
      const deltaX = touch.pageX - this.touch.startX
   console.log(deltaX)
      const deltaY = touch.pageY - this.touch.startY;
      //打印right宽度
   console.log('----',this.$refs.right.clientWidth+'px')
   const rwidth = this.$refs.right.clientWidth
   //改变right的宽度
   this.$refs.right.style.width = (this.$refs.right.clientWidth + Math.floor(deltaX/50)) +'px'
   //进行判断,当宽度小于0或者大于400
   if (rwidth<0) {
    this.$refs.right.style.width = 0
   } else if(rwidth>400){
    this.$refs.right.style.width = 400+'px'
   }
   console.log('----',this.$refs.right.clientWidth+'px')

    },
    touchEnd() {
      console.log("end");
      // console.log(this.percent);
    }
  }
}
</script>

<style scoped lang="stylus" rel="stylesheet/stylus">
body{
  margin:0;
  padding: 0;
  overflow: hidden;
  touch-action:none;
}
.back{
 width: 100%
 height: 100px
 border 10px solid #0000FF
 overflow: hidden;
}


  .back-r{
   // display: inline-block
   // vertical-align: top
   position: relative
   width: 400px
   height: 100%
   overflow: hidden;
   background-color: yellow
  }

</style>
到此,相信大家对“vue移动端实现手指滑动效果的方法”有了更深的了解,不妨来实际操作一番吧!这里是亿速云网站,更多相关内容可以进入相关频道进行查询,关注我们,继续学习!
免责声明:本站发布的内容(图片、视频和文字)以原创、转载和分享为主,文章观点不代表本网站立场,如果涉及侵权请联系站长邮箱:is@yisu.com进行举报,并提供相关证据,一经查实,将立刻删除涉嫌侵权内容。


